Thursday, July 31, 2014

Grape Vine Reveal...

When we first moved in to our home 3 years ago,
we inherited an old garden.
It was on the west side of the house with loads of trees shading it.
It also covered the septic access lid...not ideal.

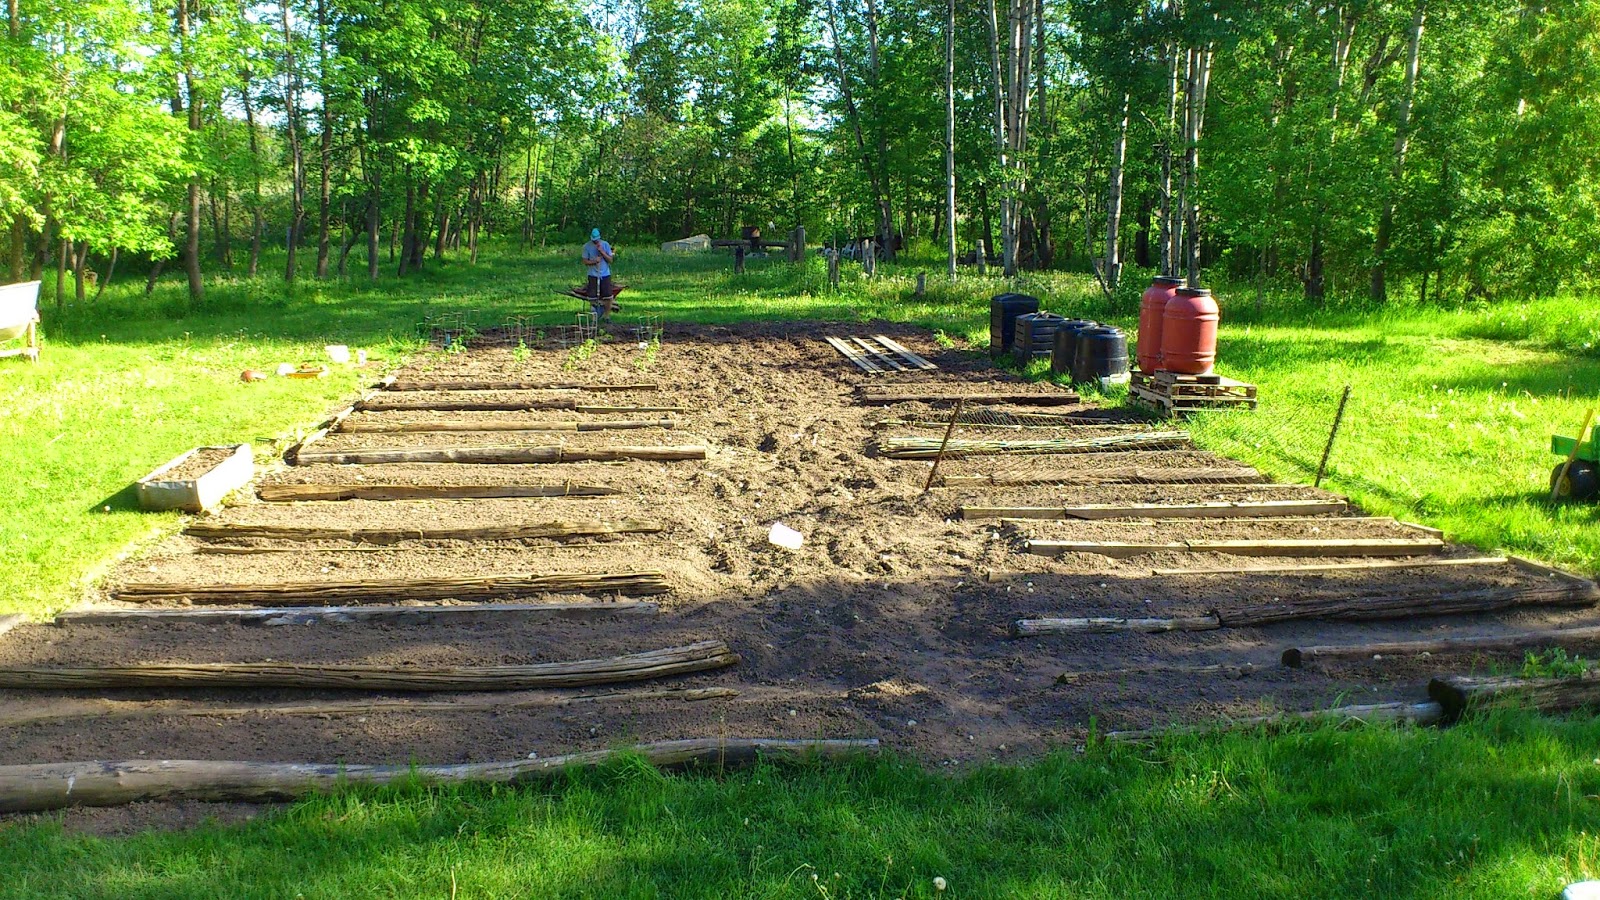
Right away we began the task of moving the garden to the center of the yard.


You see the red tangle in the middle?
It was rumored to be a concord grape vine...

That was 3 years ago!
Now we have a humongous garden in the center of our backyard.
The old garden on the west side of the house?
We found all sorts of goodies buried there...stuff we dug up and reused all over the property.
Stuff like patio stones of varying sizes, cinder blocks and red bricks.
We even found a tree growing under the grape vines! 

A few weeks ago a friend named Steve and his wife Joanne gave us some 
metal T bars they had laying around their house.

Let me show you what I did with them....


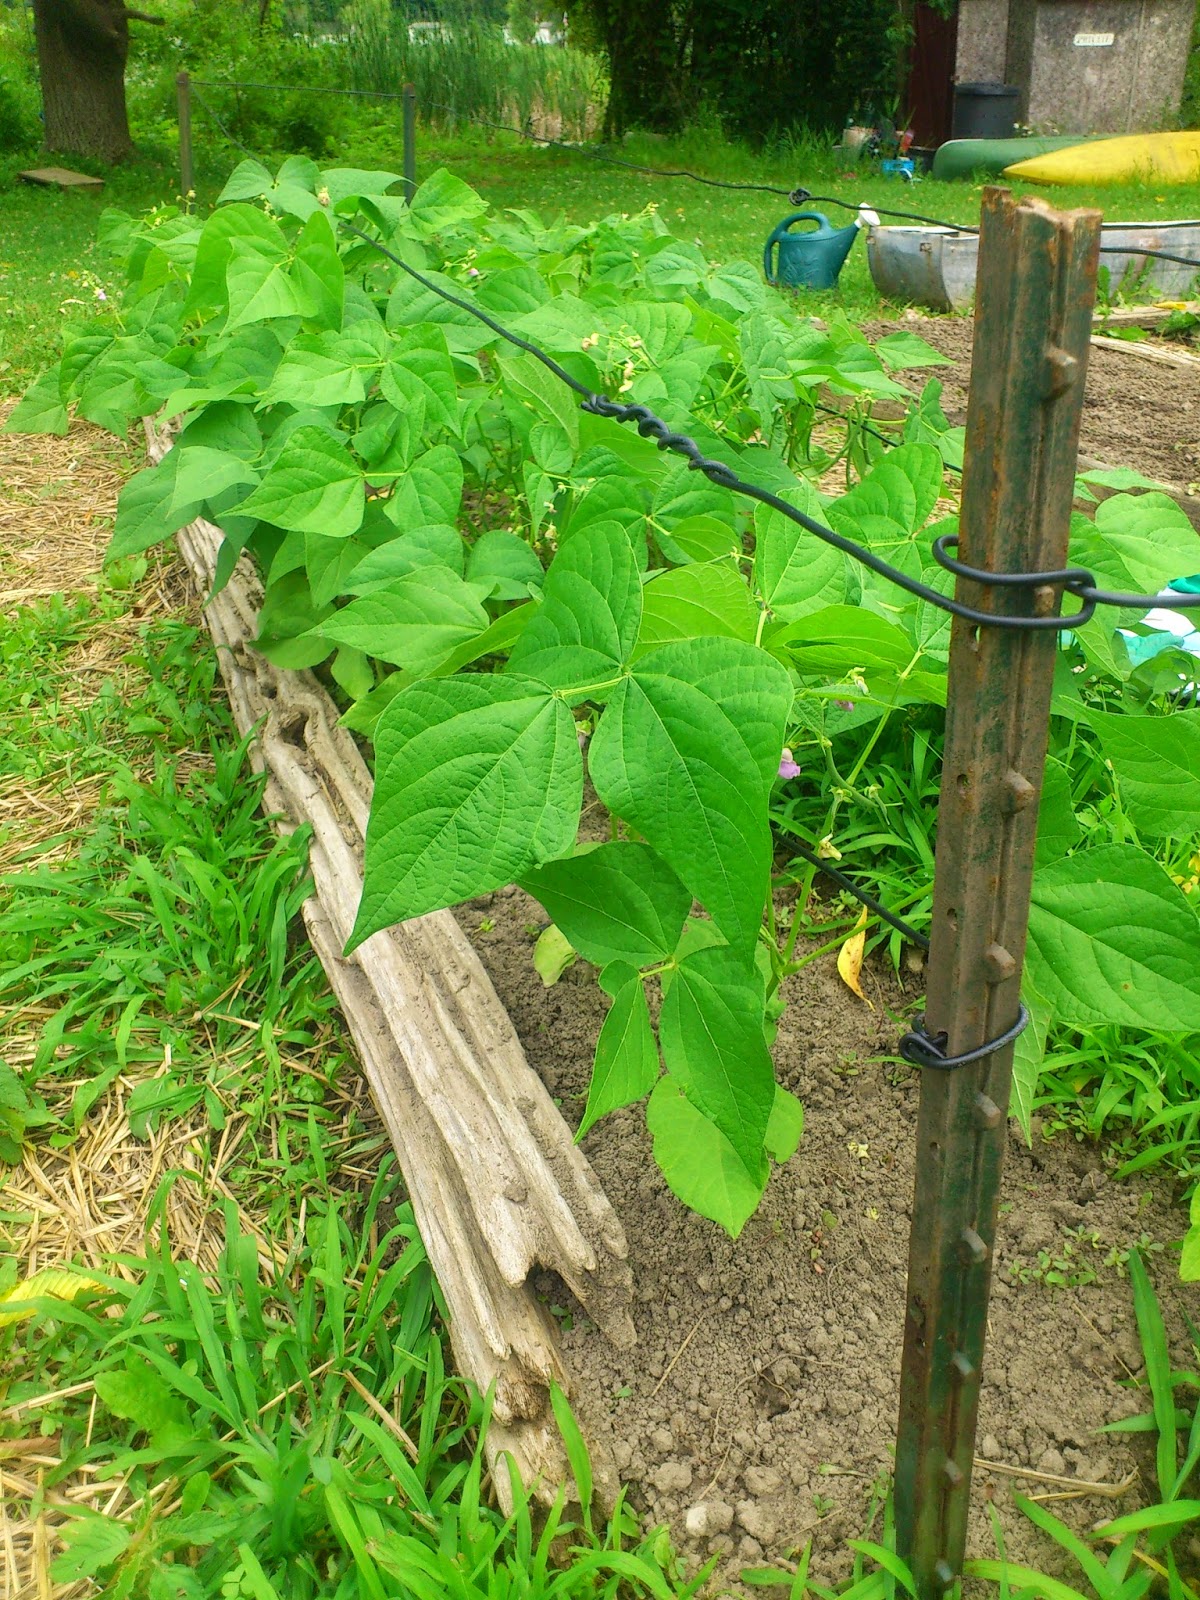
I finally cut back enough of the grape vines to find a few viable ones.
I had read in the Backyard Homestead book the proper way to string and hang your grape vines.
Finally!  A grape vine I could actually see and help grow...
With the help of Handsome Husband, we pounded the t bars into the ground.
Luckily we had some stuff left over for the wiring.
I used a bit of old clothesline wire but it was a little frustrating.
Then we remembered a whole role's worth of wire!
An owner from the not so distant past installed invisible fencing around the whole property perimeter.
It had long since worked...so we dug it all up!
It had a copper core...so it stays were you bend it!
Genius!!!


During the uncovering process...I found a mound of grasses.
The grasses had these pod like thingies...so I decided to leave them and see what became of them.
Above shows the result of my indifference!
These beauties look a little like tiger lilies...but probably just orange lilies.
I have no idea....I grow food...not flowers...unless they are edible!


I used some of those aforementioned "found" bricks to show off this tree.
I have no idea what it is either...but it was literally holding up the grapevines!!!


Once we got the vines off of the ground and onto the repurposed clothesline wire...
...I found bunches already growing!


Look at the darlings!!!


I was so smitten with the spot...I decided to make it a cozy seating area...


Just sit and watch the chicken entertainment!
(See the chicken run in the background?)


Even before I had the t bars in hand, I had purchased a small rosebush.  
I have no idea what kind I bought...only that the blooms are peachy coloured.
I just can't get that excited about flowers...sorry.
There was one thing I learned while living in Australia and touring wineries with friends.
Wineries plant roses as fences to attract the aphids.
Better they eat the roses than the grapes!


What a great spot!
I enjoyed it right away.

Do you have any favorite spots on your property?
A place of reflection?
A corner of solitude?
Or just a spot with a really, really great view?

Share photos of your favorite places on my Facebook page!

Monday, July 28, 2014

Trellis Action...

So...a few weeks ago I was struggling with how to trellis my plants.
In my garden update post, I lamented that I had a short amount of time to
think about it...before it became a necessity.

I was able to come up with some completely free solutions!
Let's check them out...

PEAS


We planted two beds of peas...multiple rows in each bed.
One day, as I walked on the shores of Desert Lake, I came upon a driftwood log!
I used other sticks to support the driftwood and 
then laced craft wire to that it formed a teepee like trellis on both sides.
The craft wire was free because I had bought it many many many years ago.
It was for a rock jewelry business that I tried.
In the end it was a trellis for some old windows we got from the dump.
I carefully unhooked all of the wire...and repurposed it!


The second bed of peas had the same treatment...for I was shocked to time a second driftwood tree!
This tree was shorter...so I made up the difference with some broken old wire tomato cages.


The shot above is probably the best to see the wire...can you see it?


I got creative by the second trellis...attaching the log to a piece of firewood set in a mix of daisies and asters.

SQUASH


The squash trellis solution was actually Handsome Husband's idea!
I had already removed the wire from the dump-scavenged windows...
Ches said "Why don't we put them on pieces of wood?"
Works for me!
Above you can see how much the enjoy the partial shade on their roots...
and all of the climbing room on the windows!


The windows aren't actually that far off of the ground...only a few inches.

BEANS


The beans don't necessarily need a trellis...
but sometimes they fall over and you're scraping the dirt for your beans.
Not my idea of fun veggies...
So we built a cage of sorts!
The t-bars came from a family friend.
The wire was repurposed invisible fencing!!!
Can you believe we have dug up the equivalent of a whole spool on 
our property compliments of previous owners?
True story.

CUCUMBERS


Above is our trusty machine.
Its made of old t-bar and metal chain-link fence found at a former house we rented in Verona!
You pound the t-bars in on an angle and plant the seeds "under" the angle.
The plants grow up the chain link and voila!
Dirt free veggies!
It has been so successful in the past...beans, cukes...whatever trails!

PUMPKINS


I still haven't figured out what to do with the pumpkins...but they are filling in too quickly now
so I think I'll just leave them this year.
They seem to like the saddle-shaped lattice!


If you want more (way more!) trellis ideas...
you can now follow me on Pinterest!
(Psst I have a whole folder of trellis ideas!!!)

Once there, you can find all of my recipes and food photos in handy dandy folders too.


Sunday, July 27, 2014

Changes....

Well, I'm unemployed.
Again.

Its the strangest thing, though.
I'm not panicking.
I'm not stressed or upset at all.

That's a first for me.

I think it has a lot to do with all of the prep work we do as a family.
If we lived as though the money was never ending...we'd be in trouble.
It was years ago that we learned that anything can and will happen.
We changed the way we looked at life...and have never looked back.

Let me explain further...

If we didn't have the garden...


I would be worried that we don't have enough money to buy food at the grocery store.
Thankfully...we have a huge garden and the years of experience in growing and storing our own food.
We are not dependent on anyone's food delivery system.
And now we have eggs!
Protein was always a source of pain for me.
It was the only thing we didn't already do ourselves...plus there were always random safety recalls.
Now we have 8 laying hens and they pay for themselves at this point.
Whew!

****************

If we didn't live in such a beautiful, natural place...


I might be upset that Owen wouldn't enjoy his summer vacation.
He might have been stuck inside...for 2 months...with his mother who was worrying about stretching every dollar.  That's no fun for anyone!
In our neighbourhood, we are still able to do many amazing adventures...thanks to the Canadian shield, Frontenac Provincial Park (only $14 for any trail!) and our beloved Desert Lake.
We're learning about rocks this year.
Living in the Canadian Shield is like living inside the ROM.
We're tumbling rocks and learning about their properties.
We're exploring the land around us and discovering its logging, trapping and hunting roots.
We're learning about the animals, birds and insects that live in our region.
It's been amazing so far...and hasn't cost us much money at all.

****************

If we didn't have each other...


I would probably be wallowing about this loss.
I probably wouldn't be able to remind myself that my job does not define me.
My family keeps me focused on what's really important in life.
We do not live to work...
we work to live...and I can do that anywhere.

Plus, since not working shift work anymore...
I actually get to see my family more than ever!


Here's to more changes!!!


Thursday, July 24, 2014

DIY Bench

Sometimes life give you lemons...
so, as the saying goes, you make lemonade!

Sometimes you just need extra seating...


And so the DIY firepit bench was conceived!

The year we moved into this home, Hydro One was on a
trimming kick.  They took down a load of trees in the front yard.
The two sides of this bench were just leftover!
The 2 x 6 plank was from the deck we got second hand.
When we reassembled it...we had a few pieces leftover...


I placed the logs and them added the plank.
The plank is wide enough for small butts...
...and freshly popped popcorn.


One of the things I love about country living is you can
eat popcorn in your pjs while watching a camp fire...


Sunday, July 20, 2014

A few of my favorite things...SUMMER EDITION

The Things I LOVE about Summer:

Swimming in lakes


The waterfall room (on our lake)
The swimming shoal
green vegetables


ripe berries


thunder and lightning storms
camping and smores
hot starry nights
the first of the snap peas straight out of the pod


fresh herbs from the garden
bike riding
water gun fights
rediscovering shorts and sunglasses
flip flops and pretty toes

Owen is a big fan of seeing the return of all of his summer friends.


Ches loves the return of bikinis.


The Things I do NOT Love about Summer:

Sunburns
deer flies and horseflies

Ches dislikes the humidity.
Owen doesn't like it when it rains in summer.

Monday, July 14, 2014

Chicken 911

It was bound to happen....we had a chicken injury.

One day, a month or so ago...we had a big storm roll through the valley.
I was busy working away inside.
I looked up from doing the dishes and noticed I had left the door to the chicken run open.

The rain was driving into the coop.

I went outside in the diagonal rain and into the coop.
I saw all of the chickens huddled on their perch.

Then I spotted it...

Drops of blood.


Our poor hen was injured.
It was pretty bad...a big gash on her side behind her leg.
It actually moved when she walked.

I had read online on various chicken blogs
that chickens are exhibit cannibalistic behaviour.
The peak at the sight of red.
Its like animal OCD.
The bad part is when the wound gets infected because it isn't allowed to heal.
The solution may be...quarantine!

The next day I posted on Facebook a request for a dog cage or something I could use in a pinch.
A friend had said they could loan me a dog cage!
Hurray!
The very day I went to pick it up, someone stopped me and offered us a cat cage for $20.
This solution would solve our need over the long term...for VERY little cost!
It had shelves for the cat that hooked right onto the cage.
I set it up right away for our injured girl Clover.


Seriously!
How cozy does little Clover look???

Ches stopped by Sydenham Pet and Farm Supply and picked
up a small plastic version of a chicken water bottle.
I used the holder from a chip and dip dish for the feed bowl.


It worked so well..that a few weeks later (after we got our new girls)
our Americauna hen named Eagle was wounded.
She had a bloody area at the top of her tail feathers.
We're figuring she was being put in her place by one of the older girls.
I watched one of the older hens reopen the wound the very next day...
so that's when she had her turn in the hospital.

Added bonus:  The chicken hospital is in our basement.
The area of our house that is the coolest.
When we had that big heat wave in June...
Eagle was cool as a cucumber!


So far that is all of the chicken emergency stories 
I have to tell...thankfully!


Wednesday, July 9, 2014

Water...trust me, you'll want to read this post!

Ok...not the most exciting topic...

But as a gardener/homesteader, water is VERY important.

Trust me...have one dry year, where you are hauling water to the garden
for what seems like an eternity, and you'll know the importance of water.

As far as I'm concerned, your water source can 
never be close enough to your growing area.
(especially thirsty stuff like corn)


A few years back we acquired a couple of water barrels.
The first place we had them, they fit right under our downspouts.
That is a GREAT location...as long as its also close to the garden.
By the end of the summer...as short distance can feel like a million miles.

We bought the barrels for $15 each from a neighbour.
Ches bought the taps from the hardware store, installing them himself.
The lids came like mason jars, so we just removed the inner lid and replaced it with
plastic mesh to keep leaves from really accumulating, 
while still allowing the water to drain into the barrel.

The first year...we placed the barrels on the ground and 
started collecting water from our downspouts.
Great!
Except when we started draining the barrels...we noticed it only trickled.
A wonderful part of science was learned.
Raise the barrels for better water pressure!
We raised the barrels on several old pallets.
Problem solved.
Our success was confirmed when it only took a few 
minutes to fill a watering can rather than an hour.

Pallets Dual Purpose:  Makes for a great snakes hiding spot...
keeps rodent population WAY down.
Keeps me on my toes though...


Since we don't have the garden anywhere near our downspouts,
We started placing buckets around the barrels.
After a good rain, you can usually fill the barrels half way.
Its a very primitive method...but the alternative is equally primitive.

You can't see it but our garden is about 15-20 feet from our dock.
The dock is our access to Holleford Creek.
I can fill up our watering cans from there and walk them over...but like I said earlier
in this post...a short distance can feel like a million miles after a whole summer.

My father in law Willie gave us a water pump!
It looks like a generator but it actually pumps water.
He also gave us a giant hose to go along with it.
When Ches tried to assemble and place it by the dock...we lost all of the gas.
There seems to be some sort of leak...
so once we find and fix said leak...we will be ROCKING the water situation.
(and probably ditch the buckets)


How do you solve the water problem as a gardener?

Friday, July 4, 2014

Strawberry Picking!!!

Back on June 30th we decided the time was right.
Timing is everything when it comes to fresh strawberry picking.

If you've been picking as long as we have...you'll see the signs.
Wait for the weather to be sunny with a light breeze.
You'll also want to avoid picking around any rainy days.
The rain will add moisture to the berries...which seems like a good thing, right?
NO!

Moisture on your berries will make them mush by the time you get home.


Another important thing to have is a good hat.
The hat should be well ventilated and have a wide brim.
Owen likes to go berry picking in style...


Most years we just bring the good old white Ontario grows baskets.
They usually charge a nominal fee for the baskets.... 50 cents!
We bought about 12 the first year...but the investment was well worth it.
We have lost a few to breakage over the years...but this year we brought 6 baskets.
This year Owen brought a bucket from the movies to fill.
You can bring whatever size of container you want!
When you bring a container (that isn't a white basket) the farmers at Paulridge Berry farm in Napanee will weigh the basket and mark on masking tape how much the container weighs.
That way, when you go to weight your berries...they will deduct the weight of the container.

I just adored the vintage weight scale!!!


We ride out to the patch on the tractor drawn flat bed trailer.
Darling Son and Handsome Husband all ready to go!


I'm all set too!
Look at the beautiful weather we had!!!


Another thing to note...we bring water floaties to sit on.
We each had a flutter board of some description.
They are perfect for kneeling or just sitting in the rows.
They are lightweight and easy to haul in with you.
(plus you can also use them as trays when getting your baskets back to the car!)


The picking was amazing!!!
Everywhere we looked was a small motherload of sweet berry goodness!
We try to stick with the smaller berries...they have concentrated flavour.
I also have a tendency to pick berries that are slightly yellow still.
I do this because we aren't always able to make jam right away.
Some years we have gotten home and the berries were already jam in the trunk of my car!
If you pick the super ripe ones (which everyone will be tempted to do)
you risk them going all moldy before you get to enjoy them.


You can see some slightly yellow ones on top.

We kept them in the car this time, turning on the AC full blast.
Once we were home, they went straight to the cool basement with a dehumidifier.
The dehumidifier keeps the moisture down and keeps the berries fresher longer.

As soon as humanly possible...make jam!
...or eat them in yoghurt, as a cereal or oatmeal topping, sliced on salads,
as a fruit salsa, in tarts or pies, or try this new recipe:

Strawberry Pinwheels
whole grain tortillas
garlic & herb cream cheese
strawberries
ham
romaine lettuce

-spread each tortilla with cream cheese
-arrange sliced strawberries and ham evenly, top each tortilla with lettuce
-roll up, cut each roll crosswise into 4 pieces to make 16 total.


...and don't forget...dipped in chocolate.

Strawberries are awesome!

Wednesday, July 2, 2014

New Girls

Soooo....we had an opportunity to get our hands on more chickens.
(why not, eh?)

I work with a fellow who was able to get us some more!
He's my friend Nathan Putnam.
We share the vision of homesteading and small scale farming for all.
He's a dispatcher like me, but he's also a paramedic on Wolfe Island, a husband,
owner of several very large dogs and runs his own landscaping business!

Check it out here:

http://www.putnamlandscaping.ca/

We arranged to meet halfway between our home and Wolfe Island...


The waiting was hard....
These were special girls...


Special package needs special care!


Owen has taken on such responsibility with the chickens...
That he had to do this job himself!


Nathan had ordered a selection of rare and heritage breeds of chicks.
We got one of each kind!

Here's the list:

-  Americauna
-  Dominique
-  Silver Laced Wyandotte
-  Buff Orpington


They started mingling with the older girls right away.
We don't have a separate brooding area.
(Yet...)


Above you can see Sun - the Buff Orpington on the left and
Dark Rainbow now known an Oreo - the Dominique.

FUN FACT:  Dominique chickens are the oldest laying breed in North America!


Above you can see Sun (again) and Pigeon - the Silver Laced Wyandotte in 
the middle.  On the right is Eagle - the Americauna.

FUN FACT:  Americauna chickens are known as "Easter Eggers"
Easter eggers will lay fun coloured eggs like blue, pink or green.
I have read on some sites that these lovely ladies will lay a variety of coloured eggs.
I've read other sites that state these girls will lay either blue or green but not both.

We shall see!
I'll keep you posted...as these new girls are too young to be laying just yet.


Stay tuned for more chicken adventures!