Showing posts with label yellow beans. Show all posts

Friday, July 19, 2013

UPDATE: Gardens abound...

Here's the update!

It took a little longer to get the big garden prepped and planted this year.
We're about a month behind.
There were tiller issues - don't get me started.
On the upside, our plants (which weren't planted yet) were not harmed by a late May hail/wind storm.
On the downside, everyone else I know is already harvesting stuff from their gardens.

What we planted this year:

-beefsteak, roma, cherry and yellow pear tomatoes
-cabbages
-green, yellow and purple beans
-white corn
-beets
-peas
-green zucchini
-potatoes
-jalapeno peppers
-regular and pickling cukes
-carrots, both orange and purple
-broccoli
NEW:  brussel sprouts - never tried growing this one before!

The big garden bed on a lovely sunny morning
The actual garden work feels like its been on hold lately.
I manage to weed the garden for about an hour in the morning or an hour in the evening, but I can't seem to manage both.  Between the incessant heat and the bugs...it's just not happening.
At least there are no water shortages this year!  WOW! 
Rain aplenty...wishing we had more rain barrels though.

One thing we have at the new house (that we certainly didn't have at our old house) is
DEERFLIES!
OMG these suckers take a chunk out of you!
I have yet to get a deerfly patch for the back of my gardening hat...
but its coming sooner rather than later.


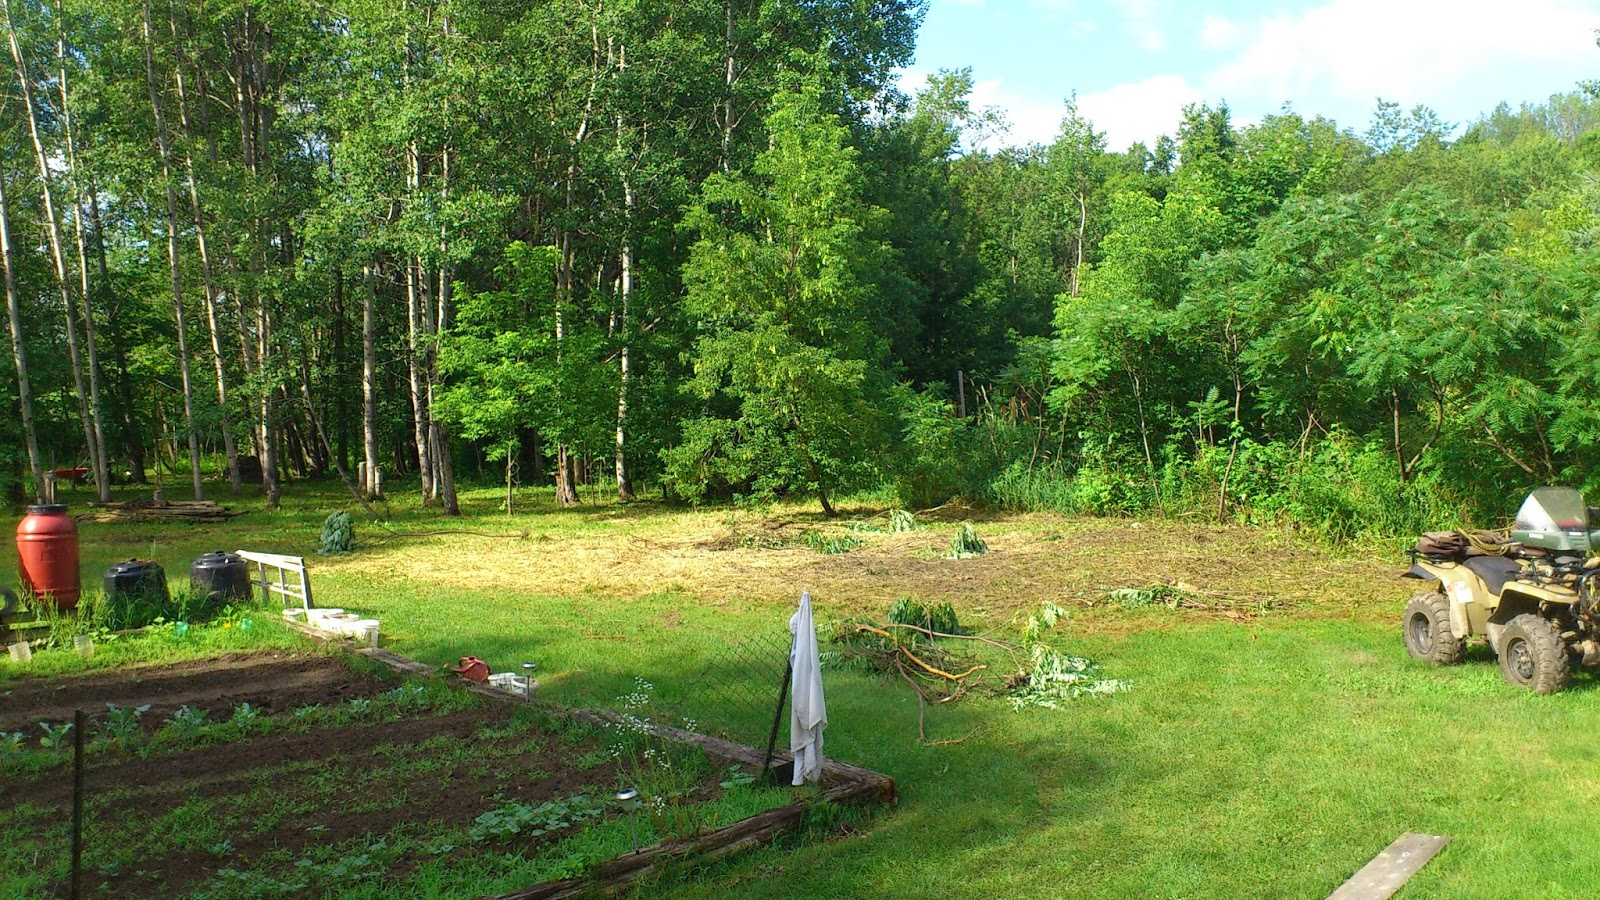
Husband has been feverishly clearing some neglected sections of our property.
The dried area you see above was previously a sumac patch riddled with long dead, wild raspberry canes.
It also was hiding a small play structure from the previous owners approximately 20 yrs ago.

Our plan is to clear it, then add more beds to the space.
We are both excited to plant berry bushes!
A space for huckleberries, fresh wild raspberry canes, blueberries and blackberries.
As an aside, Husband is super stoked to get a blackberry variety called Chester.
(his name doesn't get many shout outs...especially from fruit)


Way in the back yard, by the fire pit, is a small bed I made from deadhead rocks in the immediate vicinity.
I planted a citronella plant that I purchased from a local garden center.
The plant had been over-wintered (brought inside after its first year) and was enourmous!!!
We pick leaves, crush them up a bit and stick them in our pockets or shoes.
I stick them on top of my ears, like a flower.
Using them this way, you can also judge when you've gotten too close to the campfire.
(Discovered by accident! I was tending the campfire and forgot I had them behind my ears.
I was greeted with a strong lemony smell...much stronger than just crushed leaves)


Close up on the citronella flowers above.


Now to the front beds!  Above you can see the herb garden at the front of our house.
I labelled each herb and plant.  The green onions were transplanted from our stash last year.


The dill getting out of control!  Owen, my little guy, says it looks like a rainforest.


The mint has rooted nicely!  I still think we needs another area for mint...let it grow wild and crazy.
Momma likes her mojitos!


This side of that front garden bed was like the dumping spot for everything last minute.
(It was supposed to be for tea herbs...but I really need to do more research on teas)

The lavendar so far has been disappointing. 
I thought I would have tons for tea this winter...we'll see how that goes...
I have never grown horseradish, but it sounded like fun.
I don't even eat the stuff, but Husband does!  So I bought some...a week before someone pointed out wild horseradish that stands up to my waist in a completely unrelated area of the yard....sigh...


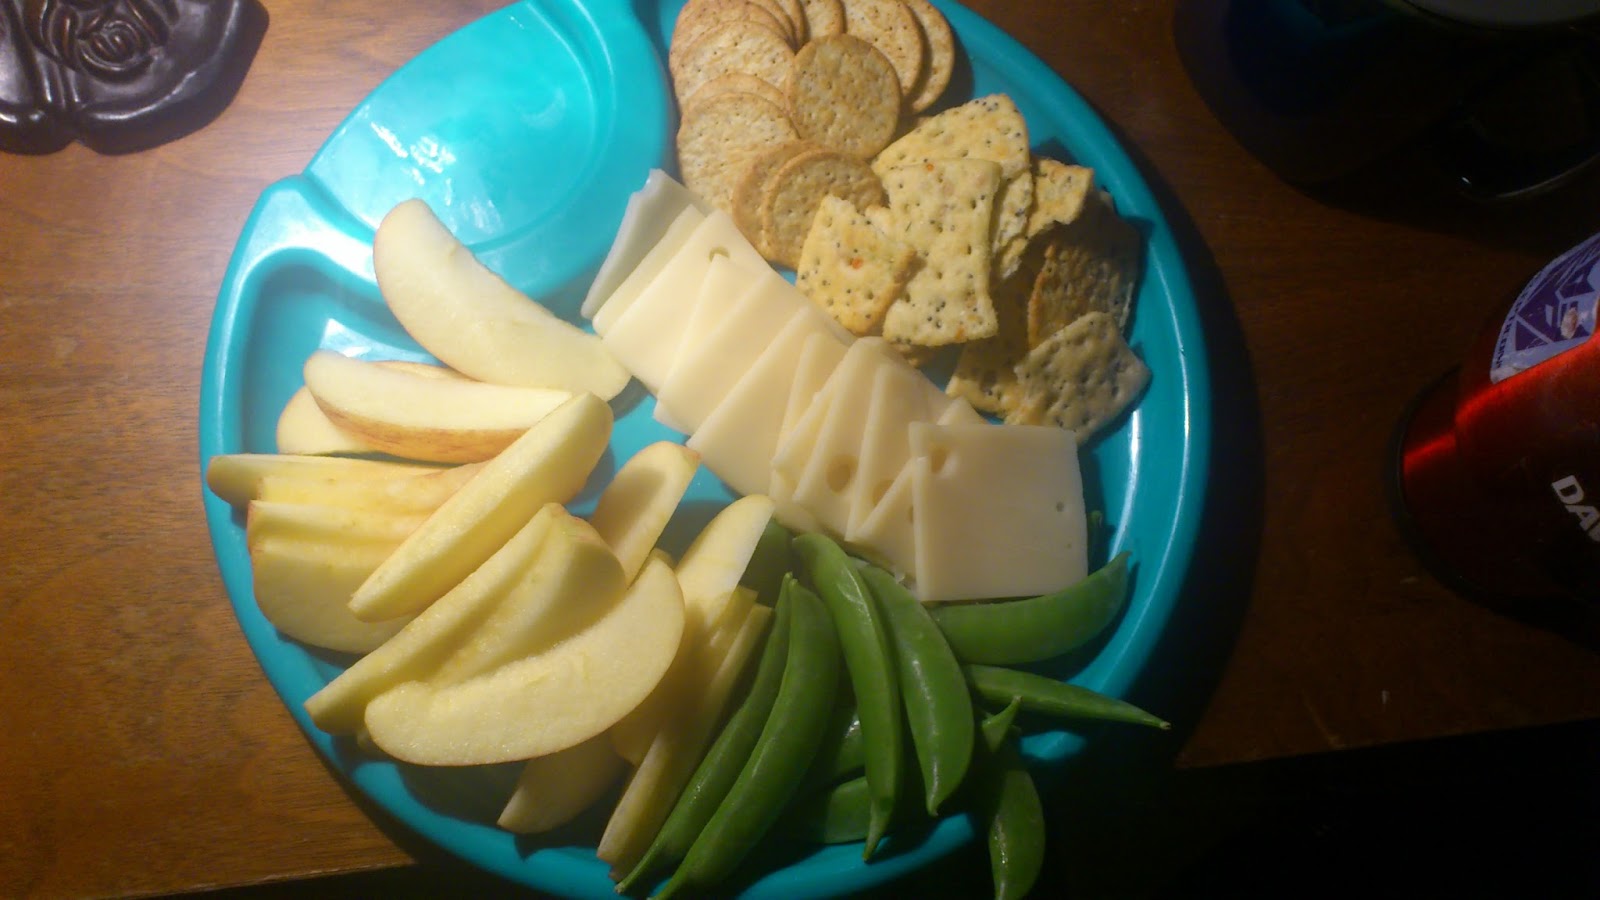
All that hard work deserves a snack!

Before bed snacking is big at our house.
Here is what was on our snack plate:

Swiss cheese from Wilton Cheese Factory
Gala Apples
Fresh peas in pods from the garden (not enough for a family meal, but enough to snack on!)
Breton mini crackers


Monday, July 25, 2011

How to blanch and store yer Beans!

When I first met my husband, I knew how to garden, but that was about it.  Along with being a stand up guy, he's also a chef by trade.  You would think that would be wonderful!  Sadly, with him working 3-4 jobs at any given point, he doesn't have a lot of time for cooking at home.  He does, however, have a wealth of knowledge in the kitchen...so if you can get him in there, you can learn a lot.

We gardened for some years before we considered storing the food we grew.  In hindsight, it seemed a little silly.  Eating beans for weeks at a time, so they didn't go bad and go to waste.  It definitely put our tastebuds through the wringer.  Nowadays we consider storage as a way to keep our garden giving throughout the year.  We have put some effort into investigating how you store different veggies. 

For our beans, we freeze them.  Pickling can be hard on the heart, what with all the salt.  We freeze our beans and they get added to soups and stews all winter, but my personal favorite is throwing them into Sheppard's Pie.  Mmmmmm.

As we found out the first year we froze beans, you MUST blanch them first BEFORE you freeze them.  Otherwise they turn brown when they hit the water or they leave everything else looking greenish.  (Like I said, gardening is VERY trial-and-error with us)

Now, let me start out by saying the only blanch I knew about was Blanche Devereaux from the Golden Girls.  So hubbie definitely came in handy on this one.  He knew how to blanch properly and he showed me how (with a lot of patience I might add).


The first step may seem obvious...but first you must pick your beans...I grab them when they are approx. 4-5 inches long...the longer they get the less sweet they are.  We grow green beans, yellow beans and purple beans!  That being said, we tried to blanch the purple beans and low and behold they turned back to GREEN!  Now we only pick the purple ones and eat them with dip or home made hummus.  So green and yellow beans get picked.

The you give them a GOOD rinse.  There will be dirt, bugs and/or wilted bean flowers stuck to them.  The outside of the beans are soft and lightly hairy, so stuff sticks to them quite easily.


Once washed, you'll want to dry them off a bit in a drainer.  Then you'll fill a big pot of water and get it on the stove now.  By the time that big pot comes to a boil, you should be all done preparing the beans.


When I prepare beans, I have old fashioned images of ladies on the porch snapping them by hand.  Your beans should snap when you break them, or they are not fresh.  I use a knife by the way, only because I'm doing a LOT of them and it takes less time.  Take off the ends and cut them into 1 inch pieces.  Any longer and you'll regret it when you add them to things in the winter.  you want bite-sized chucks, not long spears...as you may not know what you'll be adding them to later on.

When your pot is at a rolling boil, add the prepared beans.  Let boil for 1 min or until the beans change colour slightly.  Remember, you aren't cooking your beans, just par-boiling them.


After 1 min, you remove the pot from the stove and pour out all hot water.  You can use a strainer again here for this task.  I run cold water over my beans to halt the cooking process.  You can also set them in a sink of ice water if you so choose.

Allow the beans to cool a bit before you put them in a large freezer bag.


You don't want to PACK your beans in the bag.  You'll want to add a bunch, then flatten them out as thin as you can without crushing the poor veggies.  Lay the flattened bag in the freezer until frozen (approx 24 hrs).  Later on you can blanch more beans and use the same procedure for freezing.  When the beans are all done for the season, I add all the flattened bags into one.  At that point all the individual beans are frozen thoroughly and you'll also avoid "clumping".

Allow me to elaborate here.  "Clumping" was something that happened the first year we froze our beans.  Over the winter I encountered a large mass of beans frozen together.  Try adding a few beans when you have one solid block of beans (approx 3 cups worth)...not easy.  You'll either end of chipping away until you get beans shards...or you get mushy beans.  Again, trial and error....we live, we learn.

So now I take my flattened bags and add them to one or two freezer bags until each bag is full.  It may seem very labour intensive compared to the cheap bgs of Green Giant beans at the grocery store.  A relative once remarked..."Aren't those beans cheaper at the store?"  While I agree that beans at the grocery store are cheaper costing and easier than our beans, I have to mention that our beans have ZERO carbon footprint.  They were grown in our backyard and didn't have to be produced in a factory or trucked from a far away locale.  Part of our new mindset is that cheap isn't always desireable.  Cheap only means that I don't pay much money for something that costs the planet far more.

Our beans are healthy and pesticide free!  Our beans were grown with love (so they taste better!  or at least I think so) and my children understand what it takes to enjoy these green power veggies.

These beans make me feel more connected.