Showing posts with label freezing. Show all posts

Tuesday, August 25, 2015

What you plant and why it matters...

So this year I broke down and bought a bag of pea seeds.
I normally just plant what we saved from last year.
This year the packaging seduced me.
The Heritage Seeds Co.
Brown paper bag shouting
"LINCOLN HOMESTEADER"
I couldn't help myself.

I note that normally I don't care what kind of stuff I plant.
But thanks to my new job growing organic vegetables at The Kitchen Garden...
I know it matters what you grow.


I'll show you the proof.
Above you'll see the pea on the left...is one grown from seed we saved.
The one on right is the Lincoln Homesteader.
I will forever use capitals and call them by their right name...
they are an amazing specimen of shelling pea.

The one on the left (ours) produced poorly and with only about 3-4 peas per pod.
The one on the right (Righteous Lincoln Homesteader) kept pumping out the peas for 5 weeks and produced a whopping 12-14 peas per pod!!!
NOTE:  They then produced a very healthy second blush of perfectly sweet peas in the middle of AUGUST!?!!


That means...
We have 2 large freezer bags stuffed full of peas for the winter.
Dang!
That's the most peas we've ever been able to store!!!
Thank you Heritage Seed Co.
Thank you Lincoln Homesteader.

PS.  We planted another beds of peas two weeks ago...I'll give you 3 guesses what kind...

Monday, December 22, 2014

Starting to think about Root Cellars

In terms of keeping our harvest as long as we can, 
we used to do a lot of freezing.
We experimented with different sized veggies and what would thaw out better.
We learned what froze well and what certainly did not.

One day, a pipe in our basement exploded over our large chest freezer.
That was the end of freezing that year.

We lost so much stuff...it was heartbreaking.
But like most things in life - I chose this sad event to be a learning experience.

How can we save our harvest in other ways?

Last year was an experiment in air drying and preserving.
We have dried some veggies and lots of herbs.
We dried seeds for planting next year.
We put stuff in jars too!
Pickled jalapenos, dill pickles, beans, salsa, wild leeks, 
ramps pesto, strawberry jam, mint jelly and maple syrup.

Ever since the freezer died, I've had my mind focused on root cellars.
The idea of storing things with no electricity.
What a concept!!!

View from the roadside

Across the street from our house there was a lot for sale.
It used to have a small home that fell into disrepair.
The western border of the property has a steep incline.
Built right into the side of the incline is an old rocky root cellar.

I have passed by this structure for a few years now, but decided to take a closer look. 


The above shot looks straight into the cellar, showing both sides and the back.
The structure has long been unused.
It is missing its roof and door.
I imagine what it must have looked like way back when.


Can you see the bright green moss?
It grows off of the sand or mud that was inserted between the rocks.


The above image shows how the original builders of this root cellar used preexisting rock.
See the big one at the bottom of the wall?
I wouldn't want to have moved that one!


See that swirl in the middle?
I imagine there was a piece of wood supporting whatever roof was on this structure.
The sand hardened over time and stayed long after the wood rotted.

I don't think this design is necessarily the best concept for a root cellar.
That being said, someone obviously used it at one time.
Since it is still there (for the most part), I'm going to say the design was very sturdy!

WINTER HOMEWORK:
I'm going to start some research on the best home made root cellars 
so that we too can enjoy zero carbon footprint food storage.

In terms of our home, there are a few places I thought would make good cellars.
Over the last few years...I have been monitoring each area.
Upon further inspection, the temperature and moisture levels fluctuate a little too much for my liking.
Perhaps an exterior food storage option is the way to go?
Only time will tell...


What is your favorite method of storing your food?


Friday, July 20, 2012

Just about missed the strawberries!

We are so fortunate to have a choice of pick-yer-own farms in our area.

Both are great for different reasons.  Both are run by members of the same family.

We decided to go to Paulridge this year, because of necessity.  My mother in law called ahead to see which farm actually still had strawberries left!  We had waited too long in the season to have the luxury of choice.

So off to Napanee we went back at the beginning of July!

(Ideal timing in our area seems to be the middle to end of june for strawberries...but raspberries are later on)


Paulridge Farms is a family run operation that has been going on for years.


They really do have it down to a fine art.  They provide everything one might need for the experience.


Quaint placards display current pricing, wagons to haul your load to the car.  The parking lot is a short hike from the fields...kind of a nice treat to see the exhaust is kept a safe distance back from the food.


Owen shows me he is ready to go with all the tools he needs.

(Lucky for him Mum brings the other essentials like sunscreen, a cushion for your knees or bum and lots of water.)


The driver takes us on a flat bed trailer to the spot that is currently being picked.


Owen moves down the rows searching for the ultimate berry!

Lucky for us it was a hot day with no scorching sun.


Owen still needed a rest in between the rows.  Whew!


We were able to haul out 3 baskets of berries between Owen and I.

Nana picked 3 baskets herself.


We do eat some while we work...but after a while you just want to get out of the uncomfortable hunched over position.  So you pick faster...and snack less.  On the ride back to the main buildings, we snack a bit in sheer exhaustion and bliss.  Behind Owen are the baskets picked by the employees.  Those berries are sold at a premium, as "pre picked berries" at the main buildings.  The flavour of home grown, fresh picked berries but without the back pain.


Paulridge Farm has a play area at the main buildings. 
Its a nice little spot to rest up before heading back home.

We had to wait a little bit as Ches and Noah went their own route.
We decided to divide and conquer, splitting our efforts between strawberries and raspberries!

Ches and Noah picked 2 baskets of raspberries, which is saying a lot!
We have found that filling a full basket of raspberries takes twice as long because they are smaller and the bushes hide those ripe suckers!


In the end the boys were happy with the haul.
Total haul:  6 baskets of strawberries, 2 baskets of raspberries, 4 pints of fresh peas and 1 pint each of green and yellow beans.

It took approximately 2 and a half hours from the start of our trip door to door.

We made a huge batch of strawberry jam along with a couple of raspberry jams.
We rinsed and froze some of each kind of berry in large freezer bags.
Some of those frozen berries will turn into smoothies or be inserted into pies or crisps.  The newest thing for us is thawing a few for a batch of home made raspberry vinaigrette. 

All the tops we cut off the berries when we prepared them will go great in our composter too!

We ate the beans and peas almost immediately.
Eating fresh peas from the pods remind me of my childhood driving from Oshawa to a farm in Bowmanville.
My Mom and I would shell and eat them all the way home.

My paternal Grandma Bell was also big on picking your own when they were in season.
Perhaps that is a peak into her farming childhood or a reminder of the hikes in Selwyn Park in the Kawarthas where her and her husband built a cottage on Chemong Lake.

I just hope that my sons take their children picking berries and the tradition will continue.

Memories are made along the journey...not when you get to the destination!

Tuesday, January 10, 2012

Apple Crisp....winter warmth...

I have to admit that I love making apple crisp in the winter time.

The smell of it permiates throughout the house.

It sends me through a time warp of past memories.

Just the simple smell of crisp is uplifting.

Its the reason we work so hard in the fall preparing large freezer bags full of sliced and peeled apples.  Enough to fill half a chest freezer!  The apples were a combination of ones we had picked from my mother-in-laws house 15min from here and the rest were from our neighbour's tree.  Its so close we don't have to leave our property to pick them!  (but we do get permission first!)


Its so simple (and way too easy) to make a crisp at the drop of a hat with the apples already peeled and sliced, all you have to do is thaw out the amount you want.


Once thawed (or in the above picture semi-thawed) you can arrange them in a baking dish.


The topping is so simple a child could make it...as illustrated by my 4 year old son Owen.
Although if Owen were in charge of ingredients, it would be an all-sugar topping.

So Mum takes charge of ingredients...and Owen is in charge of "smashing" the topping.

Start with the dry ingredients:

1/2 cup of white flour
1/4 cup of quick oats
1/2 cup of brown sugar packed
1/4 cup of white sugar
1/2 tsp salt
1/2 tsp cinnamon (or more if you like)
1/4 tsp nutmeg

Blend thoroughly.  Add 8 tbsp of butter or margerine.  Cut in the butter with pastry knives or a device like Owen is using.  Its so easy you can do it in front of the tv!!!


The picture above features the pre-oven version. 

Sprinkle the crumb-like topping evenly over the top of your sliced apples.  Some cookbooks I've read say to knock the pan a few times to settle the crumbs.  I gently shakes my baking dish from side to side. 
It's up to you.  Whatever floats your boat...


And here's the finished product!  You bake this beauty at 375 degrees F for 55min.

Your house will smell yummy and your tastebuds will love this winter warmer!

Alternatives:

  • Add rhubarb chunks in with the apples and switch the brown sugar for white sugar for a sweet, tart flavour.
  • Add frozen raspberries or strawberries for a taste of summer.
  • Add cubed cheddar on top of the topping for a savoury twist ("Apple pie without the cheese is like a hug without the squeeze!" a direct quote from my cousins)
  • Add a swirl of maple syrup on top of the topping for a sweet and naturally Canadian taste.
  • Add chunks of caramels (you can buy them at The Bulk Barn) on top of the topping for a decadent dessert.


Thursday, December 29, 2011

Shepards Pie

Shepard's pie is one of the first things I made from scratch.  I've made it so often that I almost forgot to mention it on this blog.  I really does encorporate evrything I believe in...if a meal could represent ones beliefs...

Wikipedia says... 
Cottage pie or shepherd's pie is a meat pie with a crust of mashed potato.  The term cottage pie is known to have been in use in 1791, when the potato was being introduced as an edible crop affordable for the poor.

Wikipedia goes on to say that you can use any kind of leftover meat in this dish.  One of our favorites is venison.  My mom and her fella left for Arizona and left us with their meat!  What a score!

Hubbie browned the ground off a few days ago.

That was pefect!  

All I had to do was saute the veggies, add the meat and make the juice. 


I used a full carrot from our garden (stored in moist peat moss), 3 cloves of verona garlic festival garlic, pressed, saute both until soft.  Add meat and a liberal dash of worchestershire sauce.  Prepare 2 packets of beef boullion and add to the mixture.  Heat until flavours mix and the juice gets thicker.  Add a turn of steak spice of your choice and simmer.  When the mixture gets to smelling great...add the peas and corn (or beans) all of which we had frozen while they were in season and stored in ziploc bags in the freezer.


I have to admit to a certain amount of sneakiness here...I hide parsnips in with the mashed potatoes! 

I used several brown potatoes from our garden (stored in buckets in the basement in dry peat).  But I also slipped in 3 hunks of frozen parsnip too.  I boil them right along with the taters and mashed them with milk, a dash of cream and a big helping of butter.  S & P to taste.


I scooped all the venison mixture in a large dish...then smooth out the surface with the spatula. 
I add large dollops of mashed potatoes to the top...and smooth it out too.
I always add a dash of salt to the top of the mashed potatoes and a tsp of butter on top (to make the mashed topping get a bit crispy!)

I love that eating shepard's pie feels like you are eating a bit of history.

What you're really doing is using almost everything out of a garden and adding in someone's free meat

You also have one heck of a great recession-busting, not-made-of-turkey, beat-the-winter-chills celebration dish!  Here's to the home made goodness of gardening all year round!!!


Saturday, September 10, 2011

Storing your garden goodies...Late summer edition

I find this to be a very busy time of year.

The garden is bursting with goodness and I'm either not home enough to make meals at home or too busy to actually be in the garden.  Sigh.  Unfortunately this is the WORST time of gardening season to be so busy!  There is so much of everything ripening that it seems like a huge waste to le it all go bad.

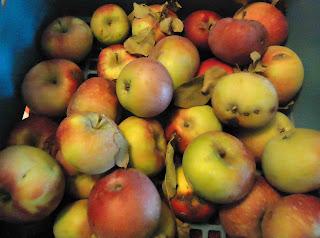
We are currently swamped in tomatoes and apples we've been given by my mother-in-law.  What to do with 7 baskets of tomatoes and a milk crate full of apples?  Well, this post is all about what we DID do with them!  Below is my wonderful husband.  He's carrying our hard work from Saturday (after we checked out the Verona Garlic Festival).  We knuckled down and peeled until our fingers hurt. 


What we ended up with was the following:  4 large freezer bags of chopped apples (ready for plopping into a pie shell or under a crisp topping), 2 large freezer bags of tomatoes, washed, rinsed and scored (so the skins with come right off of them when we make soup this winter), 3 containers of tomato sauce.  All ready for the freezer and will provide fresh summer goodness all winter long.  YUM!

The best was the apple sauce we made from scratch!  Sounds impressive, but once you find out how easy apple sauce is to make...you'll never want to buy store bought again!  (That's kinda the point, after all)


Take a whole buncha apples, you can use almost any type or apple.  Although I do know some apple purists who swear you can only use certain types.  A quick Google search will tell you to "Make sure you use a good cooking apple like Golden Delicious, Jonagold, Granny Smith, Fuji, Jonathan, Mcintosh, or Gravenstein."  I'm sure there is a reason why, but I only use what I have, so whatever Nana grows is what we use.  You don't have to be picky about the quantity of apples, because you can adjust the taste as you go!


You chop and peel the apples and unless you have a herd of pygmies working for you, you may want to use this trick.  Have a bowl of cold water and lemon juice handy.  Place the peeled and sliced apples in the lemon water until you are ready to use them.  That way the apples will not brown prematurely!


Place the apples (not the lemon water) into a pot.  Heat slowly and the moisture from the apples will steam out of the pot, leaving nothing but warm sweet applesauce.  Hubbie likes to get fancy by adding some brown sugar, allspice and cinnamon.  Basically its like apple pie fill when we make it.

Then we place it in jars.  We steamed the jars to keep the insides sealed until we're ready to eat it.  Leaving a 1/2 an inch from the top of the lid, just in case we decide to freeze the jars we aren't going to eat right away.  This is a perfect way to keep the fall taste of fresh apples all winter long, and its also a great way to make home made foods in advance for school lunches.


Delicious, nutritious, home made, low carbon foot print apple sauce!


What are you planning to make from scratch for your kids lunches? 

Maybe a better question would be, what changes are you going
to make regarding your kids lunches?

Tuesday, August 9, 2011

Digging potatoes is like digging up treasure!

We have never attempted potatoes...in hindsight I wonder why is that?  They are ridiculously easy to grow and are very satisfying...their yield per plant is decent!  So as a gardener, your time feels well spent.  We've done virtually nothing but water our potato plants...and not very often I might add...they still turned out great!
Then we did some research and discovered how you can store potatoes using no hydro electric power whatsoever...you just need buckets of dry sand or dry peat moss.  The same goes for carrots and parsnips, but the peat moss or sand must be damp in that case.

The concept really got under my skin.  I did more research on root cellars and they have been around for a long time.  Of course I had heard of them before...but with the cost of hydro these days....it really makes sense that we invest some time and effort into this concept.  Now if our own basement didn't have moisture issues...I'd throroughly consider a root cellar option for storage in our own home.

We decided to try potatoes this year in the garden...some brown skinned with white flesh...some red skinned with white flesh.  In the thrill of planting, I forgot which ones were which.  It happens. 


A row of some kind of potatoes

The best part is when you notice your green plant parts dying off, because I've read that is the time to dig em up! 


So since we had one row of potato plants that seemed to be dying off...I went to work with my kid's shovel.  I dug a trench coming in at the side of the plant...just to get a peak at how these tubers grow!

It was one of the coolest things!!!  Like you just found out that someone stashed a bag of potatoes under this plant!  I was giddy...which is probably a weird thing.


the tuber still attached to one of the roots

And boy did they just keep coming!  I found many under one plant...and we probably would have had more from each plant if we had bothered to mound them up as most books suggest. 


I just kept brushing the dirt aside and there were MORE potatoes...


This was the result of one plant and it still felt like a big score.  We scrubbed them up and added some fresh cut chives from our garden.  We always microwave our chopped taters for 4-5 minutes before we toss in butter and salt and bake in the oven for 20-30 min. 


After chopping, you can put chives in a freezer bag and use them all winter long!

For a quick, no-nonsense side dish...I merely microwaved the chopped taters...tossed them in butter...sprinkled with sea salt and fresh cut chives...baked at 350-375 degrees in the oven.  You can also do the same prep work, wrap in foil and throw them on the BBQ too.  A very good alternative to heating up your kitchen these days.


YUM!
 These were so yummy, and I can see me using more potatoes in recipes from now on.  Next year we'll may leave a large section of the garden for ALL KINDS of potatoes.  Either that or we'll invest in barrels to for potato growing.  More on that in another post...because it sounds like one of those weird experiments we'll either love...or laugh about later.

What did you try in the garden that was new for you?

Monday, July 25, 2011

How to blanch and store yer Beans!

When I first met my husband, I knew how to garden, but that was about it.  Along with being a stand up guy, he's also a chef by trade.  You would think that would be wonderful!  Sadly, with him working 3-4 jobs at any given point, he doesn't have a lot of time for cooking at home.  He does, however, have a wealth of knowledge in the kitchen...so if you can get him in there, you can learn a lot.

We gardened for some years before we considered storing the food we grew.  In hindsight, it seemed a little silly.  Eating beans for weeks at a time, so they didn't go bad and go to waste.  It definitely put our tastebuds through the wringer.  Nowadays we consider storage as a way to keep our garden giving throughout the year.  We have put some effort into investigating how you store different veggies. 

For our beans, we freeze them.  Pickling can be hard on the heart, what with all the salt.  We freeze our beans and they get added to soups and stews all winter, but my personal favorite is throwing them into Sheppard's Pie.  Mmmmmm.

As we found out the first year we froze beans, you MUST blanch them first BEFORE you freeze them.  Otherwise they turn brown when they hit the water or they leave everything else looking greenish.  (Like I said, gardening is VERY trial-and-error with us)

Now, let me start out by saying the only blanch I knew about was Blanche Devereaux from the Golden Girls.  So hubbie definitely came in handy on this one.  He knew how to blanch properly and he showed me how (with a lot of patience I might add).


The first step may seem obvious...but first you must pick your beans...I grab them when they are approx. 4-5 inches long...the longer they get the less sweet they are.  We grow green beans, yellow beans and purple beans!  That being said, we tried to blanch the purple beans and low and behold they turned back to GREEN!  Now we only pick the purple ones and eat them with dip or home made hummus.  So green and yellow beans get picked.

The you give them a GOOD rinse.  There will be dirt, bugs and/or wilted bean flowers stuck to them.  The outside of the beans are soft and lightly hairy, so stuff sticks to them quite easily.


Once washed, you'll want to dry them off a bit in a drainer.  Then you'll fill a big pot of water and get it on the stove now.  By the time that big pot comes to a boil, you should be all done preparing the beans.


When I prepare beans, I have old fashioned images of ladies on the porch snapping them by hand.  Your beans should snap when you break them, or they are not fresh.  I use a knife by the way, only because I'm doing a LOT of them and it takes less time.  Take off the ends and cut them into 1 inch pieces.  Any longer and you'll regret it when you add them to things in the winter.  you want bite-sized chucks, not long spears...as you may not know what you'll be adding them to later on.

When your pot is at a rolling boil, add the prepared beans.  Let boil for 1 min or until the beans change colour slightly.  Remember, you aren't cooking your beans, just par-boiling them.


After 1 min, you remove the pot from the stove and pour out all hot water.  You can use a strainer again here for this task.  I run cold water over my beans to halt the cooking process.  You can also set them in a sink of ice water if you so choose.

Allow the beans to cool a bit before you put them in a large freezer bag.


You don't want to PACK your beans in the bag.  You'll want to add a bunch, then flatten them out as thin as you can without crushing the poor veggies.  Lay the flattened bag in the freezer until frozen (approx 24 hrs).  Later on you can blanch more beans and use the same procedure for freezing.  When the beans are all done for the season, I add all the flattened bags into one.  At that point all the individual beans are frozen thoroughly and you'll also avoid "clumping".

Allow me to elaborate here.  "Clumping" was something that happened the first year we froze our beans.  Over the winter I encountered a large mass of beans frozen together.  Try adding a few beans when you have one solid block of beans (approx 3 cups worth)...not easy.  You'll either end of chipping away until you get beans shards...or you get mushy beans.  Again, trial and error....we live, we learn.

So now I take my flattened bags and add them to one or two freezer bags until each bag is full.  It may seem very labour intensive compared to the cheap bgs of Green Giant beans at the grocery store.  A relative once remarked..."Aren't those beans cheaper at the store?"  While I agree that beans at the grocery store are cheaper costing and easier than our beans, I have to mention that our beans have ZERO carbon footprint.  They were grown in our backyard and didn't have to be produced in a factory or trucked from a far away locale.  Part of our new mindset is that cheap isn't always desireable.  Cheap only means that I don't pay much money for something that costs the planet far more.

Our beans are healthy and pesticide free!  Our beans were grown with love (so they taste better!  or at least I think so) and my children understand what it takes to enjoy these green power veggies.

These beans make me feel more connected. 


Sunday, July 10, 2011

Wild Black Raspberries....rubus occidentalis

A few of the places we've lived have been in rural locations.  Sometimes we've been luck enough to spy the telltale red spikey canes of raspberries!  We cultivate these canes and low and behold, they take over.  We allow these tangles to grow and flourish because we know how awesome the black raspberry is.  It may look like we're the sort of neighbours who let our property go wild.  That just may be the case!  What may look like an unruly yard to some, our boys look at it like its a veritable grocery store.  Case in point, the picture below!

Looks wild...but its really yummy.
 Turns out these yummy wild treats are actually called wild black raspberries or rubus occidentalis by their proper name.  I've included some info that I borrowed from Wikipedia:

Rubus occidentalis is a species of Rubus native to eastern North America. Its common name black raspberry is shared with the closely related western American species Rubus leucodermis. Other names occasionally used include wild black raspberry, black caps, black cap raspberry, thimbleberry,[1][2] and scotch cap.[3]
Rubus occidentalis is a deciduous shrub growing to 2–3 m tall, with prickly shoots. The leaves are pinnate, with five leaflets on leaves strong-growing stems in their first year, and three leaflets on leaves on flowering branchlets. The flowers are distinct in having long, slender sepals 6–8 mm long, more than twice as long as the petals. The round-shaped fruit is a 12–15 mm diameter aggregation of drupelets; it is edible, and has a high content of anthocyanins and ellagic acid.[4][5]
Black raspberries are high in anthocyanins. This has led to their being very useful as natural dyes and, since anthocyanins are powerful antioxidants, to a great deal of interest in them for their potential nutraceutical value. Extensive work has been ongoing at Ohio State University to evaluate their benefit for cancer treatment in mammalian test systems,[6] and the first clinical trials on patients with esophageal cancer.[7]
(source:  Wikipedia, Rubus Occidentalis)

A closer view of the wild black raspberry...the trick is to wait until they turn black, as their name suggests.  The red one are too tough and they don't "fall" off the cane very easily.  You know you have a ripe berry when you touch it and it basically falls into your palm.  Our neighbourly birds do love them too, but thankfully the canes are thorny, so the birds don't get out of control like they do with our poor strawberries.  They neighbourhood animals appreciate our wild yards...even if our neighbours don't.  Tee hee!


I send the boys out with baskets in the mornings and they pick (and eat) until they are full...then we throw them into pancakes or muffins.  They keep their shape better than commercial raspberries or traditional raspberries.  They are smaller, tougher and sweeter, I find.


If you let enough of the canes take hold, you'll have plenty of berries for freezing, eating and cooking with.  I had some this morning with yoghurt, flax seeds, raw almonds and honey.  YUM!  Since we've identified these wild berries, I can't help but see these canes everywhere!  I spotted some in the back of the parking lot in an industrial area of Kingston, I've seen them all over. 

Look for red canes with small thorns.  They almost look like dogwood, but dogwood has a slightly different colour of red and no spikes. 


Saturday, June 25, 2011

Strawberries!

Its a little bit late, but strawberry season is upon us (although I think its just about done at this point...in our area anyway) 

Our strawberry plants took 3 years to make a decent crop.  Growing strawberries is definitely a labour of love and an act of patience.  I was hoping it would be worth it in the long run, but like anything in the garden, you never know how its going to turn out.  This year seemed to be a jackpot, so I decided to forgo the annual strawberry picking trip and try our hand at home harvesting our load of freezer jam.  Its one of our favorite fishing trip snacks as well as a bedtime snack (PB&J sandwiches) so we go through a lot of it!

In previous years, we have gone to two different pick your own places in our area.  Both were 20 min drive away, so I felt good about not using any fossil fuels to get to our berries for a change.  Fruition Berry Farm off of Hwy 15 and Paulridge Berry Farm north of Napanee on Palace rd are both great places.  The kids have enjoyed both farms for picking.  The one thing I'll say is that Paulridge had a lovely shaded area for the kids to play in...which was a welcome site after a couple of hours in the field under a burning hot sun.  Paulridge is typically not open on Sundays...so that's when we opted for Fruition.  The best part about Fruition is they have THE best teenagers working there.  Helpful, polite and eager...which is a great thing when you have a crazy moment of thinking you can pick berries with a 2 yr old in a stroller...by yourself!  (I clearly didn't think that one through)  Both places run about $8.50 per big white basket.  You can bring your own containers and they weigh them on site.  We purchased the big white baskets years ago...for a whole $0.50 a basket.  It added a bit to the price of our berries, but we've used them every year AND we use them in our garden too.  A good investment indeed! 


We picked our first batch and ate most of them, throwing some into pancakes to start.  By the second and third pickings, we had enough to make jam.


Crushed berries (1 3/4 cups worth in a liquid measuring cup), 3 cups of white sugar (I cut down the recipe from 4 cups, as our berries were small and super sweet), 2 tbps lemon juice and one packet of Certo.  Its the fabulous no cook recipe!  Stir the sugar and berries and let stand for 5 minutes.  Stir in the rest of the ingredients and let set for 10 min.  


Fill plastic containers so that there is about 1 inch left before the lid.  Let stand (covered) on a countertop for 24 hrs.


Freeze in the freezer! 

That's it!  That was all there is to it!!!  We ended up with 6 plastic containers in the freezer, 4 strawberry and 2 strawberry rhubarb.  Now the next sweet berry will be the raspberry.  Blue berries follow shortly after that.  We aren't in a good part of Ontario for peaches or cherries...but one can still hope. 

I have several strawberry recipes that I want to test out this year, but I may have to resort to local picked berries.  Our patch seems to have stopped producing for this year anyway. 

I was so excited to plant strawberries 3 years ago, that I had no idea there were types of strawberries.  I had no idea there was a variety called the ever-bearing strawberry.  Now that I know, I will pass along this piece of advise.  RESEARCH before you do anything...as our plants are now so established...it would be a shame to dig them all up now.  However, the idea of having strawberries for longer than the month of June is almost to much to bear!

Now all that's left to do in our strawberry patch is to keep on top of the runners, which will continue to try and make new strawberry plants until the fall comes.  Its quite a bit of work, but, like I said, its a labour of love.

Are you making any preserves with the sweetness of Ontario summer?  Tell me about it!