Showing posts with label storage. Show all posts

Tuesday, February 17, 2015

Picking and Storing Your Recipes

My husband is guilty.
He brings home recipes torn from everywhere.
And I know he is like all of you out there...
But, you see, he is a cook...so he has access to loads of recipes.
"This looks fun!"
"This one will taste awesome!"
"Wow looks tasty!"
The funny part is he has no intention of making these recipes.
He just hoards them.
Like I know we are all guilty of from time to time.


I don't know about you...but couldn't take it anymore.
So I have come up with a system!


A SYSTEM FOR CHOOSING TO KEEP A RECIPE

First, you have to be honest.
Pick a recipe you will ACTUALLY make.
If you don't normally make meals like the one in the recipe...chances are you won't start now.
If you have never tried Indian food...don't grab a recipe first...try it in a nice safe restaurant.
THEN you know what you're shooting for 
BEFORE you shell out a ton of money on weird ingredients you may never use again.
I'm not saying you shouldn't be brave and try new things.
I'm only suggesting you bring it back to reality.

Second, price out any ingredients that you don't already have.
If you need to spend $20 on saffron and it only calls for 2 threads...pass.
If you don't already have the staples to build your recipe...
you need to ask yourself if the price of buying new ingredients is worth it.

Third, if you already have a wad of recipes flying around your house...
gather them up and try sorting through them using the above method.
You will be thinning down your mess.
You will be brutally honest about your cooking intentions.
You will get the recipe paper beast under control.
You'll feel like a superhero.
(okay...maybe not...but getting rid of piles and waste always make me feel good)


For me, I had to reel in our obsessive need to keep every recipe that ever crossed our path.
(The same method was applied to our cookbooks too.)
When I grab a recipe I like, it usually has to meet a few prerequisite standards:
1 - at least 2 foods that I grow
2 - involves pantry and fridge staples I already purchase in bulk.
3 - no more than 1 ingredient has to be newly purchased (preferably none)

***************

MY 2-FOLD SYSTEM FOR STORING RECIPES

PRE TESTING
So now you have some recipes.
There are probably a billion storage solutions on Pinterest right now.
Here is what I do:


I label my folders based on the main ingredient.
 I have folders like "Tomatoes", "Fish and Game", "Zucchini", "Foraging" etc.

You can use any labelling system that works for you.
For example:
  • Breakfast, Lunch, Dinner, Snacks.
  • Slowcooker, Oven, Microwave
  • Pork, Beef, Fish, Veggies
  • Monday, Tuesday, Wednesday, etc
  • Raw, Vegetarian, Paleo, Dairy free
  • Entertaining, Home meals, Work meals

POST TESTING
Once I make a recipe, and decide it is a hit...I move it to the BINDER.


I have a binder full of plastic page protectors.
There are magazine recipes, handwritten ones, forwarded emails from friends.
All of our beloved family favorite recipes are in the BINDER.
Now, with this system, Handsome Husband can still find the recipe for 
Gramma BJ's Johnny cake...even when I'm not at home.

I have yet to organize the BINDER itself...that will be another post for sure.


How do you store your recipes?

Friday, October 24, 2014

What to do with all those Apples...

One bright and sunny Thanksgiving weekend day...
We picked a 10lb bag of apples.
It didn't really take us long...I probably could have picked the whole bag myself in 15 mins.
Seriously...not a difficult task...until you go to store these things!


I know you can store apples in a cool dark place for a few months into the winter.
I just hate the thought of one bad apple in the middle of the bag...rotting away...

So I went straight to keeping as much of the bag as I could with minimal waste or spoilage!


While I've made applesauce before...I've never jarred it for future use.
This was an awesome feat for me!
It usually smells so good when its boiling down...we eat it right away.
3 jars of applesauce now live in our food storage area.
While one can live without applesauce...it is a nice sweet addition to any pork dish.
Owen even likes dipping his potato latkes in applesauce!
Plus no preservatives or weirdness when you make your own...


Another first for me was the apple chip.
Slice thinly and sprinkle with cinnamon, nutmeg and sugar.
Like the tomatoes,  I tried both the dehydrator and the oven method.
Both worked well...but the apples took over 14 hrs in the dehydrator.
I must have sliced these apples way too thick...so I finished them off in the oven the next day.
Owen seemed to really like them at first!
Then that trailed off....must have gotten a few cinnamon heavy chips...


Frozen!
Ok...anyone with a little person these days knows that movie...
These are peeled and sliced apples in a freezer bag...
perfectly portioned so that all I have to do is pour them 
evenly into a baking dish and add crisp topping.
WAAAAAAY TO EASY....
Dangerously easy...


As nothing gets truly wasted at this house...I present to you...the chicken treat!
Once I had peeled, cored and chopped my fingers sticky...I took out the bowl to the girls.
They loved this sweet treat!


What do you do with your apple harvest?


Friday, October 17, 2014

What to do with your Tomatoes...

As any gardener knows, you do the best with what you've got.
Sometimes that means you deal with a poor growing season...
(like the one we just had...cool and rainy)
and save what you can...while you've got it!


This past spring, we started our own tomato plants indoors in March.
We always had indoor cats...so this was a first for us!
We raised 45 Roma tomato plants and several yellow pear and tiny tim cherry tomatoes.
The romas did so well, we donated 35 of them to the Grandmothers for Africa plant and bake sale.
In return, we were gifted with some of the heritage tomatoes we grew this year. 

Although the growing season was poor...we were still drowning in tomatoes.
What to do?

I picked a sunny day to sit outside and listen to the Blue Jays 
(a local fall bird....not the sports team)
while I sliced and seeded our plentiful Romas.


There was also a beautiful breeze going on...so I took advantage!
Sundried tomatoes...on my screen.
The dried for about 3 days, each night I brought them in so the heavy dew wouldn't make them mold.

Alternatively, I tried a food dehydrator to see if there was a big difference.


It just so happened my mother in law had one she was willing to loan me!
What I eventually found out was...both ways worked about the same.
The dehydrator was pretty darned convenient during our week of overcast skies and rain.
They smelled pretty nice too.
Still...there is something extra nice about tomatoes that were actually dried in the sun.
These sad indoor tomatoes just felt like impostors.


Luckily you can't tell the difference between them when they are all in the same bag!

The end result was a small freeze bag of dried summery goodness that we will enjoy all winter.

***************

Another solution is to host a salsa party!


We had friends come by, enjoy some salsa music and we took over the entire kitchen with salsa fixins.
Of course the open bags of tostitos were for the sampling...so much sampling...just to make sure, ya know?

A salsa party is an excellent idea to make the work go quicker.
You can also invite each guest to bring something that they has in abundance...
or that they can buy and contribute to the salsa.
We don't grow sweet bell peppers or cilantro...so having our guests bring those ingredients was a win for us!
We even had a guest bring the snap lids!
Perfect!!!


With so many helpers...you can make enough to split between each guest.
Everyone wins!

***************

This year, we also made pizza sauce in jars...


And pasta sauce for the freezer...

You can also make ahead meals and freeze them too...using your tomatoes...but I haven't gotten than far yet.
You can also blanch and skin them for the freezer too!

****************

Sadly...I tried making pasta sauce in jars...
but after a few days it became apparent that something went wrong in the canning process.
While this is common...it is no less heartbreaking.
It felt like a serious waste...but that sometimes happens when you are learning.
I am very thankful for the fact that my mistakes aren't going to mean my family will be starving this winter.
Luckily, when I make sauce, I don't add meat until I'm ready to cook it for dinner.
That meant the spoiled sauce went right into the composter.
Not so sad, right?


So tell me, what do you do with your tomatoes?


Friday, February 28, 2014

Seed Saving...a first for Us!

Let me just start off by saying we are
an experimental family.
We dabble, we attempt.
Occasionally we have a success!
Normally that's just the result of trial and error.
Often a lot of error.

I like the idea of saving seeds.
I really had no idea where to begin.
To be honest, the whole concept seemed too big to grasp.
It was intimidating.


Husband and I started researching on the web...
in newspaper articles and books.

We took it one seed at a time.
Each plant requires a different plan.
Some plans are as easy as separating seed pod from plant 
and then drying the seeds.

Other plants require a much more thought out process.

Ches was much more ambitious than I was this past year.
He decided to try tomato seeds.


Tomatoes keep their seeds in a gooey substance that actually inhibits the seeds from growing!
You have to force the seeds to germinate by making them start to mold.
Separate seeds from fruit and place in a mason jar.
Fill partially with water and place a porous cloth (or in this case coffee filter)
and secure with elastic band.
Let seeds stand in liquid for a week and then a mold will form on the surface of the water.
When ready to dry the seeds, remove from scummy water and discard the mold.
Dry seeds as per normal.

I'll be sure to let you know if this well researched method pays off in the spring...


All in all we did a great job last year in seed saving.
Peas, jalapenos, broccoli seeds, white corn kernels, purple, yellow and green beans.
Other jars in the above image show dried herbs (not seeds) like lavender, thyme and oregano.
Very important spices in our household!
The lavender is used for tea and respiratory ailments.
The thyme and oregano are staples in our cooking.
We even dried chunks of jalapeno flesh (the red stuff on the right)
...still haven't used it for anything...
but you never know...


We have a couple of black walnut seeds from a past neighbour's yard.
We also have a couple of peach and plum pits (the wild plums I wrote about previously)...


I finally found some rose hips in Pres-Quile Provincial Park in Brighton.
I dried them for tea making purposes...they contain obscene amounts of vitamin C.


The above picture shows something we never did before...
Broccoli seeds!
They form a bizarre little pod with tons of small black seeds inside.
We dried the pods on the screens,
then removed the seeds by hand.


See how small the pods are???


The seeds are totally tiny!
We've never let a broccoli go to seed before..so this past year was a treat.

I'm sure as the seasons go on,
we'll learn more about seed saving.
This past year was more fluky than anything intentional.
I feel it is important to be able to save your own seeds.
Food self sufficiency becomes more and more important as our 
food supply continues to let us down in terms of safety.


Speaking of seeds!

I plan on bringing the some of my seeds to the seed swap on Mar 4th in Tamworth.
The Tamworth and Erinsville Grassroots Growers Assoc.
featuring local celebrities like 
Karen ten Cate of Bumblerock farm, 
John Wise of Wiseacres organic farm in Centreville 
and Brian Burt of Burt's Greenhouses!

Nothing gets me going more than gardening talk in the middle of winter!!!!
Plus we'll be planting our "tropical" seeds this week...like tomatoes and peppers.


Wednesday, September 25, 2013

UPDATE: Fourth Installment of the Garden Progress

WOW!

The garden is reaching new heights...
Seriously...we've never had corn get so tall before!

The cooler weather is approaching - much to my dismay.
Don't get me wrong, the summer had its moments.
Overall it was rainy and lacked a lot of sunny days to dry things out.

The result was twofold:

1 - we hardly had to water the garden at all! YAY!
2 - we had mushrooms growing in our garden...not the edible kind...sigh.


There were some good things about all the rain...the cucumbers seemed to LOVE it!
This year had to be the first time in a long time that we have had luck growing cukes.


Our cuke machine seemed to work out great.
Both slicing cukes and pickling cukes flourished in our cuke machine.


Can you believe the red headed corn we have???
It's almost hot pink!


Ewww....anybody know what the heck this thing on my cornstalk is???
Investigation required...in the meantime, I snapped it off and tossed it in the fire pit.


Brussels sprouts have got to be the cutest thing I've ever grown...
Once we snapped off the lower leaves the wee lil buds were more visible.
It is like seeing a whole host of tiny cabbages stuck on the side of the stalk!
(In my mind, its baby cabbage patch kids...but that's just my 80's brain)


Our jalapenos are also going like crazy!
I've already given away lots...
And those I kept have been added fresh to recipes
or pickled.


We've also begun the process of thinking about next year's garden.
As the fresh produce slows down, we leave some things on the plants to dry for seeds for next year.
We do that with the peas and beans....that is if I can stay away from the peas long enough.
You can also use either in soups all winter!
(Just make sure you keep enough for planting)
I keep mine in mason jars once dried thoroughly.

As we eat the jalapenos, we keep the seeds and dry them on screens.
I also tried to slice, de-seed and dry the actual peppers.
We'll see if it works out.
The herbs are also coming to an end.
Since we didn't have a hot summer, a lot of our herbs are still producing.
I gather some herbs sporatically, then wash and pat them dry.
I place them between 2 screens on a warm fall day with a nice breeze.
I bring the screens inside at night so the dew doesn't affect the drying process.
(we have been having pretty heavy dews lately...luckily for the rest of the produce, no frosts yet)

How are you saving your harvest?

Are you already thinking about next year's garden?


Saturday, June 15, 2013

Ramps, Ramps and Wild Leeks...


I feel like I'm behind on my posts...but I will try to keep up...as the growing season ramps up...

ok...that was a bad pun...

This post is all about what we made this year with wild leeks.

I have posted about the actual picking of wild leeks before...so I won't rehash it.
If you are in desperate need of picking info...click the link below:


This year, the family went out twice for picking leeks.
The first time was my husband and son in the first few weeks of May...but the plants weren't quite ready yet.

We waiting a week or two and then went out again.
It was the mother-load!!!
We went to our usual spot, but hiked back about 100 feet further into the woodsy interior.
It was like an unspoiled haven for leeks.

We hauled out 3 cloth grocery bags of wild leeks.
Husband spent 3 nights separating the green leaf part and the white bulb part.

I spent about a day preparing the leeks to be made into several new and exciting edible forms.

So this post is about all the thing we made this year!

Read on and salivate...


Potato & Wild Leek Soup

This recipe is so basic and filling...enjoy it topped with bacon bits or herbed croutons.

10-12 medium sized potatoes
8 wild leek bulbs (the white part only)
2 tbsp coarse chopped leeks leaves (the green part only)
1 cup veg or chicken broth
4 cups of water
1 tsp fresh chopped chives
1 tsp salt & ground pepper each

Simmer potatoes in water until tender.
Add broth, leeks bulbs and S & P.
Simmer until aromatic.
Add leek greens, chives and simmer for a few minutes.

You can make this recipe with fresh or frozen leek bulbs.


I'm so proud of that picture above!

From left to right:
-Dried ramp leaves
-Sweet pickled leek bulbs
-Ramp greens pesto


I borrowed the pesto recipe from my friends at The 3 Foragers blog!

check out their delicious recipe here:


For some reason, this image makes it look like the pesto turned out fluorescent green...
but in reality it was more dark green in colour.


On the same page as the recipe for the pesto...was a recipe I've been dying to try...
Ramp Pesto Twists!!!

The 3 Foragers include the recipe for both the pesto, the bread and instructions on forming the twists.
The only substitution made was using marble cheddar instead of the recommended mozzarella.

The results ROCKED!


Above is the image taken of the final product with Pork chops, spinach salad and mashed garlic potatoes.

While I've made the Potato Wild Leek Soup before, the other recipes were new to our family (and me!)
We jarred the pesto for future enjoyment (it really was very tasty)
We dried and stored the ramps greens for future use in soups etc over the fall and winter.

The sweet pickled leeks will have their own post very soon...they are THAT good.


I would like to send a BIG thank you to The 3 Foragers
for continuing to post very tasty recipes for us to try.


Monday, February 18, 2013

A couple o Taters

 Potatoes can be so many things.

They can transform and make different additions to any meal.
I have raved about potatoes on this blog before...so I won't rehash the details.
(but you can search on the right hand side for any posts relating to potatoes)

I have been enjoying some potatoes this winter.

Potatoes are one of those foods you can store all winter long given the right conditions.

If you follow my Facebook group or page for this blog, you
will have seen me show off meals with chopped or diced potatoes
fried up with other veggies or roasted with other roots.

Potatoes can be so versatile...and good for you!
Most of the carbs associated with potatoes are found in the starch content.
Starches are very important to our functions...as they turn into the sugars that feed our brain.

I thought I would show you
a few more ways we've been enjoying this amazing tuber.


A close up on the crispy texture of the hash browns.


The recipe I used can be found at the following link:

Another way I have been enjoying potatoes is below.


Soft and Savory!!

For the full recipe, click the link below:


Serve with steamed greens or with a salad.

********************
Furthermore!
We also love a good creamy potato soup...we liven ours up with
wild leeks we picked, washed and froze for winter use.
This soup is great in the winter with frozen leeks or in the spring with the fresh picked leeks.

Potato & Wild Leek Soup
by Lisa Pedersen for this blog


This one is so simple...I just do it from memory...

12 large potatoes
8-10 wild leek bulbs (the white part)
1/2 cup chopped wild leek greens (optional)
1 tsp chives (fresh or dried)
1/2 tsp garlic powder
1/2 tsp onion powder
4 cups chicken or veg stock
2 cups water
S & P to taste
  • simmer leeks in 1 tsp butter or oil until softened
  • add potatoes and simmer a few minutes
  • add water and stock
  • bring to a boil and simmer on med - high for 10-15 mins or until potatoes are softened
  • add spices and simmer for another 5-10 mins
  • either add by cup to a food processor and blend until desired consistancy or mash with a potato masher.
  • top with bacon pieces if desired
This soup is so thick and hearty that I don't bother to serve it with biscuits.
You could just as easily serve it with crackers or toast points...but that would have to be a big hungry belly!

*******************
If you are going to start storing vegetables, I would recommend the potato first.
Its versitile and lasts all winter long.
By spring, the tubers that are no longer edible
will be ready to plant for another successful growing season.

Wednesday, January 16, 2013

Cooking for the End of the World...AKA a million soup recipes...

I love books...especially reference books...
It's gotten so bad I actually have to limit my exposure to Amazon.com...
I could literally spend a small country's national debt on that site alone!!!

One of these books from Amazon was all about storing food for emergency purposes.


A large part of this book was about reconstituting dried foods for cooking.
I was intrigued.  We do store a lot of food, but drying isn't one of the ways we usually do it.
(It's one of my resolutions for 2013...to become more comfortable with drying food)
Mostly we just freeze or jar our food.  In the fall, I aim to make a bunch of soup when the fall veggies are ripe and freeze them in Becel containers.

We have bags of dried beans, but I prefer to work with canned.
The big problem I have with canned beans is that they are packed in salt or preservatives.

So I decided to try reconstituting for the first time!

I soaked 4 cups of mixed beans over night....kind of anti-climactic...


Those above are the beans after I had soaked and rinsed them.

I looked up several recipes online in places like cooks.com seaching under the tag "mixed bean soups".

I found LOADS of recipes to choose from...but many of them called for a pork shank.
I didn't want to rely on having a shank laying around...that and the beans themselves are full of proteins already....why add more?
I found a few recipes that didn't call for a pork shank...just to mix thing up a little.

I had both varieties of soup going at the same time....one in a slow cooker and one of the stove in a pot.


MOM'S BEAN SOUP


2 cups beans 
4 cups water
1 chopped onion
1  1/2 tsp. chili powder
1 tsp. cumin
1 tsp. garlic salt
Soak beans overnight - or - boil for one hour. See Soaking Dry Beans. Rinse beans. Add all ingredients and bring to a boil. Simmer for 2 hours or until beans are tender. Serve with chips, cheese, sour cream if desired.


TEN BEAN SOUP
1 1/2 c. Ten Bean Soup Mix
4 c. water
2 (10 oz.) cans chicken broth
1/2 tsp. garlic powder
1/4 tsp. pepper
1 lb. smoked sausage, thinly sliced (i used mild italian spiced turkey sausages)
1 lg. onion, chopped
1 (14 oz.) can tomatoes, chopped
-Sort and wash beans, place in large Dutch oven and cover with water 2 inches above beans.
-Soak beans overnight.
-Drain beans, add 4 cups water, chicken broth, garlic and pepper.
-Bring to a boil, reduce heat, cover and simmer 1 1/2 hours or until beans are tender.
-Add remaining ingredients and simmer an additional 30 minutes. Yield: 2 1/2 quarts.


Of the two bean recipes, the sausage one turned out to be more of a crowd pleaser.
You can't always see what everyone will like until you try it.

My only advise for that is don't make 16 servings of anything until you've tried a portion of the recipe to start.
It feels like a waste of ingredients and a lot of space in your freezer.

******************

Here are some other recipes I made this fall for the freezer...
They are great to make ahead and hearty for the whole family.

******************

Mean Green Broccoli Soup

1 large stalk of broccoli
2 cloves of garlic, pressed
1 sm onion chopped
2 tbsp sharp cheddar cubed
1/4 cup wild & brown rice cooked
6 cups chicken or veg broth
2 tbsp lemon juice
S & P to taste
pinch of hot pepper flakes for fun!


-cut broccoli stalks from tops, peel fibrous outer layer and chop coarsely.
-Cut off flowers and set aside
-In a pot, combine stalks, garlic, onions and broth.
-bring to a boil over high heat.
-reduce heat and boil gently for 10 mins, covered.
-add flowers, hot pepper flakes and cooked rice and simmer for 5 mins longer
-in a blender, puree a little at a time until smooth (or desired consistency) and return to pot
-stir in lemon juice, S & P (and milk if you like) and let simmer but not boil.
-dish out into bowls and add cubed cheddar just prior to serving

Another great recipe!
I got it from some grocery store handout for quick and easy lunches. 
 Make it while you have broccoli around...then freeze it for long term use. 
It works great for a winter warmer-upper!  Thick and healthy too! 
The heartiness comes from the rice instead of using heavy cream.


***************

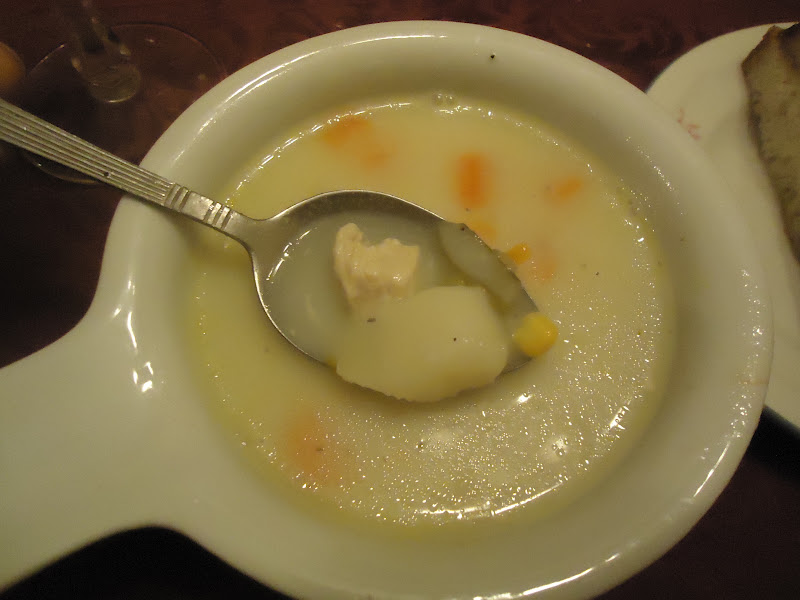
Chunky Chicken Vegetable Chowder

4 packets vegetable bouillon
3 cups water
1 cm onion
2 tbsp butter
1 cup each diced potato(stored from garden), carrot(stored from garden), beans (frozen from garden), peas(frozen from garden), cooked chicken cubed
1/2 tsp dried basil
1/2 cup frozen corn (cut from cobs in the fall and frozen)
1 1/2 cups milk
3 tsbp corn starch

-dissolve bouillon in water as per directions, set aside.
-in large pot, cook onion in butter until softened.
-add bouillon, vegetables, chicken, and basil, bring mixture to a boil
-cover and simmer on med heat 20 mins or until tender.
-add corn, and simmer 5 mins longer
-in a cup, stir corn starch into milk until smooth
-add to pot stirring slowly, bring pot back up to a boil. 
-boil 1 min to thicken
-add S & P to taste and serve with biscuits or bread


This recipe is great to freeze if you save the milk until you reheat it.
It "sticks to the ribs" as they say.  Great for after a day outside ice fishing or sledding.
I originally got it from a box of Bovril packets but have made it many times with many different veggies.

See below where we served it with fresh homade bread from the bread machine and also our homemade white wine from the concord grapes in our backyard!


****************

A current favorite of mine is venison Guiness stew.
It is very hearty and full of vitamins and a lean source of meat.

Venison Guinness Stew

venison
1 cup of carrots peeled & chopped
1 sm onion chopped
2-3 garlic cloves pressed
1 sm potato chopped & peeled
1 cup beans & peas
4 cups of beef broth
4 cups of water
1 tsp steak spice
1 tsp worchestershire sauce
2 tbsp Guinness beer (or other dark lager)
S & P

-Brown Venison in a pan and set aside, discard juice.
-Fry in oil onions and potatoes in a pot until tender.
-Add carrots to pot and simmer for 5 mins.
-Simmer in beef broth and steak spice.
-Add meat, peas and beans.
-Add worchestershire sauce and beer.
-simmer all ingredients in a pot or slow cooker for 2 hrs.


******************

A new favorite I found this fall is the spicy pumpkin soup!
This one is a variation on traditional soups made with squashes, 
but freezes really well!


Spicy Pumpkin Soup Recipe

Ingredients
4 Tbsp unsalted butter
2 medium yellow onions, chopped
2 teaspoons garlic pressed
1/8 to 1/4 teaspoon crushed red pepper
2 teaspoons curry powder
1/2 teaspoon ground coriander
Pinch ground cayenne pepper (optional)
3 (15 oz) cans 100 percent pumpkin or 6 cups of chopped roasted pumpkin
5 cups of chicken broth or veg broth
2 cups of milk
1/2 cup brown sugar
1/2 cup heavy cream

1 Melt butter in a 4-quart saucepan over medium-high heat. Add onions and garlic and cook, stirring often, until softened, about 4 minutes. Add spices and stir for a minute more.
2 Add pumpkin and 5 cups of chicken broth; blend well. Bring to a boil and reduce heat, simmer for 10 to 15 minutes.
3 Transfer soup, in batches, to a blender or food processor. Cover tightly and blend until smooth. Return soup to saucepan.
4 With the soup on low heat, add brown sugar and mix.
(if you are going to freeze the soup, don't add the milk or heavy cream)
5 Slowly add milk while stirring to incorporate. Add cream. Adjust seasonings to taste. If a little too spicy, add more cream to cool it down. You might want to add a teaspoon of salt.
Serve in individual bowls.
Sprinkle the top of each with toasted pumpkin seeds for a nutty aftertaste.