Showing posts with label broccoli. Show all posts

Monday, August 5, 2013

UPDATE: Third Installment of the Garden progress

Although our bounty is a bit behind...it still looks luscious!!!
It only took my husband and I working for about 7 days straight to get the whole area weeded.
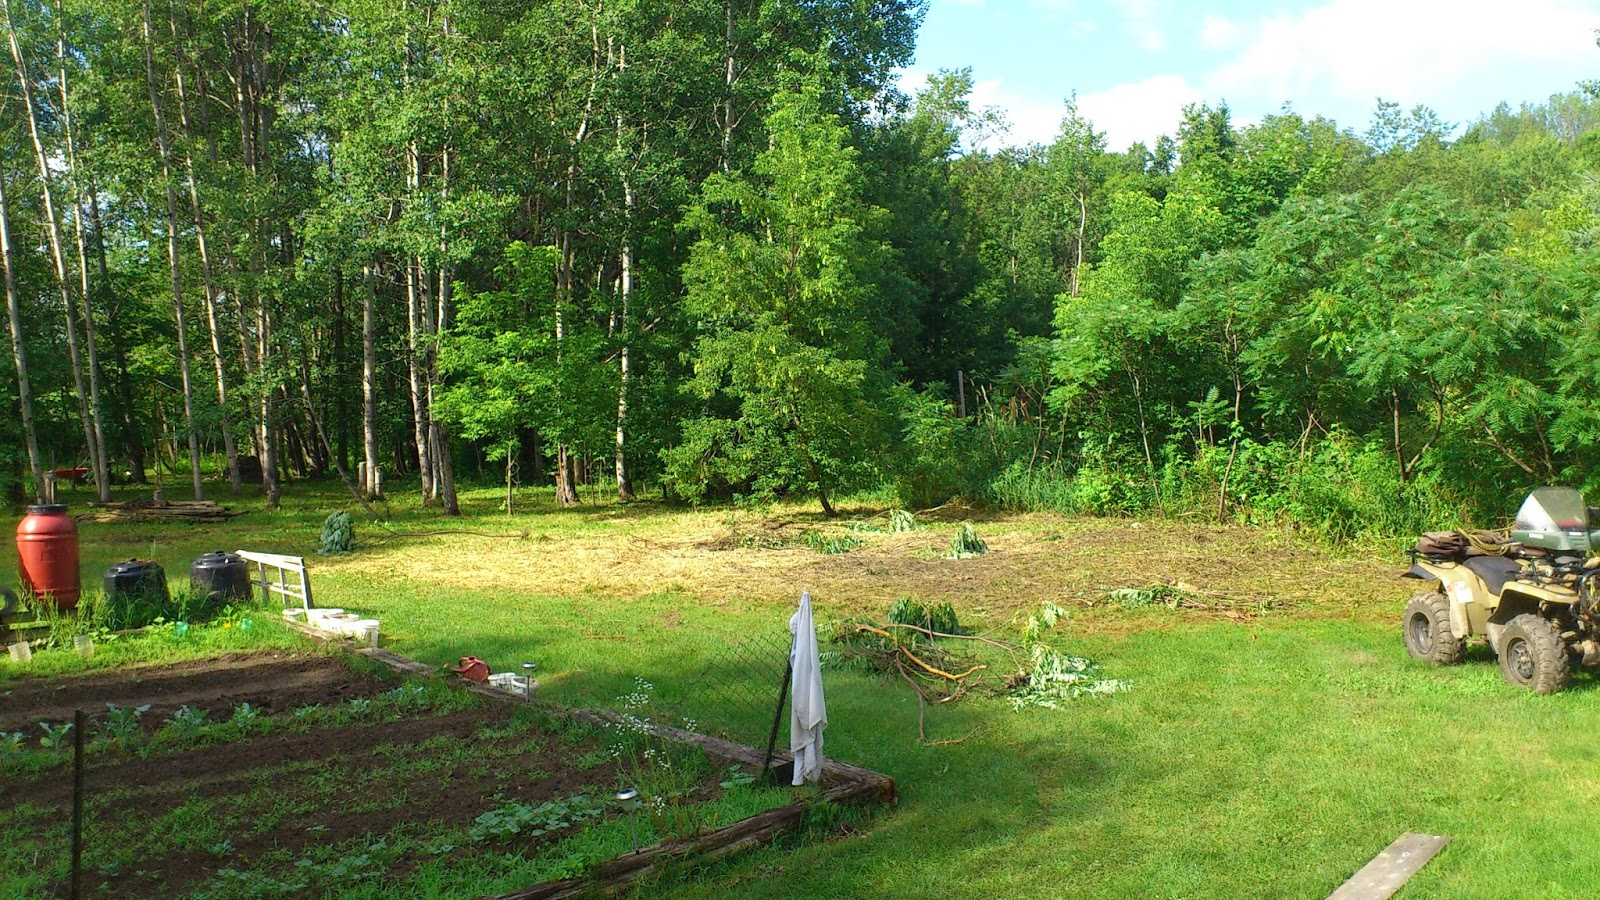
(The image below shows it only about halfway weeded)
Methinks if we are to expand the garden at any point - we will have to 
think about alternatives to manual weeding.


Can you spot the husband in the back?
Weed picking in the big garden one evening.

So far this season, I've only posted far back shots of the garden as a whole.
(like the image above)

Here comes the veggies!
(They're ready for their close ups...)


CORN:  Our white corn plants...waist high!


CUKES:  Our cucumber machine...nothing to it...just an old chain-link fence with 
steel rods driven into the ground on an angle.  They are starting to get the idea...


The lovely little cucumber flowers are teasing us!!!
We planted both pickling and English cukes.


BRUSSELS SPROUTS:  ...a first for us!


BEANS...green, yellow and purple...but the green ones outnumber the rest.


CARROTS...we planted the leftover purple carrots from 2 yrs ago...but apparently the purple fades away.  All of the purple carrots I thinned out of the row were definitely orange.
Maybe the purple colour comes later?  Stay tuned...I'll let you keep you posted...


BEETS...coming along just fine.  After I thinned them, I was left with more room for the beets to flesh out and some amazing baby beet leaves for salads.


PEAS:  First round of peas in tomato cages did alright, but I wasn't satisfied with the amount of plants. 


So we planted a second round of peas with hemp string supports...can't wait!


BROCCOLI:   transplanted from sister-in-law Sally's garden...doing well!


GARLIC:  we planted garlic and got loads of purslane as well!


ACORN SQUASH:  We wanted more squashes to store for the winter.  We've already experimented with butternut - now we roll the dice on acorn!


ZUCCHINI:  Green zucchinis taking off - finally.


A prized zuke!!!  I really can't wait...these are a favorite summer nosh


TOMATOES:  We planted tomatoes in different stages...the ones on the right hand are a few weeks ahead of the ones on the left.  That should mean we won't be drowning in "maters" all at once.


ROMAS!


As you can see, our haul this night is small but productive.
A rainbow of colours!

A few things we planted did not come up.
Like I said, we're working with seeds we kept from 2 yrs ago...so I'm just thankful
anything came up!  Parsnips and flying saucer squash did not take at all.
Not sure if the seeds just went "stale" or if our seed storage techniques are flawed.
More research will have to be done on this subject, I'm afraid.

There is a bonus this time of year.
As you work away in the garden, you are also able to grab extra stuff you wouldn't have expected!
Whether you use seeds or seed tape, when you plant carrots and beets...you will have to thin out the harvest before they start establishing themselves.

So while you are thinning out the crop (so the veggies don't crowd each other),
you can harvest some baby beet leaves and baby carrots!
I hate to waste anything and, even more importantly, there is valuable vitamins in them babies!


How does your garden grow this year?

Friday, July 19, 2013

UPDATE: Gardens abound...

Here's the update!

It took a little longer to get the big garden prepped and planted this year.
We're about a month behind.
There were tiller issues - don't get me started.
On the upside, our plants (which weren't planted yet) were not harmed by a late May hail/wind storm.
On the downside, everyone else I know is already harvesting stuff from their gardens.

What we planted this year:

-beefsteak, roma, cherry and yellow pear tomatoes
-cabbages
-green, yellow and purple beans
-white corn
-beets
-peas
-green zucchini
-potatoes
-jalapeno peppers
-regular and pickling cukes
-carrots, both orange and purple
-broccoli
NEW:  brussel sprouts - never tried growing this one before!

The big garden bed on a lovely sunny morning
The actual garden work feels like its been on hold lately.
I manage to weed the garden for about an hour in the morning or an hour in the evening, but I can't seem to manage both.  Between the incessant heat and the bugs...it's just not happening.
At least there are no water shortages this year!  WOW! 
Rain aplenty...wishing we had more rain barrels though.

One thing we have at the new house (that we certainly didn't have at our old house) is
DEERFLIES!
OMG these suckers take a chunk out of you!
I have yet to get a deerfly patch for the back of my gardening hat...
but its coming sooner rather than later.


Husband has been feverishly clearing some neglected sections of our property.
The dried area you see above was previously a sumac patch riddled with long dead, wild raspberry canes.
It also was hiding a small play structure from the previous owners approximately 20 yrs ago.

Our plan is to clear it, then add more beds to the space.
We are both excited to plant berry bushes!
A space for huckleberries, fresh wild raspberry canes, blueberries and blackberries.
As an aside, Husband is super stoked to get a blackberry variety called Chester.
(his name doesn't get many shout outs...especially from fruit)


Way in the back yard, by the fire pit, is a small bed I made from deadhead rocks in the immediate vicinity.
I planted a citronella plant that I purchased from a local garden center.
The plant had been over-wintered (brought inside after its first year) and was enourmous!!!
We pick leaves, crush them up a bit and stick them in our pockets or shoes.
I stick them on top of my ears, like a flower.
Using them this way, you can also judge when you've gotten too close to the campfire.
(Discovered by accident! I was tending the campfire and forgot I had them behind my ears.
I was greeted with a strong lemony smell...much stronger than just crushed leaves)


Close up on the citronella flowers above.


Now to the front beds!  Above you can see the herb garden at the front of our house.
I labelled each herb and plant.  The green onions were transplanted from our stash last year.


The dill getting out of control!  Owen, my little guy, says it looks like a rainforest.


The mint has rooted nicely!  I still think we needs another area for mint...let it grow wild and crazy.
Momma likes her mojitos!


This side of that front garden bed was like the dumping spot for everything last minute.
(It was supposed to be for tea herbs...but I really need to do more research on teas)

The lavendar so far has been disappointing. 
I thought I would have tons for tea this winter...we'll see how that goes...
I have never grown horseradish, but it sounded like fun.
I don't even eat the stuff, but Husband does!  So I bought some...a week before someone pointed out wild horseradish that stands up to my waist in a completely unrelated area of the yard....sigh...


All that hard work deserves a snack!

Before bed snacking is big at our house.
Here is what was on our snack plate:

Swiss cheese from Wilton Cheese Factory
Gala Apples
Fresh peas in pods from the garden (not enough for a family meal, but enough to snack on!)
Breton mini crackers


Thursday, November 3, 2011

Broccoli, Baby

Our garden is all but done for the year. 
Most of the plants are long dead and have been yanked out of the ground.
The only thing still growing and producing (for some reason) is our broccoli!

Broccoli is one of those plants that likes cool weather.  You can plant it early in the season, as the cold evenings will not affect it adversely.

Its almost as though broccoli was made for Canadian weather!

We are having a tough time finding new ways to eat it though.  A side of fresh broccoli is nice...but it gets tired very quick.  How many things can you serve with a side of broccoli?  

Turns out, quite a lot. 

Any followers on my Facebook page will have noticed broccoli show up on some of my frequent meal pics.  But that doesn't mean your broccoli has to be boring!  My Mom makes a GREAT cold salad with broccoli, sunflower seeds, bacon bits and a bunch of other great stuff.  If anyone is interested in the recipe, I can get it for you...just let me know in the comments section of this post.  Sadly, it isn't a dish my kids like.  Live and learn.

I've decided to make a quiche for the first time tonite.  I've never made quiche.  I've also never made a crust from scratch either...well see how this goes...


I made the dough according to the recipe found in "The Joy of Cooking" for deluxe butter flaky pastry dough (pg 862).  I think I added too much butter though.  It just seemed like a ton!  Once the dough is complete...you must divide it and refrigerate it for at least 30 min.  The longer the better really.  The directions say 1-2 hours.  When I was working with the dough, I kept having to put it back in the fridge to firm it up.  

I pressed it into the pan, as this was my first time, so I didn't feel confident enough to roll it out and place it in the pan.  Once the dough is pressed thin in the pan, place dry beans in the center, enough to cover the bottom of the pie pan.  This method is called blind baking.  It helps keep the dough from bubbling up in the center or sliding down the side of the pan.  (ps.  you can keep the beans for reuse the next time you make crust from scratch)


FAIL!!!
I REALLY added too much butter...I suppose it helps to read the directions VERY thoroughly.  Hubbie had a good laugh at my expense...but, in the end, it all worked out.  I grabbed what was left over from the dough and kneeded it with several more tablespoons of flour.  I kneeded it until the dough wouldn't absorb any more flour and the dough was no longer sticky.  (Please do not follow this example...read the actual directions!)

This time I tried the rolling pin and it worked much better for me...


TA DA!

The new crust was blind baked at 400 degrees C for 35 min (you tent some tin foil over it for the first 20 min, then remove for the rest of the time).

Then you add the other ingredients...such as shredded cheddar cheese, fried onions and garlic as well as the steamed broccoli chopped up into chunks.  After you've laid all these ingredients in the bottom of the crust, then you add the egg mixture.  Egg mixture:  3 eggs, 1 1/2 cups dairy (we used 1/2 cream and 1/2 milk), dash of nutmeg and S & P to taste.  Pour egg mixture into crust and bake for 25 min on 375 degrees C.


QUICHE!!! 

So I lived AND learned on this recipe.


The quiche turned out great...but what to have as a side???  Hubbie had been out in the garden the whole time I was struggling with crusts.  He grabbed what was left of our beets and was removing the greens when I asked him what should we have as a side?  His reply...beet greens with honey mustard dressing!


As a bonus to this post, here is the recipe for honey mustard dressing a la Chester.

4 tbsp olive oil
1 tbsp grainy dijon mustard
1 tbsp honey (organic or local)
1 tsp of white vinegar
S & P to taste

Makes enough for two...quick and easy!!!

Hope you guys enjoyed following along as I tried to make crust, hopefully the next time will be LESS EXCITING...haha.

The really nice thing about quiche is you can make it, cook it and freeze it for another day.

ps.  Hubbie was quite impressed I was able to save the dough...not bad for a beginner eh?