Showing posts with label trellis. Show all posts

Thursday, October 13, 2016

Trellising Tomatoes...

I'm not even sure trellising is actually a verb.
After working at the farm last year, 
it definitely feels like an action word.

In years past, we had lost a large percentage of our harvest. 
The loss was due to the fact that the weight
of the tomatoes actually bent the vines down. 
The vines then grew along the ground
and produced more tomato fruit. 
The result was the tomatoes that touched
the ground went bad very fast. 
After all of the effort in growing the seedlings
and tending to them in the garden beds,
to see them go bad was heartbreaking.

While I wasn't the person who actually did the trellis work at the farm,
I understood the principle behind it.


With that knowledge, I felt better equipped this year.
My husband and I do not spend money on our garden.
We get the majority of garden-related stuff by donation or trading.
When I suggested we invest in metal T bars this year
it took a bit to convince the husband.

"It is an investment!"
"They will last for a very long time!"
"They are reusable!"

These were just a few of the sales pitches I tried out.

In the end, he relented and we purchased the T bars.

Luckily it wasn't the sort of thing we had to buy right away!
We planted our tomato seedlings at the beginning of June.

It took a few weeks for them to be tall enough for us to work with.


We hammered in the T bars at the end of each row of tomato plants.

(There are two rows of tomato plants in the bed shown above.)

Then the REAL fun begins!


Next we grabbed some baling twine.

We started at a spot that is near the bottom of the T bar.
Tie off one end and go around the inside of the first plant,
then outside of the next plant,
and so on...until to reach the end of the bed.

We tied off the twine at the other end just in case.

Then we came back to the beginning,
reversing the direction of the twine for each plant.

We had to grab the odd vine that was growing this way and that.

What you are left with is a great way to keep the tomatoes
standing tall without strangling the life out of the vines.


For the record, we've never seen the walkways look so great!
You can even see the recycled water jugs we use.

Cut the bottom off of a jig and
plant the spout end in the ground.
Its like a funnel right to the roots!

This method works best if you organize the jugs as
you plant the seedlings.

It also works best if you place the jugs between
the plant and the walkway...rather than beside the plant.
(we discovered that placing the jug beside the plant
results in losing the jug in the jungle of tomato plants)


It might be difficult to see in the above picture...
But our tomato plants are up to my shoulder!


Our tomatoes thrived this year!
Our walkways were clear enough that we could access
all of the plants for watering.
We also had way less loss due to mould.

Almost none of our plants had vines or
fruit which touched the ground!


The results speak for themselves in this instance.

Perfect tomatoes!

Monday, July 28, 2014

Trellis Action...

So...a few weeks ago I was struggling with how to trellis my plants.
In my garden update post, I lamented that I had a short amount of time to
think about it...before it became a necessity.

I was able to come up with some completely free solutions!
Let's check them out...

PEAS


We planted two beds of peas...multiple rows in each bed.
One day, as I walked on the shores of Desert Lake, I came upon a driftwood log!
I used other sticks to support the driftwood and 
then laced craft wire to that it formed a teepee like trellis on both sides.
The craft wire was free because I had bought it many many many years ago.
It was for a rock jewelry business that I tried.
In the end it was a trellis for some old windows we got from the dump.
I carefully unhooked all of the wire...and repurposed it!


The second bed of peas had the same treatment...for I was shocked to time a second driftwood tree!
This tree was shorter...so I made up the difference with some broken old wire tomato cages.


The shot above is probably the best to see the wire...can you see it?


I got creative by the second trellis...attaching the log to a piece of firewood set in a mix of daisies and asters.

SQUASH


The squash trellis solution was actually Handsome Husband's idea!
I had already removed the wire from the dump-scavenged windows...
Ches said "Why don't we put them on pieces of wood?"
Works for me!
Above you can see how much the enjoy the partial shade on their roots...
and all of the climbing room on the windows!


The windows aren't actually that far off of the ground...only a few inches.

BEANS


The beans don't necessarily need a trellis...
but sometimes they fall over and you're scraping the dirt for your beans.
Not my idea of fun veggies...
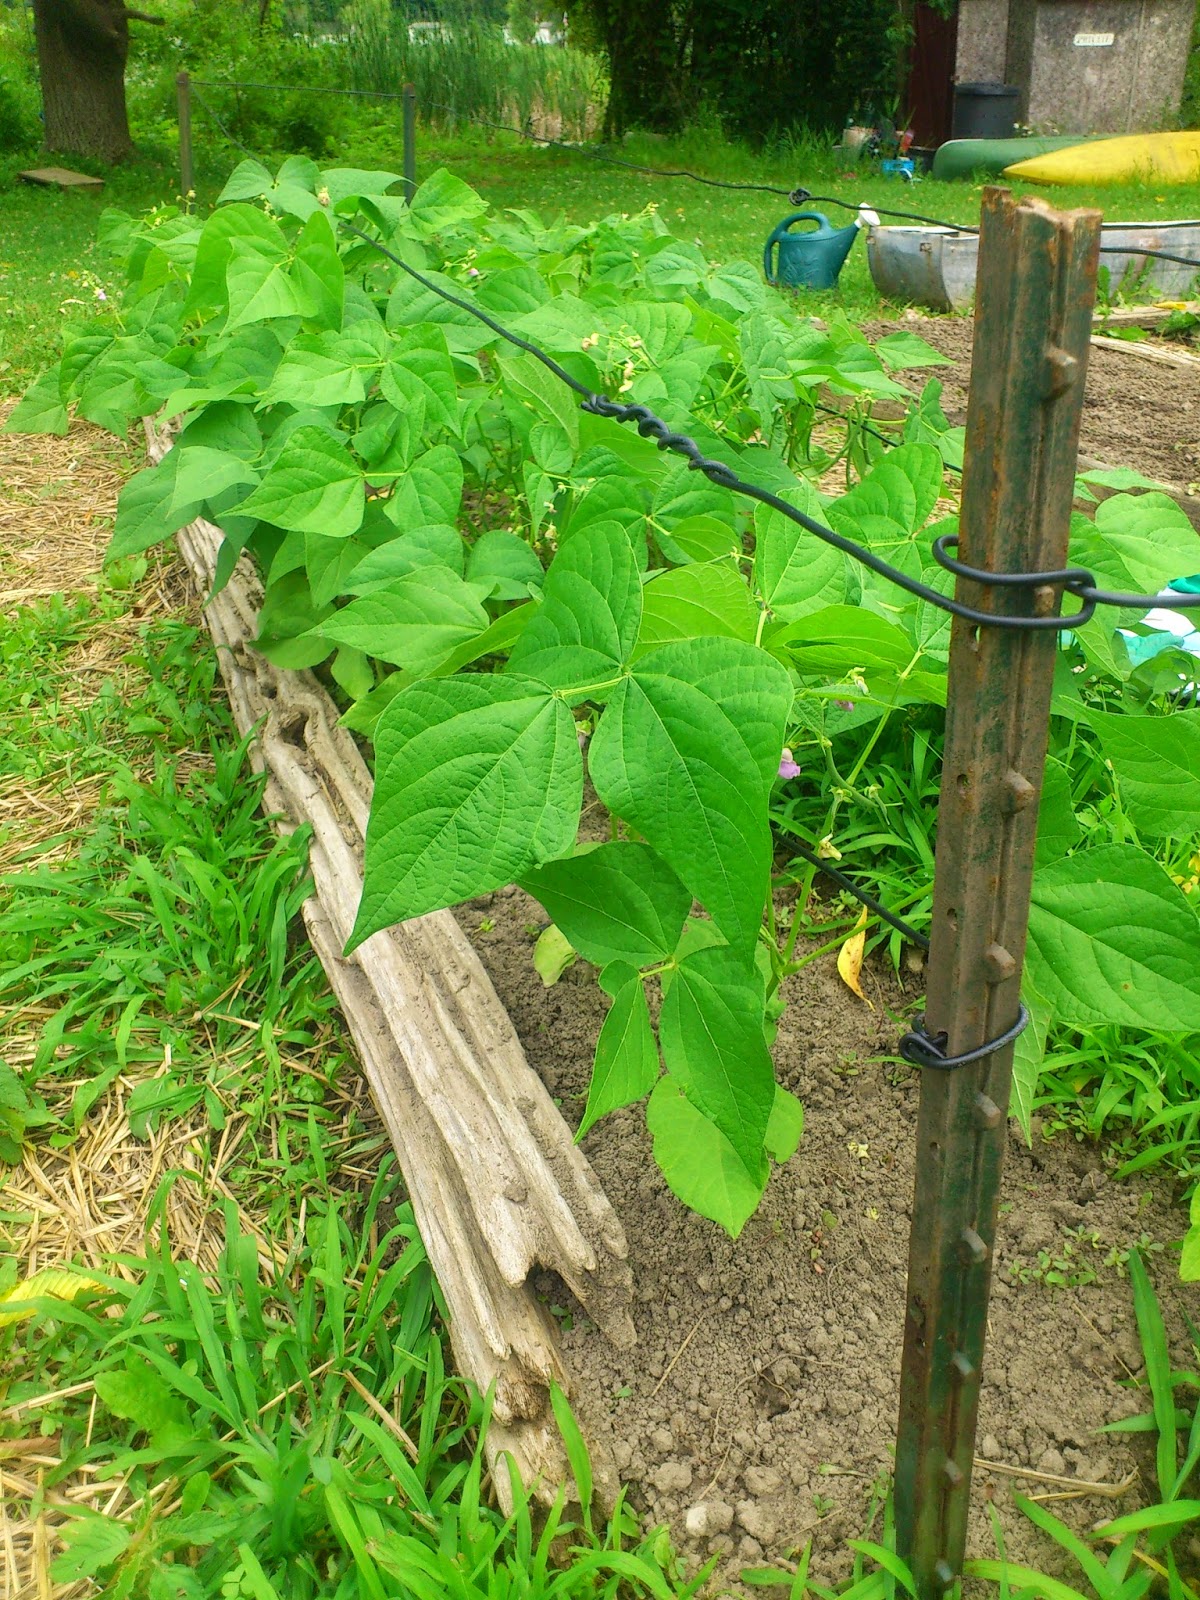
So we built a cage of sorts!
The t-bars came from a family friend.
The wire was repurposed invisible fencing!!!
Can you believe we have dug up the equivalent of a whole spool on 
our property compliments of previous owners?
True story.

CUCUMBERS


Above is our trusty machine.
Its made of old t-bar and metal chain-link fence found at a former house we rented in Verona!
You pound the t-bars in on an angle and plant the seeds "under" the angle.
The plants grow up the chain link and voila!
Dirt free veggies!
It has been so successful in the past...beans, cukes...whatever trails!

PUMPKINS


I still haven't figured out what to do with the pumpkins...but they are filling in too quickly now
so I think I'll just leave them this year.
They seem to like the saddle-shaped lattice!


If you want more (way more!) trellis ideas...
you can now follow me on Pinterest!
(Psst I have a whole folder of trellis ideas!!!)

Once there, you can find all of my recipes and food photos in handy dandy folders too.


Thursday, June 26, 2014

UPDATE: Garden 2014

So here is our garden for this year....
It's bigger!
It's badder!!
It's all ours!!!

Above is the plan we created while planting.
We used the "Carrots Love Tomatoes" plan and adjusted it where necessary.
Some plants we already had planted in other areas of the yard, so we
weren't able to adhere to it very strictly.


The above shots are of our red and white potatoes.
The metal bin at the back is actually filled with spare soil.
Potatoes need to be mounded as the get taller...so we save
some dirt for that purpose.


Red and white onions in the above shot.


Many jalapeno plants as some other hot peppers at the front.


Our field of tomatoes!
There are 24 plants in this area, some romas and some hertiage varieties.
While I am loving not hauling water, the tomatoes are not loving all the rain we've been having.
Can you see the leaves that are yellowing at the back?


Heritage white corn...we grew it last year and saved the seeds
for this year!  Looks like it worked!!!
(we found the wood under our pile of logs for the campfire...
nicely repurposed to keep the weeds down)


Directly to the left of the corn are our two sweet potato plants!
We tried growing sweet potatoes once in 2011...
it didn't turn out then...so we thought we'd try again!
The last time the plants spent the whole growing season just trying to grow leaves!
The bunnies thought the leaves were mighty tasty...so the plants never got a chance to grow tubers.


Our yellow zucchinis are starting out great!


The green zucchinis...not so much...


We dismantled a black composter...and filled them with dirt.
The sides have slots...so you don't have to worry about the plants drowning
in rain water!  Score!


Our pumpkins...with one sad trellis...
I have to get me some T bars and do these
trellis thingies right!


The radishes are coming along...


The beets are shy.
We planted dill with them (as per the book)
and the dill likes the bed...
NOW WAKE UP BEETS!!!


Our cucumber machine makes its triumphant return.
We had such a great year with cukes last year.
We're taking a small break and only planted about a dozen of them this year.


Our kale seems to love it here!
The swiss chard on the left hand side of the bed...not so much.
I want to make kale chips so badly...
mainly so I can see what all the hype is all about...

\

Above shows our salad bar!
We have 5 different packs of lettuce and salad greens sprinkled
in this bed.  We forgot almost instantly what kinds we planted...but does it really matter?
SALADS!


Our spinach bed is pretty pathetic right now...
Hopefully it will make a come back...
or a decent fall crop from a second planting...


We have 2 rows of peas this year...cuz why not?
No seriously...we love peas.  
Especially sitting in the garden eating them straight out of the pod.
Each year we plan to store some in the freezer...and sometimes we actually do!
This year I am determined to get a whole large freezer bag full!

We also have to get to work on trellises (or is it trelli!?) for these peas.
Pea plants have a tendency to fall over and grow in the dirt.


We saved beans from last years crop.
We have no idea which beans are which...
but in this bed are green, yellow and purple wax beans.


Finally we have our acorn squash.
Again with the sad trellis...

So I've been pinning a TON of trellis ideas.
I will be posting soon with the results of my adventures into trellising.
(Trellising?  I have no idea...but you'll see some cool stuff for sure!)


I have to admit...last year we didn't plan much.
In fact, I made the mistake of having a few libations while planting seeds.
The result was that I had no idea what I planted and where.
(Laugh all you like)
It was a surprise when everything started growing...which was funny for about a week.
(oh who are we kidding...I'm still getting ribbed for that!!!)


Don't forget to send me your garden love!
I want you to post photos of YOUR gardens on my facebook group and page.
Lets celebrate our accomplishments together!!!