Showing posts with label herbs. Show all posts

Wednesday, September 25, 2013

UPDATE: Fourth Installment of the Garden Progress

WOW!

The garden is reaching new heights...
Seriously...we've never had corn get so tall before!

The cooler weather is approaching - much to my dismay.
Don't get me wrong, the summer had its moments.
Overall it was rainy and lacked a lot of sunny days to dry things out.

The result was twofold:

1 - we hardly had to water the garden at all! YAY!
2 - we had mushrooms growing in our garden...not the edible kind...sigh.


There were some good things about all the rain...the cucumbers seemed to LOVE it!
This year had to be the first time in a long time that we have had luck growing cukes.


Our cuke machine seemed to work out great.
Both slicing cukes and pickling cukes flourished in our cuke machine.


Can you believe the red headed corn we have???
It's almost hot pink!


Ewww....anybody know what the heck this thing on my cornstalk is???
Investigation required...in the meantime, I snapped it off and tossed it in the fire pit.


Brussels sprouts have got to be the cutest thing I've ever grown...
Once we snapped off the lower leaves the wee lil buds were more visible.
It is like seeing a whole host of tiny cabbages stuck on the side of the stalk!
(In my mind, its baby cabbage patch kids...but that's just my 80's brain)


Our jalapenos are also going like crazy!
I've already given away lots...
And those I kept have been added fresh to recipes
or pickled.


We've also begun the process of thinking about next year's garden.
As the fresh produce slows down, we leave some things on the plants to dry for seeds for next year.
We do that with the peas and beans....that is if I can stay away from the peas long enough.
You can also use either in soups all winter!
(Just make sure you keep enough for planting)
I keep mine in mason jars once dried thoroughly.

As we eat the jalapenos, we keep the seeds and dry them on screens.
I also tried to slice, de-seed and dry the actual peppers.
We'll see if it works out.
The herbs are also coming to an end.
Since we didn't have a hot summer, a lot of our herbs are still producing.
I gather some herbs sporatically, then wash and pat them dry.
I place them between 2 screens on a warm fall day with a nice breeze.
I bring the screens inside at night so the dew doesn't affect the drying process.
(we have been having pretty heavy dews lately...luckily for the rest of the produce, no frosts yet)

How are you saving your harvest?

Are you already thinking about next year's garden?


Friday, July 19, 2013

UPDATE: Gardens abound...

Here's the update!

It took a little longer to get the big garden prepped and planted this year.
We're about a month behind.
There were tiller issues - don't get me started.
On the upside, our plants (which weren't planted yet) were not harmed by a late May hail/wind storm.
On the downside, everyone else I know is already harvesting stuff from their gardens.

What we planted this year:

-beefsteak, roma, cherry and yellow pear tomatoes
-cabbages
-green, yellow and purple beans
-white corn
-beets
-peas
-green zucchini
-potatoes
-jalapeno peppers
-regular and pickling cukes
-carrots, both orange and purple
-broccoli
NEW:  brussel sprouts - never tried growing this one before!

The big garden bed on a lovely sunny morning
The actual garden work feels like its been on hold lately.
I manage to weed the garden for about an hour in the morning or an hour in the evening, but I can't seem to manage both.  Between the incessant heat and the bugs...it's just not happening.
At least there are no water shortages this year!  WOW! 
Rain aplenty...wishing we had more rain barrels though.

One thing we have at the new house (that we certainly didn't have at our old house) is
DEERFLIES!
OMG these suckers take a chunk out of you!
I have yet to get a deerfly patch for the back of my gardening hat...
but its coming sooner rather than later.


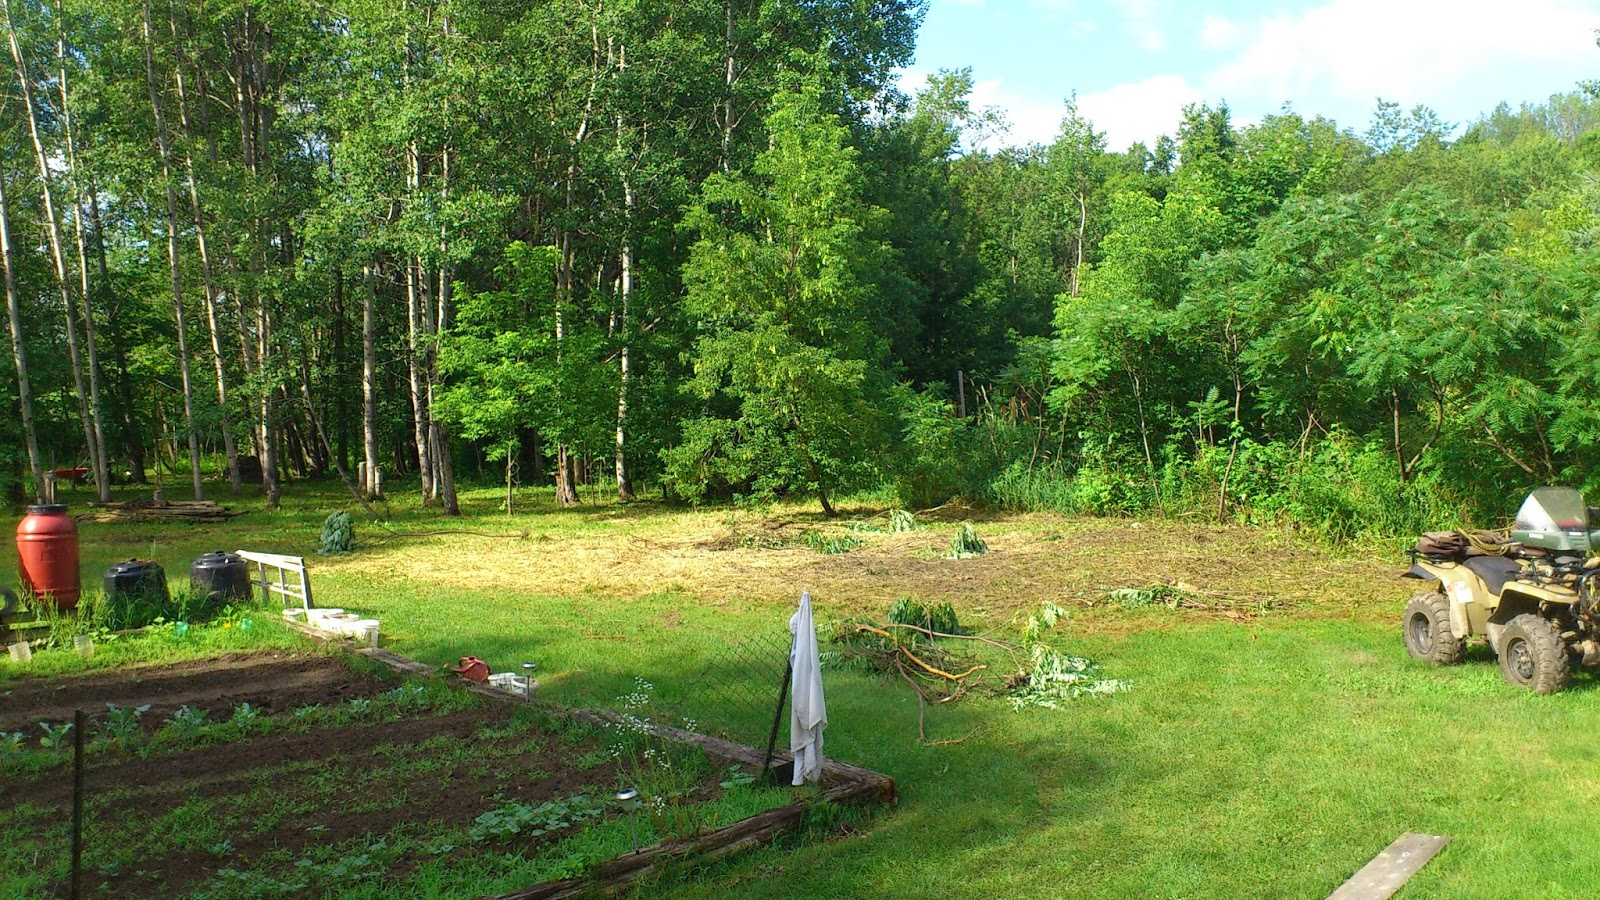
Husband has been feverishly clearing some neglected sections of our property.
The dried area you see above was previously a sumac patch riddled with long dead, wild raspberry canes.
It also was hiding a small play structure from the previous owners approximately 20 yrs ago.

Our plan is to clear it, then add more beds to the space.
We are both excited to plant berry bushes!
A space for huckleberries, fresh wild raspberry canes, blueberries and blackberries.
As an aside, Husband is super stoked to get a blackberry variety called Chester.
(his name doesn't get many shout outs...especially from fruit)


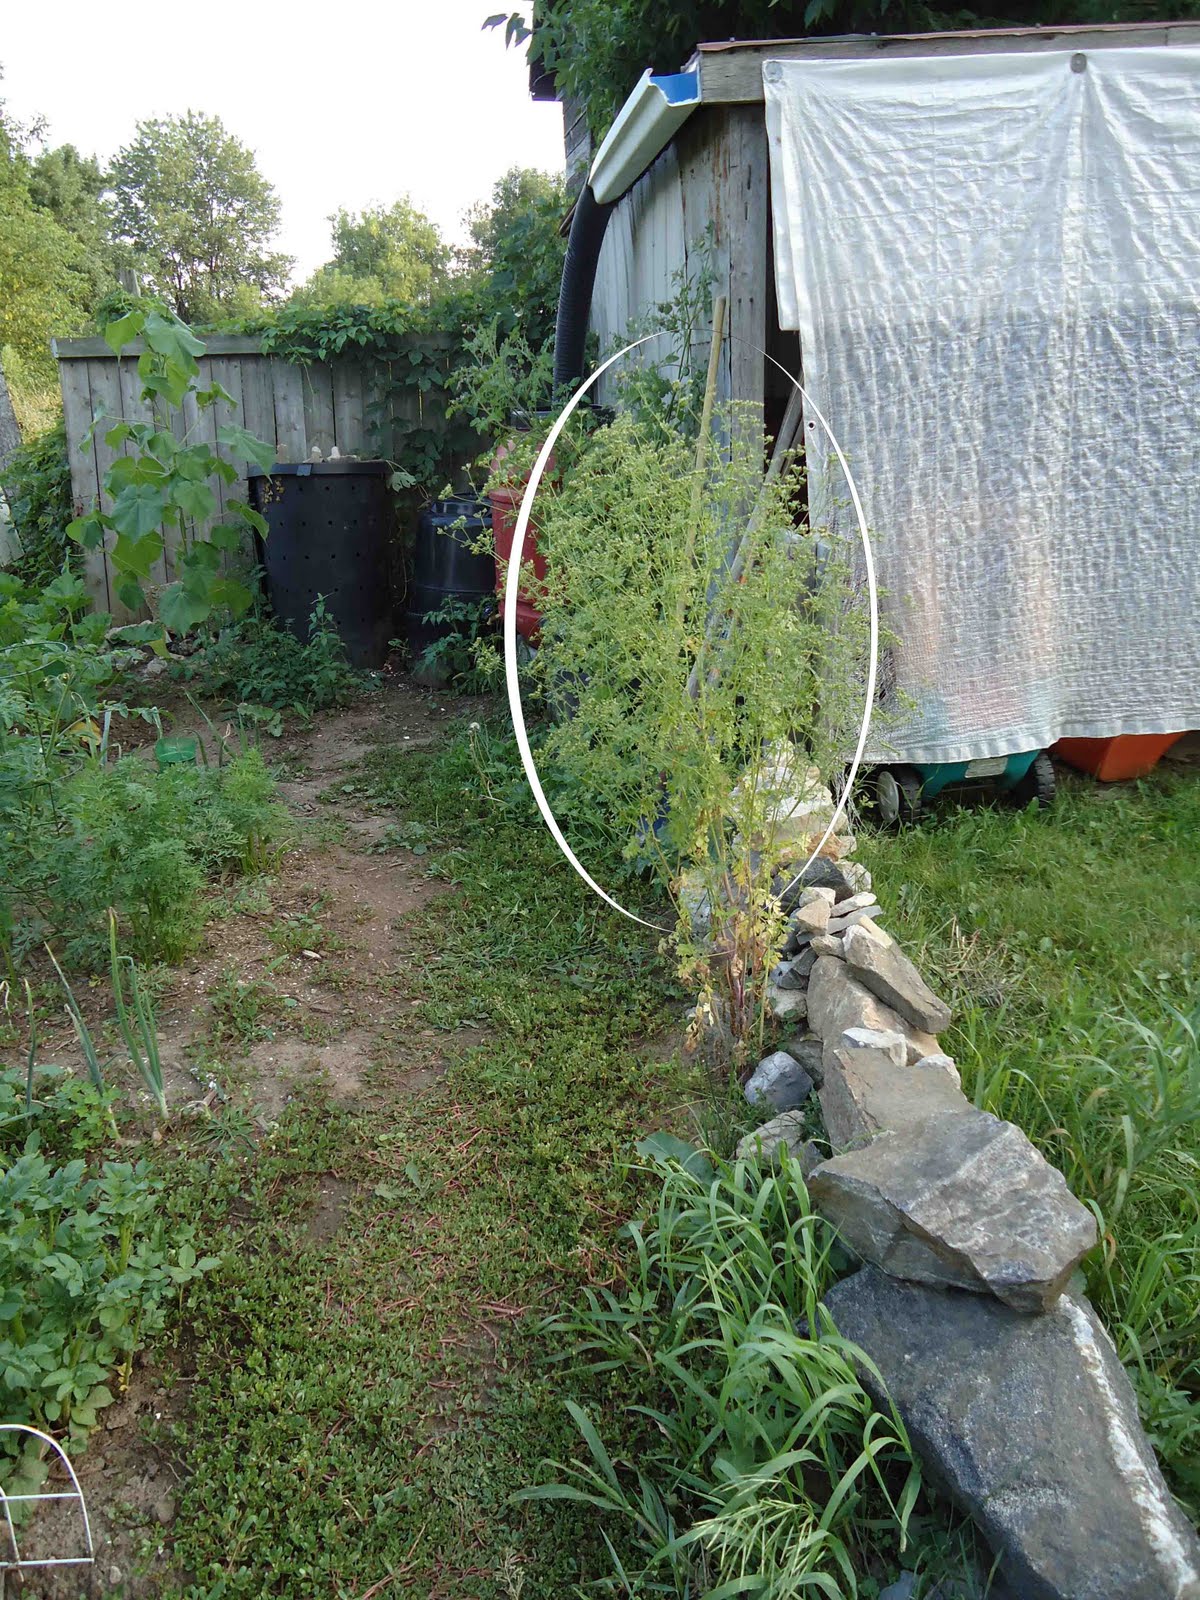
Way in the back yard, by the fire pit, is a small bed I made from deadhead rocks in the immediate vicinity.
I planted a citronella plant that I purchased from a local garden center.
The plant had been over-wintered (brought inside after its first year) and was enourmous!!!
We pick leaves, crush them up a bit and stick them in our pockets or shoes.
I stick them on top of my ears, like a flower.
Using them this way, you can also judge when you've gotten too close to the campfire.
(Discovered by accident! I was tending the campfire and forgot I had them behind my ears.
I was greeted with a strong lemony smell...much stronger than just crushed leaves)


Close up on the citronella flowers above.


Now to the front beds!  Above you can see the herb garden at the front of our house.
I labelled each herb and plant.  The green onions were transplanted from our stash last year.


The dill getting out of control!  Owen, my little guy, says it looks like a rainforest.


The mint has rooted nicely!  I still think we needs another area for mint...let it grow wild and crazy.
Momma likes her mojitos!


This side of that front garden bed was like the dumping spot for everything last minute.
(It was supposed to be for tea herbs...but I really need to do more research on teas)

The lavendar so far has been disappointing. 
I thought I would have tons for tea this winter...we'll see how that goes...
I have never grown horseradish, but it sounded like fun.
I don't even eat the stuff, but Husband does!  So I bought some...a week before someone pointed out wild horseradish that stands up to my waist in a completely unrelated area of the yard....sigh...


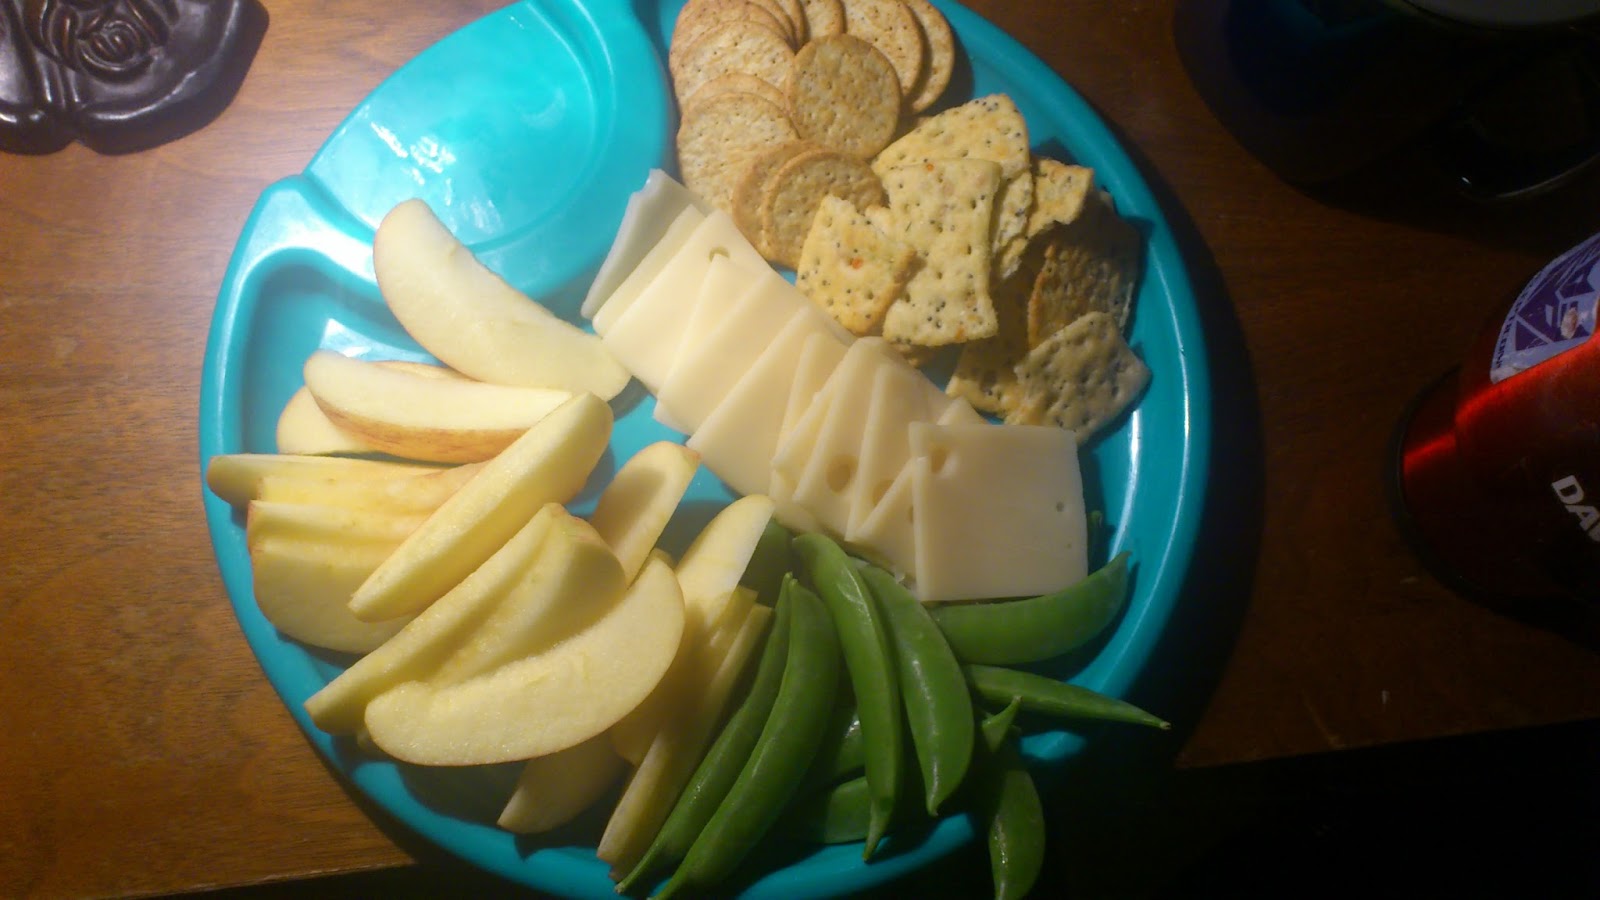
All that hard work deserves a snack!

Before bed snacking is big at our house.
Here is what was on our snack plate:

Swiss cheese from Wilton Cheese Factory
Gala Apples
Fresh peas in pods from the garden (not enough for a family meal, but enough to snack on!)
Breton mini crackers


Tuesday, May 14, 2013

Preparing the beds...

Super excited for springtime right now!

Last year we moved into our new home in the middle of May...
So we missed the time of year when you would normally prepare your gardening beds for planting.

This year, however, we are GOOD TO GO!
(I'm clearly very excited about it)


We have several large beds in the front yard as well as our main garden bed in the backyard.
This post will focus on the front beds only.


There were several things that had to be done in the front.
The beds themselves are part of our brickwork in the front patio...so I didn't have to reconfigure them.
Bonus!

We started turning up the existing topsoil in the beds....to see what we were dealing with.


Turns out...there was FAR too much topsoil in the beds, so I had to remove the bricks surrounding the beds and replace them with large rocks found all over our property.

Next I shovelled out over 18 wheelbarrows full of excellent topsoil for use in other areas of our property.
This act made it possible to mix the remaining soil with other things that would help new plants proliferate.

Pure topsoil is great, but after a season of watering and weeding, tends to harden up pretty fast.
Good gardening soil needs a variety of moisture grabbing peat moss and nutrient rich compost.
I use a 3-in-1 topsoil mix and a peat moss mixed together and added to the existing topsoil.


(our sad empty frog pond)

The original owners used driftwood to decorate their beds.
We decided to make things simpler and remove the driftwood so the focus would be on the greenery.


The above shot shows a bed that we didn't do anything with...mainly because it had a lot of ostrich ferns already growing there!  We're leaving it for this year to see how many ferns and their locations.


The above bed is where we are going to plant ever bearing strawberries!
Husband purchased them for a school fundraiser and we are both seriously excited about the ever bearing species.  Having already grown normal strawberries...this should be interesting.


This was a bed long forgotten.
Last year, I started placing rocks around the outside edges.
There is an old metal pipe sticking out of the middle.
Turns out it is from the old well...so one day, when I get a solar water pump system...I'll be set!

I thought this would make a great spot for pumpkins or other melon-type veggies.


I started this bed for cooking herbs...but it turned into my son's play area.
I still plan on planting herbs here...but I thought it wise to make a pathway for little feet.

Why fight it when you can roll with it?


Once I dug out the surplus top soil from the beds, I set out to add the good stuff.
I purchased 4 bags of 3-in-1 landscaping soil and a big cube of peat moss.
I mix them together in a big half barrel, making sure I break up big clumps.
Next I dump the mixed soil into the beds and rake it out,
careful to make the ground level and break up any resistant clumps.


Nice work!


I was given some seeds this year to plant for a church fundraiser...plus I added some of my own selections.
(some seeds were saved from our garden 2 years ago!  We'll have to see if they are still viable)

Edible Plants:

Borage, Purple Cornflower (Echinacea)

Herbs:

Thyme, Basil, Rosemary, Lavender, Dill, Summer Savoury, Chives, Garlic Chives, Lemon Basil, Catnip, Coriander/Cilantro


Another really good buy (a long while back)  was a pack of craft popsicle sticks from Michael's.

I normally try NOT to buy stuff, preferring to make it myself or reuse/repurpose existing stuff.
The popsicle sticks are an amazing time/space saver!
I highly recommend them for marking purposes...mainly for little feet...until the plants start to grow and he can see where not to step.
(I've been using the same bag of sticks for years now...well worth it)

So the herb beds are all planted and waiting for rain...

Check back on my facebook pages to see their progress!

What have you planted already?


Friday, August 10, 2012

Helping out helps everyone...

I'm pretty sure I've already mentioned this before...but we don't really have a full garden this year.

In the meantime, we are committed to helping out my mother in law with her garden!
She just lives around the corner, so its not an inconvenient endeavour.

I have to say, it's great to get my hands back in the dirt and taking care of blooming plants.


She planted cabbages, herbs, carrots, beets, beans, peas, pumpkins and cukes.

There are also tomatoes of various varieties.


Our mother in law is a busy lady and always has loads of stuff on the go.

She returns the favour by offering up some of the surplus veggies as well as bringing us the odd bucket of compost!


Owen checked to make sure the apple trees are still strong...

Helping out has so many benefits:

-healthy outdoor exercise!  (my legs are killing me)
-aiding another's desire to grow their own food is never a bad thing.
-pooling your resources is a wise endeavour.
-if you don't want to dig up your own property but still want home grown organic foods, helping someone else could supply you with that extra food!
-make a deal with your gardening neighbours, food for work!
-building relationships with your gardening buddies.
-takes the load off of someone who is busy.
-builds good karma!

and last but not least...you can still get the opportunity to get in the garden...even if it isn't yours!!!

Wednesday, January 25, 2012

Artichoke Pesto Pasta...

One of the wonderful things you can do with the pesto recipe I included in my herb post is make it!

I crave pesto every now and again.  This time I wanted to change it up a little bit and all it took was one can of whole artichoke hearts!  Pesto itself is already cheap and if you can find a can of artichokes for a decent price, this meal will go a long way.

Artichokes are amazing things that I'm told can grow in Canada.  You have to take them indoors in the winters though which can provide a problem.  Its a lot of work for the average gardener.  We planted artichokes last year, but tended to forget about them.  They didn't get a lot of attention, but we left them outdoors in the ground and placed buckets over top of them until its warmer.  Fingers crossed, they will survive.  Artichokes take 2-3 years before you can harvest the "fruits"  wqhich are actually their flower blossums.  You can let them go to flower and they are a beautiful additional to your flower garden.  Who could resist picking them though????

According to Cam Mather's book The All You Can Eat Gardening Handbook "artichokes are an excellent source of the B vitamins, including Thiamin (B1), Riboflavin (B2), Niacin (B3), B5, B6,  and Folate (B9).  They are also high in vitamin C, calcium, magnesium, and phosphorous.

Basically, they are healthy and wholesome!!!

I added a whole can of artichokes (halved and then quartered) and sauteed them in the pesto for about 10min on med-high heat.  The artichokes took on the flavour of the oil and the garlic pretty quickly.


Its not the most colourful meal, but its packed with flavour and nutritional goodness.

So all you need to make this dish is to prepare the pasta to your taste and add the heated artichoke mixture to the warm, drained noodles.  Toss and serve!


All it took for the sauce was a couple of heaping tablespoons of prepared pesto and a 1 can of whole artichokes, quartered.  It was like the ultimate in fast food!

(I made it again this week with cheese tortellini and it was even more AWESOME!!!)

See my previous post on herbs for the easy pesto recipe you can make and store!

What's your go-to-easy-to-make recipe?

Sunday, January 22, 2012

These are the Herbs I know...

Herbs are a delicious way to add something special to a meal.

Its hard though...some people don't know enough about herbs to feel confident using them in their cooking.

Here is a post on the herbs I tend to use the most.

Dill:

Dill is a surprising spice.  I always see it mentioned with fresh fish in shore lunch menus.  Dill is so much more than just pickling and fish spices.  (Although both of those are fine places for Dill)  I add Dill to things that I want to have a smooth buttery flavour.  I add it to egg salad mixture or omelettes.  Its dreamy.  You can sprinkle it on popcorn for a low sodium treat.  Baked potatoes are good with Dill too.


Thyme:

I just discovereed this herb.  I never really knew what the flavour was supposed to be.  When you smell the fresh stuff its easy to tell.  My Hubbie says it smells like Italian cooking.  I add it to tomato-based soups and in baking for a savoury smell.  I recently added it to cormeal breakfast muffins with excellent results!  Thyme is an excellent source of vitamin K and iron.  In herbal medicine, Thyme is used to treat menstrual symptoms and for body aches and pains. Its also my friend's beautiful daughter's name.


Coriander:

I'm learning to appreciate cilantro...the fresh green leaves of the coriander plant (they go so well with fresh tomatoes that I swear they are having a love affair in my mouth!)  But for me, the whole reason to grow this plant is for the lemony seeds called Coriander.  When you put this dried seed in a grinder, it makes a slightly crunchy, lemony, citrusy flavour in your meals.  I especially use it in homemade hummus.  I eat it most days with vegetable sticks or nan bread.  A feel good choice compared to chips and dip.


Chives:

Chives are one of the wonderful things that grow in our garden and we had nothing to do with it!  We found it growing in our main garden patch and transplanted it into our bed beside the bbq.  Nothing beats a warm baked potato with butter sprinkled with freshly cut chives from you doorstep.  Easy gardening at its finest.  If you need extra incentive to use chives...know that you can use them almost anywhere you would normally like a flavour of onion. 


Rosemary:

For me, Rosemary is synonmous with pork.  My mom used to cook this juicy pork tenderloin crusted with a rosemary garlic rub that was awesome!  Recently I discovered its uses in balsamic vinegrettes, on roasted root vegetables, and in roasted chickens.  They also kick eggs on their ass.  Don't be discouraged by the pine needle smell.  Cooking releases some of the awesome power of rosemary.  Use the essential oil for Rosemary and calm yourself.  The fresh leaves also aid in digestion.


Mint:

Mint is for drinks and desserts!  Any herb you can candy...is fine by me!  Seems like if you have fresh mint and add it to your cooking, you are immediately a gourmet.  We fell in love with Moroccan Mint tea, introduced by our friends from Montreal.  It's just green tea with fresh mint and 5 tbsps of white sugar...brought to a boil and served piping hot.  SO GOOD!  It's the tea that got our 10 yr old Noah to start drinking herbal teas.  You can also add a new dimension to desserts by adding a candied mint sprig to a frozen treat.  You can also make daquiris and add a sprig there too.  It could all be growing in a pot at your front door.  Really, Mint would be the one herb I think everyone should have growing somewhere.  The fresh leaves aid in digestion, soothe colic, and relieve flatulence!  Harvest before the plant flowers and you recieve maximum mint flavour

Parsley:

Is the only herb I know that freshens your breathe while you chew it!  I add parsley to almost everything if I have it on hand.  Its a plant that can grow all spring, summer and fall if properly cared for.  Top salads, stick in sandwiches, season entrees with it.  Add it everywhere for a fresh splash of green.  It has vitamin K, C, A, iron, and calcium.  Parsley also helps in digestion.  Growing it close to sensitive things in your garden can also keep away garden pests.


Basil:

Is a gardener's must!  The smell of it raw or cooking is devine.  It makes your kitchen smell like a gourmet restaurant without even trying.  To me, it smells like everything I love about cooking in the country.  Its simple.  We've even come across purple basil and lemon basil.  Like with all Bsil, you must catch the tender leaves before the whole plant goes to flower.  Once it flowers, the whole plant gets bitter...no matter what flavour you originally bought.  Turns out, Basil is also good for you!  High in vitmain K, iron, calcium, vitamin A and C, manganese, magnesium, and potassium.  Eat your pesto...its good for you too!  Try serving on crackers or fresh bread and top with chopped tomatoes for a garlicky snack.

Speaking of pesto...here's a grest recipe we use for jarring pesto sauce for the winter.  We use basil and parsley from our garden.  We never have great luck with garlic, so we bought some from the Verona Garlic festival.  We use either pine nuts or walnuts.  Both are acceptible nuts, each bringing their own flavour to the sauce.  Parmesan cheese is a key ingredient. 

2 qt fresh basil leaves
1 1/2 cups of olive oil
2 oz pine nuts or walnuts, toasted
6 cloves garlic
1 1/ tsp salt
5 oz grated parmesan cheese
1 1/2 oz romano cheese (or more parmesan)

Put basil, oil, nuts, garlic and salt in a blender.  Blend until chunky.  Transfer to a bowl and add cheese.  Mix together.  Pour over warm pasta noodles and serve.


If you are storing the sauce to eat later...add to jars leaving 1/4 in space before the lid.   Seal immediately.  If you are really a die-hard you can do the whole double boiling thing to seal the jars too.  Our method has worked in a cupboard, root cellar or freezer!

I love jarring food because you can store it in a cupboard and as long as it doesn't get too warm and it has a good seal, it will last for years.  No electricity required!


Friday, September 23, 2011

A Lifetime Supply of Coriander...

Weeks ago I posted that I had discovered a wonderful surprise...a huge tree of cilantro we never expected.  It sprung from a plant we had placed there 2 years ago!  Its nice to have the cilantro for fresh summer salads.  It pairs so perfectly with fresh tomatoes.  This season was hot and quick...so sadly it went to flower pretty quickly. 


Actually that's not such a bad thing...


Cilantro flowers are my most favorite thing...because once the flowers fall, the little green balls form...


Then they turn ligjht brown!  They are now called coriander.  Once the plants and seeds are quite dried, gently pull the tree right out of the ground and insert into a plastic bag, seeds end goes in first.


When you are sitting watching the clouds go by on a mild fall day, or inside watching a great movie on the couch...you can separate these dried seed balls off and store them for a loooooooong time.  We filled a small pepper grinder with coriander 2 years ago (the last time we grew the herb).  We are still working our way through it and its one of my most favorite herbs.  You grind the seeds much like you do with peppercorns. 

The result is a wonderfully lemony flavour!  I use it as a flavour enhancer to a lot of simple dishes like home made hummus, a salad topping, a pick me up for roasted potatoes.  Just about anything you could put lemon juice on...try coriander instead.  Don't get me wrong, I love lemon juice in a dish...but sometimes I like the texture the cracked coriander seeds bring to a meal too.  (If you're interested...its like a calorie-free way to boost the flavour of your dish, but without the added sweetness, moisture content or acidity)

Wikipedia says of coriander, "Coriander, like many spices, contains antioxidants, which can delay or prevent the spoilage of food seasoned with this spice. A study found both the leaves and seed to contain antioxidants, but the leaves were found to have a stronger effect."  It goes to to state that cilantro leaves contains Vitamin A and C, small amounts of protein and fiber.   Both the spice and the herb have been used widely all over the world throughout history.  Traces of the plant itself were found in the tomb of Tutankhamen.

PS.  Coriander also travels well.  It survived better than the lemon I tried to bring home from Ottawa in my suitcase! 

I'M BACK, BABY!!!


Monday, August 22, 2011

Recipe Feature...3 meals in one post!

I've been away all week again...so I find the post ideas have been piling up...

I was about to make 3 posts with a lot of details about each meal.  Instead...I want my readers to get the most bang for their buck.  Here is a post that features 3 hit meals from the past week.  All were delicious.  Some were planned, some were accidental...some used recipes, some were made up on the spot.

Here are the delectible servings of seasonal, easy and CHEAP meals (they all required at least ONE ingredient that DIDN'T come from the backyard).


Dinner last Sunday, some for family and some for friends

Aubergine & Courgette Bake

1 large eggplant
2 Tbsp olive oil
1 large onion (chopped)
2 garlic cloves (crushed)
2 lbs tomatoes (peeled and chopped)
a handful of fresh basil leaves (chopped)
1 Tbsp fresh parsley (chopped)
2 zucchinis (sliced lengthwise)

whole wheat flour for coating
shredded mozzarella
parmesan cheese

1.  Slice the eggplant, sprinkle with salt and set aside for 45-60  min.
2.  Heat the olive oil in a large frying pan.  Fry the onion and garlic for 3-4 minutes until softened.  Stir in the tomatoes, half the basil and the parsley.  Bring to a boil.  Reduce the heat and cook, stirring, for 25-35 minutes until sauce has thickened.  Mash the tomatoe to a pulp.
3.  Rinse and dry the eggplant.  Dust the eggplant and zucchinis with the flour.
4.  Heat more olive oil in another frying pan and fry the eggplant slices and zucchini slices until golden brown.  Set aside.
5.  Preheat the oven to 350 degrees.  Butter an overproof dish.  Put a layer of eggplant, the zucchini in the dish, pour a layer of sauce and scatter with some mozzarella.  Sprinkle over most of the remaining basil and parsley.  Repeat the layers, ending with mozzarella.  Sprinkle with the parmesan and remaining herbs on top and bake for 30-35 minutes.  Serve at once.
(REF:  The Complete Encyclopedia of Vegetables and Vegetarian Cooking, by Roz Denny & Christine Ingram, 1997)


Saturday Lunch at Home


Swiss chard noodles with Pesto sauce

a dozen large leaves of Swiss chard, sliced in long lenths
walnuts
3 Tbsp olive oil
1 onion cut in lengths
2 cloves garlic crushed
handful of basil leaves
a tsp of parmesan
handful of cherry tomatoes as topping
whole wheat bagels toasted with butter & a dash of parmesan
S & P

Fry up the onions and walnuts in some of the oil.  Add garlic and chard and simmer.  Grind salt over the whole mess.  Add basil and some of the parmesan.  Heat and serve in bowls with cherry tomatoes and toasted bagels.  Top greens with more parmesan.  


Dinner on Saturday night

Squash and Tomatoes on noodles

1 Flying saucer squash
1 pit red and black cherry tomatoes
2 cloves garlic
1 1/2 cups chopped chicken breast
2 tbsp fresh oregano and parsley
2 tbsp olive oil
spaghetti noodles
shredded cheddar
S & P


Microwave the chopped flying saucers for 2 minutes.  Fry up the heated squashes in olive oil until browned.  Add garlic and chicken and simmer for 5 min.  Add sliced cherry tomatoes, oregano, parsley, salt and pepper.  Simmer a 5 more minutes.  Serve over noodles and top with shredded cheddar. 


REVIEW:

These meals were a hit each time.  Each dish hit a different flavour of the season.  The first recipe was wonderful but WAY too much oven and frying for a hot summer day.  I could see me making that dish and freezing it for a fresh taste of summer in the mid-winter season (not sure how these ingredients would stand up to freezing...but worth a shot!).  The second two recipes were completely made up from stuff we needed to eat up.  Both required a minimal amount of frying and served up hot and fresh.  

If you wonderful readers make this dish, let me know, post a pic of your creation on my facebook page!  Lets all share our accomplishments.  

That's me...saving the planet one low carbon footprint meal at a time... 

Friday, July 22, 2011

Rawlicious and the Delicious NO COOK Marinara Recipe...

As many of you are already well aware...its been HOT out there...

I won't go on about it...just that with the humidity and the heat...it has not been a very active few days.  We haven't had rain in a while...so our rain barrels have been rendered useless.  The sun beats down like a laser.  I look at my garden and see the poor plants having a hard time with the air!

I also had a hard time thinking about feeding ourselves using any sort of heating device.  I would cringe at the sight of the oven.

It was this week that I dug up one of the Raw recipes I got out of Best Health magazine.  http://www.besthealthmag.ca/  There was a recent issue that focused on the raw food diet.  Raw is not a new idea, but I just discovered it.  According to About.com:


"The raw food diet is based on the belief that the most healthful food for the body is uncooked. Although most food is eaten raw, heating food is acceptable as long as the temperature stays below 104 to 118 degrees Fahrenheit (the cutoff temperature varies among those in the raw food community).
Cooking is thought to denature the enzymes naturally present in food. According to raw foodists, enyzymes are the life force of a food, helping us to digest food and absorb nutrients. If we overconsume cooked food, our bodies are forced to work harder by producing more enzymes. Over time, a lack of enzymes from food is thought to lead to digestive problems, nutrient deficiency, accelerated aging, and weight gain."

I was intrigued by the idea and did some digging.  I liked some of the recipes I found, however, you would probably need to live near a tropical or sub-tropical area in order for this diet to be kind to the environment.  It just isn't doable in Canada AND maintain a low carbon footprint.  I do appreciate its benefits though...and thought I would benefit from some of the recipes while the ingredients were ripening in my garden.  I would probably have to put raw dietism on hold in winter though.  Could you imagine the carbon footprint of the meal posted below in February???  **Shudders**


So I kept one of the recipes in Best Health Magazine and decided it would come in handy one day....that day came when the temp in our back porch was almost 100 degrees F and I wanted to disown my stove.

I grabbed it and went hunting in the garden for virtually all of the ingredients:

2 Tomatoes
1 cup of sundried tomatoes coaked in warm water
1/4 red bell pepper
2 tbsp chopped red onion
2 tbsp extra virgin olive oil
1 clove garlic peeled
1 tbsp agave or maple syrup
1 1/2 tsp dried oregano
4 large leaves of fresh basil
1 tsp sea salt
1/2 black pepper
1/2 tsp thyme
1/4 tsp cayenne
1/2 tsp marjoram (optional)
1 small-medium green zucchini
1 small-medium yellow zucchini


You also need a food processor...

Put everything in the blender...except the zucchinis and blend a bit (thats the key...don't blend too much or it will be veggie juice).

I just rinsed off the zukes and went at them with a peeler.  I made the "noodles" about fettucini width or close enough.  They made pretty striped noodles on my plate!  Even the "noodles" aren't cooked...so I could have my marinara AND not cook it too!

I blended the fresh ingredients...


See what I mean about veggie juice?  My substitutions are below:

I didn't have a red onion, so I used a white one. 
I didn't have dried oregano, so I used fresh.
I didn't have sundried tomatoes, so I used a bit more red pepper and a bit more regular tomato.
I didn't have agave, so I used pure maple syrup instead.

I spooned the mix onto my "noodles"...


The recipe was in the article in Best Health magazine, but it originally came from a restaurant called "Rawlicious". 

http://www.rawlicious.ca/Rawlicious/Home.html

In the end, this meal satisfied me on a number of levels.  First, I didn't have to turn on one thing that generated heat.  Secondly, I ate a really hearty meal!  Third, I got to pick the bulk of this recipe from my backyard.  And lastly, it made a really pretty post!!!

I will continue to research the raw phenomenon...but I will also consider its impact on the environment as well as my body.