Showing posts with label easy gardening. Show all posts

Thursday, October 13, 2016

Trellising Tomatoes...

I'm not even sure trellising is actually a verb.
After working at the farm last year, 
it definitely feels like an action word.

In years past, we had lost a large percentage of our harvest. 
The loss was due to the fact that the weight
of the tomatoes actually bent the vines down. 
The vines then grew along the ground
and produced more tomato fruit. 
The result was the tomatoes that touched
the ground went bad very fast. 
After all of the effort in growing the seedlings
and tending to them in the garden beds,
to see them go bad was heartbreaking.

While I wasn't the person who actually did the trellis work at the farm,
I understood the principle behind it.


With that knowledge, I felt better equipped this year.
My husband and I do not spend money on our garden.
We get the majority of garden-related stuff by donation or trading.
When I suggested we invest in metal T bars this year
it took a bit to convince the husband.

"It is an investment!"
"They will last for a very long time!"
"They are reusable!"

These were just a few of the sales pitches I tried out.

In the end, he relented and we purchased the T bars.

Luckily it wasn't the sort of thing we had to buy right away!
We planted our tomato seedlings at the beginning of June.

It took a few weeks for them to be tall enough for us to work with.


We hammered in the T bars at the end of each row of tomato plants.

(There are two rows of tomato plants in the bed shown above.)

Then the REAL fun begins!


Next we grabbed some baling twine.

We started at a spot that is near the bottom of the T bar.
Tie off one end and go around the inside of the first plant,
then outside of the next plant,
and so on...until to reach the end of the bed.

We tied off the twine at the other end just in case.

Then we came back to the beginning,
reversing the direction of the twine for each plant.

We had to grab the odd vine that was growing this way and that.

What you are left with is a great way to keep the tomatoes
standing tall without strangling the life out of the vines.


For the record, we've never seen the walkways look so great!
You can even see the recycled water jugs we use.

Cut the bottom off of a jig and
plant the spout end in the ground.
Its like a funnel right to the roots!

This method works best if you organize the jugs as
you plant the seedlings.

It also works best if you place the jugs between
the plant and the walkway...rather than beside the plant.
(we discovered that placing the jug beside the plant
results in losing the jug in the jungle of tomato plants)


It might be difficult to see in the above picture...
But our tomato plants are up to my shoulder!


Our tomatoes thrived this year!
Our walkways were clear enough that we could access
all of the plants for watering.
We also had way less loss due to mould.

Almost none of our plants had vines or
fruit which touched the ground!


The results speak for themselves in this instance.

Perfect tomatoes!

Tuesday, July 26, 2016

Welcome back!

Well its been a while since I posted here.
In fact, life got away on me and I kind of avoided the blog.
It was just about the very last thing I had energy for...
But that doesn't mean I wasn't still thinking about posts and content.

Life gets busy, as we all know.

This year has been pretty great so far!

We started off by getting new chicks to add to our flock.
They were a LOT tinier than we were expecting.


We haven't had chicks that small before...
so it was a learning curve at first.

It was so much fun to watch them learn how to chicken.
Seriously...I could watch them for hours.


I volunteer at a few plant sales in my area.
I also grow seedlings inside my home for the sales.


Our living room became a small greenhouse for a while.
This year was excellent for my heirloom tomato seedlings.
Varieties this year include;
Anna Russian (Oxheart) - a robust girl with bright pink flesh!
Black Krim - a beefy stock with a deep purple flesh and green shoulders.
Aussie Heirloom - the one I'm most excited to see...reportedly yields 2-3 lb sized fruit.
(let that just sink in a minute...)
And of course our ever popular Roma...ours grows to be about the size of your fist.
Still full of great flavour but lots of flesh for sauces and salsas.

Then the actual helping at the sales took up a fair chunk of May.

Then we became consumed with our garden.


This year...

We are on top of our garden.
(surprisingly)

Partly due to crucial things I learned while working at the farm last summer.

I was introduced to my trusty girl Lola the Hoe.


This is a shuffle hoe purchased at Lee Valley.
That is not shameless promotion....I just bought it there.
I also mention it because I think everyone should have one of these.
Seriously.
(Hello...Lee Valley?  Looking for a spokesgirl?)


Just look at our walkways!
They are spotless this year...and I love it.


Another thing I learned was about trellising the tomatoes
so we can FINALLY get them off of the ground.
(more on that in a later post)

You can kind of see the steel T bars on the left hand side.

Not to mention the side garden beds not shown in this picture.
(Main garden shown...manly husband also shown)

This year has been rolling along just grand.
(Drought conditions in our area notwithstanding)

Can't wait to see our harvest at the end of it all.

How are your gardens doing this year?
How do you deal with water scarcity?
Sound off below!


Tuesday, August 25, 2015

What you plant and why it matters...

So this year I broke down and bought a bag of pea seeds.
I normally just plant what we saved from last year.
This year the packaging seduced me.
The Heritage Seeds Co.
Brown paper bag shouting
"LINCOLN HOMESTEADER"
I couldn't help myself.

I note that normally I don't care what kind of stuff I plant.
But thanks to my new job growing organic vegetables at The Kitchen Garden...
I know it matters what you grow.


I'll show you the proof.
Above you'll see the pea on the left...is one grown from seed we saved.
The one on right is the Lincoln Homesteader.
I will forever use capitals and call them by their right name...
they are an amazing specimen of shelling pea.

The one on the left (ours) produced poorly and with only about 3-4 peas per pod.
The one on the right (Righteous Lincoln Homesteader) kept pumping out the peas for 5 weeks and produced a whopping 12-14 peas per pod!!!
NOTE:  They then produced a very healthy second blush of perfectly sweet peas in the middle of AUGUST!?!!


That means...
We have 2 large freezer bags stuffed full of peas for the winter.
Dang!
That's the most peas we've ever been able to store!!!
Thank you Heritage Seed Co.
Thank you Lincoln Homesteader.

PS.  We planted another beds of peas two weeks ago...I'll give you 3 guesses what kind...

Thursday, December 4, 2014

Critters who ate our garden this year...2014

Japanese beetles....


I know everyone was talking about them...but I didn't really pay attention.

Then one day, I noticed my concord grape leaves looked like lace...

Sigh.

Eventually I did look them up on Wikipedia.
I wanted to make sure they were what I thought they were.
The write up is interesting...although depressing.
They are attracted to just about every plant.
You can use a soap/water mixture...which I will be trying out next spring!
I will try to post my results of a few different types of mixtures too.

This past year, I just reached out, picked it up and squished it.


Black Horsefly...


These things weren't eating my garden...but they were REALLY horrifying!
They are a relative of the horsefly...which is already big and scary.
These suckers are TWICE the size of a regular horsefly!!!
They are jet black all over and probably the worst looking thing I've seen
since moving to the country.

Monday, July 28, 2014

Trellis Action...

So...a few weeks ago I was struggling with how to trellis my plants.
In my garden update post, I lamented that I had a short amount of time to
think about it...before it became a necessity.

I was able to come up with some completely free solutions!
Let's check them out...

PEAS


We planted two beds of peas...multiple rows in each bed.
One day, as I walked on the shores of Desert Lake, I came upon a driftwood log!
I used other sticks to support the driftwood and 
then laced craft wire to that it formed a teepee like trellis on both sides.
The craft wire was free because I had bought it many many many years ago.
It was for a rock jewelry business that I tried.
In the end it was a trellis for some old windows we got from the dump.
I carefully unhooked all of the wire...and repurposed it!


The second bed of peas had the same treatment...for I was shocked to time a second driftwood tree!
This tree was shorter...so I made up the difference with some broken old wire tomato cages.


The shot above is probably the best to see the wire...can you see it?


I got creative by the second trellis...attaching the log to a piece of firewood set in a mix of daisies and asters.

SQUASH


The squash trellis solution was actually Handsome Husband's idea!
I had already removed the wire from the dump-scavenged windows...
Ches said "Why don't we put them on pieces of wood?"
Works for me!
Above you can see how much the enjoy the partial shade on their roots...
and all of the climbing room on the windows!


The windows aren't actually that far off of the ground...only a few inches.

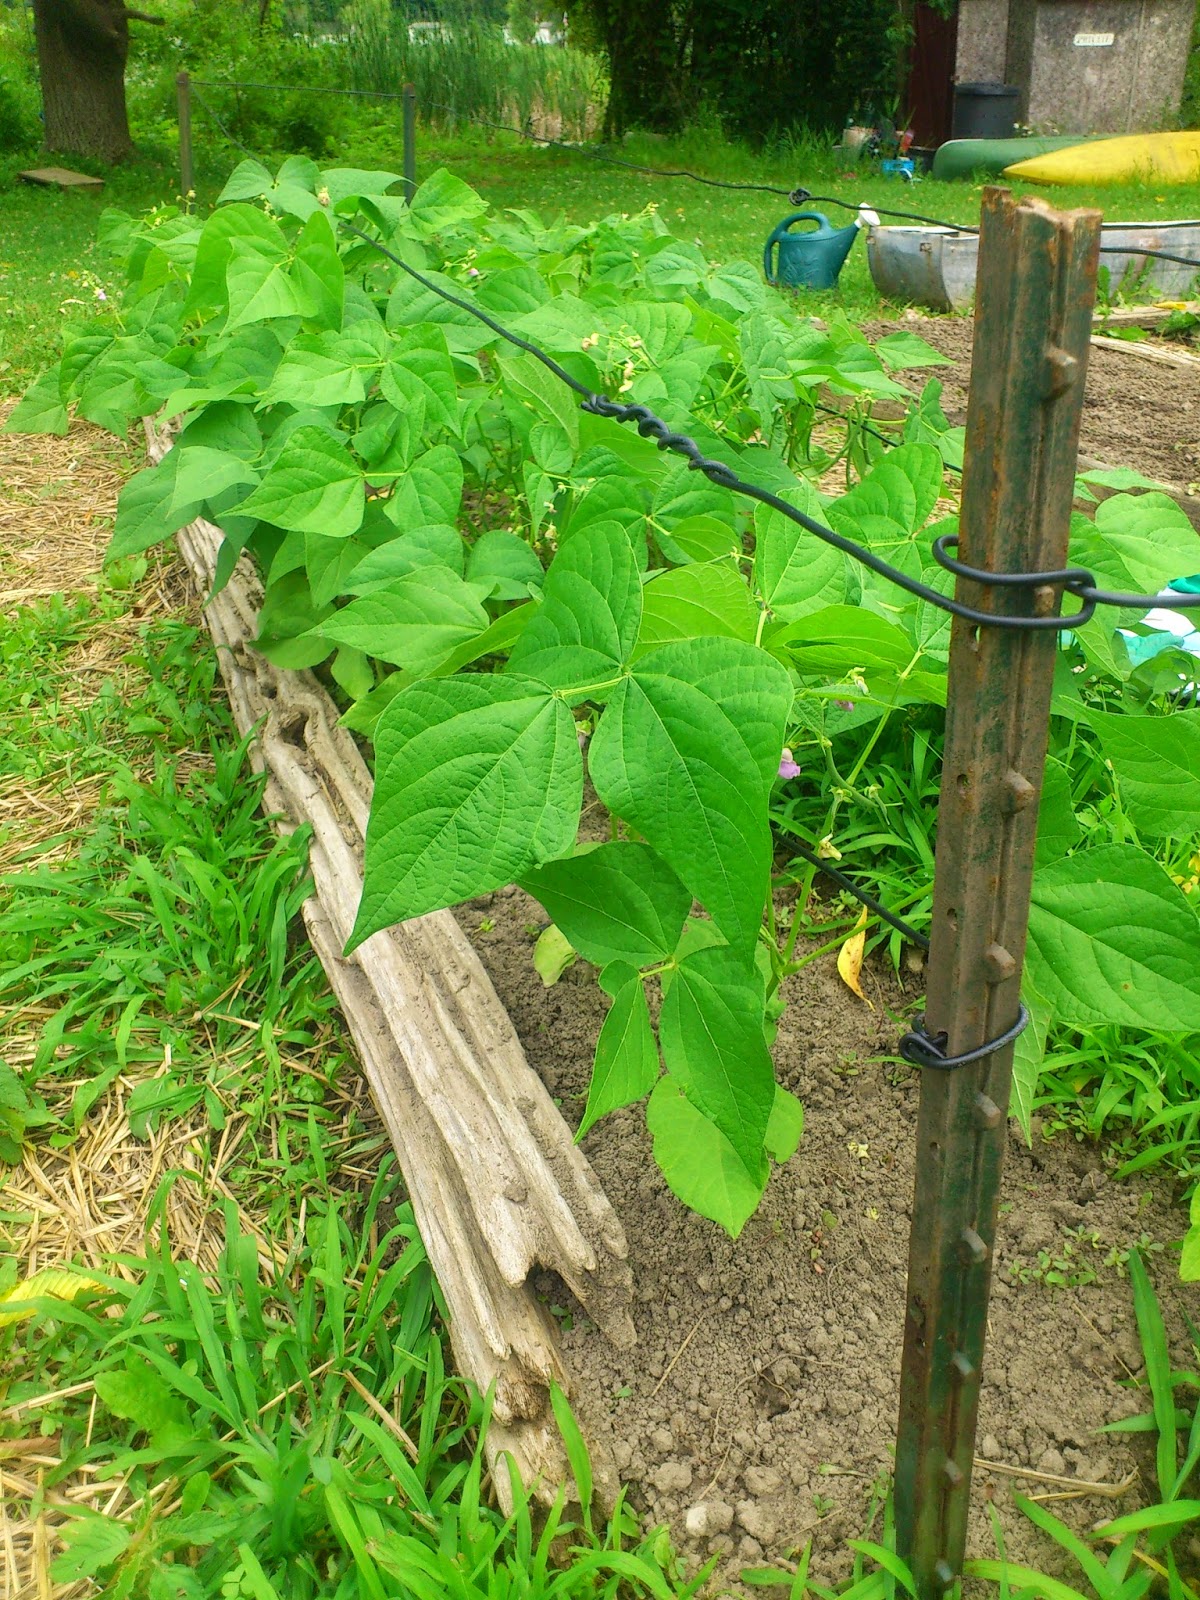
BEANS


The beans don't necessarily need a trellis...
but sometimes they fall over and you're scraping the dirt for your beans.
Not my idea of fun veggies...
So we built a cage of sorts!
The t-bars came from a family friend.
The wire was repurposed invisible fencing!!!
Can you believe we have dug up the equivalent of a whole spool on 
our property compliments of previous owners?
True story.

CUCUMBERS


Above is our trusty machine.
Its made of old t-bar and metal chain-link fence found at a former house we rented in Verona!
You pound the t-bars in on an angle and plant the seeds "under" the angle.
The plants grow up the chain link and voila!
Dirt free veggies!
It has been so successful in the past...beans, cukes...whatever trails!

PUMPKINS


I still haven't figured out what to do with the pumpkins...but they are filling in too quickly now
so I think I'll just leave them this year.
They seem to like the saddle-shaped lattice!


If you want more (way more!) trellis ideas...
you can now follow me on Pinterest!
(Psst I have a whole folder of trellis ideas!!!)

Once there, you can find all of my recipes and food photos in handy dandy folders too.


Wednesday, July 9, 2014

Water...trust me, you'll want to read this post!

Ok...not the most exciting topic...

But as a gardener/homesteader, water is VERY important.

Trust me...have one dry year, where you are hauling water to the garden
for what seems like an eternity, and you'll know the importance of water.

As far as I'm concerned, your water source can 
never be close enough to your growing area.
(especially thirsty stuff like corn)


A few years back we acquired a couple of water barrels.
The first place we had them, they fit right under our downspouts.
That is a GREAT location...as long as its also close to the garden.
By the end of the summer...as short distance can feel like a million miles.

We bought the barrels for $15 each from a neighbour.
Ches bought the taps from the hardware store, installing them himself.
The lids came like mason jars, so we just removed the inner lid and replaced it with
plastic mesh to keep leaves from really accumulating, 
while still allowing the water to drain into the barrel.

The first year...we placed the barrels on the ground and 
started collecting water from our downspouts.
Great!
Except when we started draining the barrels...we noticed it only trickled.
A wonderful part of science was learned.
Raise the barrels for better water pressure!
We raised the barrels on several old pallets.
Problem solved.
Our success was confirmed when it only took a few 
minutes to fill a watering can rather than an hour.

Pallets Dual Purpose:  Makes for a great snakes hiding spot...
keeps rodent population WAY down.
Keeps me on my toes though...


Since we don't have the garden anywhere near our downspouts,
We started placing buckets around the barrels.
After a good rain, you can usually fill the barrels half way.
Its a very primitive method...but the alternative is equally primitive.

You can't see it but our garden is about 15-20 feet from our dock.
The dock is our access to Holleford Creek.
I can fill up our watering cans from there and walk them over...but like I said earlier
in this post...a short distance can feel like a million miles after a whole summer.

My father in law Willie gave us a water pump!
It looks like a generator but it actually pumps water.
He also gave us a giant hose to go along with it.
When Ches tried to assemble and place it by the dock...we lost all of the gas.
There seems to be some sort of leak...
so once we find and fix said leak...we will be ROCKING the water situation.
(and probably ditch the buckets)


How do you solve the water problem as a gardener?

Thursday, May 22, 2014

Garden Decor

Like some gardeners, I am not just satisfied to
grow food and encourage nature's bounty.
I also like to make my beds look pretty.

Now pretty is a very subjective word!
Some like loud and bold, others prefer dainty and cute.

I adore the odd and the slightly magical...


As I mentioned in my previous post,
I was in the process of raking off the dried brown leaves
that we put on the beds in the fall.
We do this to protect our green investments from the harsh winter cold.  
Not only that, but the leaves break down and add nutrients to the soil.
Bonus!

I reorganized the decorations and thought I would share 
with you the truly odd assortment of things I have collected over the years.


A lovely lady in Verona, ON makes this adorable concrete mushrooms.
This one stands approximately 10 in. 
It looks so magical against the backdrop of our newly unfurled ostrich ferns.


Some animals reside here too...but they don't make a mess or need too much care.
So I let them stick around...
The metal rooster came from our first purchased home.
We found it while tearing out the flower garden.
The turtle we found in our current garden bed!
Its become Owen's turtle now.
(It guards his sticks)


I also love driftwood or old logs with interesting holes.
I place them around the garden and see what peeks through the holes.
In this case, I found a small animal skull...muskrat or cat most likely.
The dichotomy of life and death is something strangely playful.


Some of the decorative stone we made one year.
Some were personalized for each family member.
Some now growing moss in the grooves for each letter.
The one above was just for fun.


Last year we destroyed a garden bed that was sorely neglected.
All it was growing was poison ivy and sumac.
We tore it down and reused the flat stones that surrounded it.

We made an Inukshuk...a very Canadian motif.
It is a stone landmark built by many of the indigenous peoples of the Arctic. 
Wikipedia says:
The Inukshuk may have been used for navigation, as a point of reference, a marker for travel routes, fishing places, camps, hunting grounds, places of veneration, drift fences used in hunting or to mark a food cache.

Our place feels like it falls under a lot of those categories!

Tell me on Facebook what decorates YOUR garden!

Sunday, July 10, 2011

Wild Black Raspberries....rubus occidentalis

A few of the places we've lived have been in rural locations.  Sometimes we've been luck enough to spy the telltale red spikey canes of raspberries!  We cultivate these canes and low and behold, they take over.  We allow these tangles to grow and flourish because we know how awesome the black raspberry is.  It may look like we're the sort of neighbours who let our property go wild.  That just may be the case!  What may look like an unruly yard to some, our boys look at it like its a veritable grocery store.  Case in point, the picture below!

Looks wild...but its really yummy.
 Turns out these yummy wild treats are actually called wild black raspberries or rubus occidentalis by their proper name.  I've included some info that I borrowed from Wikipedia:

Rubus occidentalis is a species of Rubus native to eastern North America. Its common name black raspberry is shared with the closely related western American species Rubus leucodermis. Other names occasionally used include wild black raspberry, black caps, black cap raspberry, thimbleberry,[1][2] and scotch cap.[3]
Rubus occidentalis is a deciduous shrub growing to 2–3 m tall, with prickly shoots. The leaves are pinnate, with five leaflets on leaves strong-growing stems in their first year, and three leaflets on leaves on flowering branchlets. The flowers are distinct in having long, slender sepals 6–8 mm long, more than twice as long as the petals. The round-shaped fruit is a 12–15 mm diameter aggregation of drupelets; it is edible, and has a high content of anthocyanins and ellagic acid.[4][5]
Black raspberries are high in anthocyanins. This has led to their being very useful as natural dyes and, since anthocyanins are powerful antioxidants, to a great deal of interest in them for their potential nutraceutical value. Extensive work has been ongoing at Ohio State University to evaluate their benefit for cancer treatment in mammalian test systems,[6] and the first clinical trials on patients with esophageal cancer.[7]
(source:  Wikipedia, Rubus Occidentalis)

A closer view of the wild black raspberry...the trick is to wait until they turn black, as their name suggests.  The red one are too tough and they don't "fall" off the cane very easily.  You know you have a ripe berry when you touch it and it basically falls into your palm.  Our neighbourly birds do love them too, but thankfully the canes are thorny, so the birds don't get out of control like they do with our poor strawberries.  They neighbourhood animals appreciate our wild yards...even if our neighbours don't.  Tee hee!


I send the boys out with baskets in the mornings and they pick (and eat) until they are full...then we throw them into pancakes or muffins.  They keep their shape better than commercial raspberries or traditional raspberries.  They are smaller, tougher and sweeter, I find.


If you let enough of the canes take hold, you'll have plenty of berries for freezing, eating and cooking with.  I had some this morning with yoghurt, flax seeds, raw almonds and honey.  YUM!  Since we've identified these wild berries, I can't help but see these canes everywhere!  I spotted some in the back of the parking lot in an industrial area of Kingston, I've seen them all over. 

Look for red canes with small thorns.  They almost look like dogwood, but dogwood has a slightly different colour of red and no spikes. 


Thursday, June 30, 2011

Purslane stir fry....dig in!

Tonite was a special foraged meal....because it proves just how much we've learned during this whole gardening thing. 

We used to bust our backs weeding for hours and hours.  (I'm strange though....I LOVE weeding)  The point being we discovered (by way of Brigitte Mars, master herbalist) that what we thought were weeds, were actually purslane!  At the end of last season, we left some of the stranger looking weeds to grow.  The purslane flowered these cute little yellow flowers here and there.  That's what helped me identify them officially.  The are chubby stalks with meaty leaves.  The stalks are green or red depending on the type of purslane it is.  It turns out we have an obsene amount of sea purslane in our garden and its all edible.

Our radish row that has more purslane than radish.

We created something...as you may find yourself doing the more you garden.

Purslane stir fry
 It started with simmering 1/2 a cup of diced white onions in veg oil until clear.

Then we added diced orange peppers and diced ham (we had to eat our ham up tonite...but next time I would use almonds instead!).  Approx. 1/2 cup of each.

I dumped in a cup and a bit of pre cooked wild 5 grain rice from the bulk barn.  It added a wonderful nutty taste to the fry up.  Simmer on med for about 5 min.  I splashed in a lid and a half of lemon juice.  A couple of grind from our coriander grinder (grown 2 years ago and getting low!) and a dash of red pepper flakes.  S & P to taste.  Then we added a generous handful of washed, rinsed and spun purslane.

How much for that purslane in the window?
The purslane is already quite peppery so I could have left out the black pepper.  The salt made the purslane taste almost like edamame (steamed salted soya beans)!  We already tried it cold in a previous post.  When raw it tastes like spinach and pepper's lovechild.  It tastes even more healthy in salads than spinach (and I am a hardcore spinach fan). When cooked, purslane tastes like spinach crossed with a legume.

All in all, I'm considering taking purslane to the farmer's market and setting up a stand...samples daily.  Its so versatile and we've only just begun to figure out the possibilities.

Please, send me you purslane recipes...if you have any.  Or if you choose to experiment with this years weeds, let me know what you come up with.  We're up for anything!

Check out my facebook page too...there are bi-weekly picture updates of our garden this year.  The occassional tip or trick.  Sometimes additional recipe pictures too!  You never know what you're gonna find.  My facebook community has been a source of information as well as support.  Thanks guys and dolls!      

Saturday, June 25, 2011

Strawberries!

Its a little bit late, but strawberry season is upon us (although I think its just about done at this point...in our area anyway) 

Our strawberry plants took 3 years to make a decent crop.  Growing strawberries is definitely a labour of love and an act of patience.  I was hoping it would be worth it in the long run, but like anything in the garden, you never know how its going to turn out.  This year seemed to be a jackpot, so I decided to forgo the annual strawberry picking trip and try our hand at home harvesting our load of freezer jam.  Its one of our favorite fishing trip snacks as well as a bedtime snack (PB&J sandwiches) so we go through a lot of it!

In previous years, we have gone to two different pick your own places in our area.  Both were 20 min drive away, so I felt good about not using any fossil fuels to get to our berries for a change.  Fruition Berry Farm off of Hwy 15 and Paulridge Berry Farm north of Napanee on Palace rd are both great places.  The kids have enjoyed both farms for picking.  The one thing I'll say is that Paulridge had a lovely shaded area for the kids to play in...which was a welcome site after a couple of hours in the field under a burning hot sun.  Paulridge is typically not open on Sundays...so that's when we opted for Fruition.  The best part about Fruition is they have THE best teenagers working there.  Helpful, polite and eager...which is a great thing when you have a crazy moment of thinking you can pick berries with a 2 yr old in a stroller...by yourself!  (I clearly didn't think that one through)  Both places run about $8.50 per big white basket.  You can bring your own containers and they weigh them on site.  We purchased the big white baskets years ago...for a whole $0.50 a basket.  It added a bit to the price of our berries, but we've used them every year AND we use them in our garden too.  A good investment indeed! 


We picked our first batch and ate most of them, throwing some into pancakes to start.  By the second and third pickings, we had enough to make jam.


Crushed berries (1 3/4 cups worth in a liquid measuring cup), 3 cups of white sugar (I cut down the recipe from 4 cups, as our berries were small and super sweet), 2 tbps lemon juice and one packet of Certo.  Its the fabulous no cook recipe!  Stir the sugar and berries and let stand for 5 minutes.  Stir in the rest of the ingredients and let set for 10 min.  


Fill plastic containers so that there is about 1 inch left before the lid.  Let stand (covered) on a countertop for 24 hrs.


Freeze in the freezer! 

That's it!  That was all there is to it!!!  We ended up with 6 plastic containers in the freezer, 4 strawberry and 2 strawberry rhubarb.  Now the next sweet berry will be the raspberry.  Blue berries follow shortly after that.  We aren't in a good part of Ontario for peaches or cherries...but one can still hope. 

I have several strawberry recipes that I want to test out this year, but I may have to resort to local picked berries.  Our patch seems to have stopped producing for this year anyway. 

I was so excited to plant strawberries 3 years ago, that I had no idea there were types of strawberries.  I had no idea there was a variety called the ever-bearing strawberry.  Now that I know, I will pass along this piece of advise.  RESEARCH before you do anything...as our plants are now so established...it would be a shame to dig them all up now.  However, the idea of having strawberries for longer than the month of June is almost to much to bear!

Now all that's left to do in our strawberry patch is to keep on top of the runners, which will continue to try and make new strawberry plants until the fall comes.  Its quite a bit of work, but, like I said, its a labour of love.

Are you making any preserves with the sweetness of Ontario summer?  Tell me about it!