Showing posts with label storing vegetables. Show all posts

Friday, October 17, 2014

What to do with your Tomatoes...

As any gardener knows, you do the best with what you've got.
Sometimes that means you deal with a poor growing season...
(like the one we just had...cool and rainy)
and save what you can...while you've got it!


This past spring, we started our own tomato plants indoors in March.
We always had indoor cats...so this was a first for us!
We raised 45 Roma tomato plants and several yellow pear and tiny tim cherry tomatoes.
The romas did so well, we donated 35 of them to the Grandmothers for Africa plant and bake sale.
In return, we were gifted with some of the heritage tomatoes we grew this year. 

Although the growing season was poor...we were still drowning in tomatoes.
What to do?

I picked a sunny day to sit outside and listen to the Blue Jays 
(a local fall bird....not the sports team)
while I sliced and seeded our plentiful Romas.


There was also a beautiful breeze going on...so I took advantage!
Sundried tomatoes...on my screen.
The dried for about 3 days, each night I brought them in so the heavy dew wouldn't make them mold.

Alternatively, I tried a food dehydrator to see if there was a big difference.


It just so happened my mother in law had one she was willing to loan me!
What I eventually found out was...both ways worked about the same.
The dehydrator was pretty darned convenient during our week of overcast skies and rain.
They smelled pretty nice too.
Still...there is something extra nice about tomatoes that were actually dried in the sun.
These sad indoor tomatoes just felt like impostors.


Luckily you can't tell the difference between them when they are all in the same bag!

The end result was a small freeze bag of dried summery goodness that we will enjoy all winter.

***************

Another solution is to host a salsa party!


We had friends come by, enjoy some salsa music and we took over the entire kitchen with salsa fixins.
Of course the open bags of tostitos were for the sampling...so much sampling...just to make sure, ya know?

A salsa party is an excellent idea to make the work go quicker.
You can also invite each guest to bring something that they has in abundance...
or that they can buy and contribute to the salsa.
We don't grow sweet bell peppers or cilantro...so having our guests bring those ingredients was a win for us!
We even had a guest bring the snap lids!
Perfect!!!


With so many helpers...you can make enough to split between each guest.
Everyone wins!

***************

This year, we also made pizza sauce in jars...


And pasta sauce for the freezer...

You can also make ahead meals and freeze them too...using your tomatoes...but I haven't gotten than far yet.
You can also blanch and skin them for the freezer too!

****************

Sadly...I tried making pasta sauce in jars...
but after a few days it became apparent that something went wrong in the canning process.
While this is common...it is no less heartbreaking.
It felt like a serious waste...but that sometimes happens when you are learning.
I am very thankful for the fact that my mistakes aren't going to mean my family will be starving this winter.
Luckily, when I make sauce, I don't add meat until I'm ready to cook it for dinner.
That meant the spoiled sauce went right into the composter.
Not so sad, right?


So tell me, what do you do with your tomatoes?


Sunday, October 5, 2014

The Mighty Potato...

The mighty potato!
Saviour of the Irish...
Scourge of Atkins-diet followers everywhere...

We absolutely love to grow potatoes!
Each year we attempt to grow a huge amount of potatoes.
The funny thing is...you never know how many potatoes you are growing...until you dig them up!


Each year we come up with some brilliant idea of how to grow MORE potatoes.
This year, we tried to grow the plants inside buckets with the bottoms cut out.

The first few plants I unearthed...I wasn't convinced it was a good method.


For some reason, the other half of the potato bed proved this method an unusual success!


We planted a dozen potato plants...and the above picture shows our white fleshed potato yield.
The ones in the bucket are for storing.
The ones on the straw are tubers that I scratched or nicked with my fingers or the trowel.
I was told that any disturbed flesh on the potato will rot very quickly.
I had no idea how quickly.
That is, until some of our red skinned potatoes went bad in 2 days where I had been careless.


Careless?  Maybe.  Excited to dig up super sized tubers?  Definitely!
There were more than a few that were the size of my head!!!


So what do you do when you scratch a freshly dug potato?
Make a loaded baked potato for dinner!

Gently scrub the skins of the potato (fresh taters have very delicate and papery skin)
Clean, soak and chop a handful freshly picked cooked broccoli.
Chop a few pieces of cooked bacon.
Shred marble cheddar cheese from Wilton Cheese.
Pierce potato all over and wrap in foil.
Bake for 1 hr approx.
Open foil and pinch sides of potato to open.
Add Stirling butter and top with broccoli, bacon, cheddar and s & p to taste.

Over the past few years of blogging, I have discussed potatoes before.

If you would like more potato-ey goodness:

Here I discuss cooking potatoes 
(features recipes for Potato and Wild Leek Soup, Leftover Mashed Potato Pancakes, Hashbrowns)


Here I illustrate the recipe for Shepard's Pie


Here is our recipe for Venison Steak and Veggie Pie with Pastry topping


Here is my original potato post complete with recipe for roasted red potatoes as a side dish.

Monday, February 18, 2013

A couple o Taters

 Potatoes can be so many things.

They can transform and make different additions to any meal.
I have raved about potatoes on this blog before...so I won't rehash the details.
(but you can search on the right hand side for any posts relating to potatoes)

I have been enjoying some potatoes this winter.

Potatoes are one of those foods you can store all winter long given the right conditions.

If you follow my Facebook group or page for this blog, you
will have seen me show off meals with chopped or diced potatoes
fried up with other veggies or roasted with other roots.

Potatoes can be so versatile...and good for you!
Most of the carbs associated with potatoes are found in the starch content.
Starches are very important to our functions...as they turn into the sugars that feed our brain.

I thought I would show you
a few more ways we've been enjoying this amazing tuber.


A close up on the crispy texture of the hash browns.


The recipe I used can be found at the following link:

Another way I have been enjoying potatoes is below.


Soft and Savory!!

For the full recipe, click the link below:


Serve with steamed greens or with a salad.

********************
Furthermore!
We also love a good creamy potato soup...we liven ours up with
wild leeks we picked, washed and froze for winter use.
This soup is great in the winter with frozen leeks or in the spring with the fresh picked leeks.

Potato & Wild Leek Soup
by Lisa Pedersen for this blog


This one is so simple...I just do it from memory...

12 large potatoes
8-10 wild leek bulbs (the white part)
1/2 cup chopped wild leek greens (optional)
1 tsp chives (fresh or dried)
1/2 tsp garlic powder
1/2 tsp onion powder
4 cups chicken or veg stock
2 cups water
S & P to taste
  • simmer leeks in 1 tsp butter or oil until softened
  • add potatoes and simmer a few minutes
  • add water and stock
  • bring to a boil and simmer on med - high for 10-15 mins or until potatoes are softened
  • add spices and simmer for another 5-10 mins
  • either add by cup to a food processor and blend until desired consistancy or mash with a potato masher.
  • top with bacon pieces if desired
This soup is so thick and hearty that I don't bother to serve it with biscuits.
You could just as easily serve it with crackers or toast points...but that would have to be a big hungry belly!

*******************
If you are going to start storing vegetables, I would recommend the potato first.
Its versitile and lasts all winter long.
By spring, the tubers that are no longer edible
will be ready to plant for another successful growing season.

Monday, September 24, 2012

Update from the property...

So the days are getting shorter and the nights are getting cooler.

We have been fully engulfed in making way for next years' plans.

In the works:

Making room for a fruit orchard, chicken coop, seed saving and getting the full garden going.


One side of our property provides the shelter of pre existing trees...but we've been discovering that most of the trees we thought we had...are actually dead tree trunks with thousands of vines growing up them.

The result is a bunch of trees that appear to have foliage...tricky mother nature!

Our plans include apple, pear and cherry trees.
I need to research what types are hardier for cool climates.
I need to learn about cross pollination,
some types won't produce if your don't have a couple of more than one type around.


I also drafted next year's water barrel structure.
It still needs the ends evened up with a saw and nailed or screwed together.

Elevating the water barrels will provide nature force to the stream of water from the barrel faucets.


The dead trees we've been removing from the scrobs around the edges of our property became a huge store of kindling and logs for our fireplace.

We're pretty stoked about that...as it is one step towards not caring if the power goes out.


We were given these crates by some guys staying at Desert Lake Resort.
The were elevator guys working in Kingston for a few months.
The crates were actually boxes for shipping their parts for the elevators.
The guys left them for us for burning, but I had other ideas!


Another thing we're waiting on is our potatoes!
I think I forgot to mention our composter experiment.

When we moved we found a bag of potatoes that had started growing.
We threw them in this composter and started filling it with top soil
every now and again.

The top soil is now about 4-5 rows of holes up the barrel!
The idea is that when the tops start to die off, we'll empty the dirt out of the barrel.

Ideally we'll have a big pile of potatoes too!


Perfect for storage this winter!


I'm still toying with some locations for a cold storage at this new house.

I have a couple of candidates but I want to monitor the temp fluctuations throughout the seasons.
I also want to monitor if these locations have any moisture issues.
I had a spot in mind, but the roof over top of it might leak during heavy rains through an air vent.

These are all things I prefer to investigate prior to losing a whole harvest to pests, mold or rot.
I can't think of anything more disappointing.

I've also been saving some seeds too!
So far I've cleaned and dried canteloupe seeds and green onion seed bulbs.


So as the leaves change colour, don't forget to enjoy all that fall has to offer:

-Pumpkins and squashs
-apple cider
-apple pies & crisps
-using nutmeg and cinnamon in your cooking (they taste like fall to me)
-root vegetables, roasted & buttered
-warm wooly sweaters
-thick socks
-cool evening walks in the woods
-the smell of campfires or wood stoves


Tuesday, August 14, 2012

For those of you who asked...

For those of you who asked me about this on my facebook page & group...

The pattypan squash!

AKA The flying saucer squash.

Its a summer squash, like a zucchini.  It cooks like a zucchini and it tastes like a zucchini.
It just looks a little bit different!

And, boy, can they be different...


Pattypan squash is low in saturated fat and sodium and contains no cholesterol. It provides an excellent source of vitamins and minerals. One cup of cooked pattypan squash provides 38 calories and 43 percent of your daily value of Vitamin C, 13 percent of your daily value of folate, and substantial amounts of vitamin B6, magnesium, potassium and Vitamin A. Additionally, one serving of pattypan squash provides 5g of fiber.
 
Pattypan squash has many disease-fighting elements. Its fiber content helps reduce the risk of colon cancer and reduce dietary cholesterol. The vitamin C found in pattypan squash can also help prevent oxidation of cholesterol in the blood vessels, which in turn can decrease risk for atherosclerosis. Pattypan squash's potassium and magnesium content work to lower blood pressure. Magnesium also reduces the risk for heart attack and stroke.


Above is the view of the top. 
I say top because, traditionally speaking, the plant is attached to the veggie via the stem. 


Above is the bottom view.

Now to the burning question!
How does one prepare such a veggie?


I slice off the top.


Then slice down the center.
(makes it easier for handling and further slicing)


Once halved, I quarter it!


Pattypans aren't supposed to be as big as your head, but like most summer squashes, if you blink, it will go from cute like disks to humungous veggie monsters!

This one was a little big and therefore had a small row of seeds.
The seeds are soft and you can cook them too, but I just sliced them out.

What you are left with is above.
(kinda looks like a heart!)


Continue slicing to your hearts desire.
The thinner the veggie slice, the faster it will absorb oil and cook.

You have to be aware of the thickness because you could end up with some slices where the inside is cooked, but the thicker outer rim is still raw.

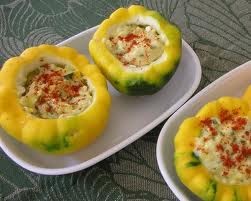
My favorite way to prepare these veggies is to heat up some oil and fry them up, adding pressed garlic towards the end.  You can stuff them...


...roast them or steam them. 
Throw them in your favorite casserole, stir-fry or even muffins or bread (shred them for use in baking).
Since they are really mild tasting (or don't really have a specific taste of their own), you can add just about any spice to add flavour.  Chili powder, cayenne, coriander, black pepper.  Or you can serve them with a really flavourful food to balance out the meal.

Salt is a must!

These veggies don't keep, so its important to eat them shortly after they have been picked.
Trust me, if I ever find a way to store these beauties, YOU'LL be the first to hear about it!

Wednesday, March 14, 2012

2 Meat-free Recipes Just for You!

Although I don't grow black beans, they are something I really love to use in my cooking.  Especially since I've been trying to integrate vegetarian meals into my famil diet.  Luck for me, our home grown tomatoes and black beans are wonderful eating companions!

In light of the whole "Meat-free Mondays" thing I mentioned in a previous post, I thought I would add a few of my favorite dishes using both black beans and the tomatoes we grew last year and froze.

For the record, black beans are a great source of vitamins and nutrients.  The website called the world's healthiest foods (or whfoods.com) says "The amazing protein-plus-fiber content of black beans. From a single, one-cup serving of black beans you get nearly 15 grams of fiber (well over half of the Daily Value and the same amount consumed by the average U.S. adult in one entire day of eating) and 15 grams of protein (nearly one third of the Daily Value and equivalent to the amount in 2 ounces of a meat like chicken or a fish like salmon). You won't find this outstanding protein-fiber combination in fruit, vegetables, grains, meats, dairy products, nuts and seeds, or seafood. The almost magical protein-fiber combination in legumes--including black beans--explains important aspects of their health benefits for the digestive tract, the blood sugar regulatory system, and the cardiovascular system."

First we have a big feed of vegetarian burritos!

Burritos are an easy and quick way to feed your family healthy, nutritious food.


I fry up some onions and garlic in a frying pan.  I add black beans, lemon juice, red pepper flakes, chili powder and cumin.  S & P to taste.  Then I add some pre-cooked brown and wild rice.  (I always keep some cooked rice in the fridge in case)  FYI beans and rice served together make up a complete protein!  Livestrong.com says "Beans and rice combined provide all of the B vitamins except B12, including thiamine (41 percent DV), vitamin B6 and niacin (23 percent DV each) and 8 to 9 percent of thiamine and pantothenic acid. Beans supply 230 micrograms (mcg) of folate; rice has 128 mcg, for a huge total of 90 percent of the recommended daily value."Read more: http://www.livestrong.com/article/96675-nutrition-beans-rice/#ixzz1okGgEzC6


Then comes the fun part!  I lay out the ingredients in small bowls so it feels like a buffet!  (Plus i don't have to build everyone's burrito...)  I shred cheese, chop lettuce and spinach, chop tomatoes, chop orange peppers (thats just what I had on hand, you can use any flavour or colour).  I use white tortilla wraps (because I find the whole wheat kind breaks easily)  I also set out some home made salsa and ranch dressing for those who want it.


My husband Ches made home made salsa back in September when all of our veggies were ripening at the same time (or so it felt like it).  Everything went into the salsa and placed in jars. 

Next you fill the wrap and roll it.  Bibs may be required but at least you'll know its all good stuff.

----------------------------

Another recipe I made was Southwest soup.

Take a large pot and add onions and garlic with a bit of oil.  Simmer until translucent. 
Add a dozen or a dozen and a half of frozen tomates (we had both red and yellow tomatoes).
Add some water and simmer until the tomatoes are all thawed.  I always add a tsp of white sugar to lessen the bitterness of the tomatoes.  Then I add black beans (I use canned and then rinse thoroughly) and corn (frozen from last fall), as well as lemon or lime juice.  Next you add the yummy spices that give it its southwestern flavour.  Chili powder and cayenne...1/4 tsp each or more depending on your taste.  Or go the easy route and add taco seasoning...but you can't control the salt as easily with this method.


You can simmer this soup all day if you like and serve with corn bread (aka johnny cake) or sprinkle with bits of seasoned taco chips.

So now you can enjoy some meatless alternatives that really don't feel like alternatives.

Try something meat free today! (start planning for this Monday...)


And as always, check out my facebook page for Small Purse, Big Garden...it has loads more recipes, photos, links and helpful tips for growing and cooking your own food, living green and living a bit more gently on this earth.

Tuesday, January 10, 2012

Apple Crisp....winter warmth...

I have to admit that I love making apple crisp in the winter time.

The smell of it permiates throughout the house.

It sends me through a time warp of past memories.

Just the simple smell of crisp is uplifting.

Its the reason we work so hard in the fall preparing large freezer bags full of sliced and peeled apples.  Enough to fill half a chest freezer!  The apples were a combination of ones we had picked from my mother-in-laws house 15min from here and the rest were from our neighbour's tree.  Its so close we don't have to leave our property to pick them!  (but we do get permission first!)


Its so simple (and way too easy) to make a crisp at the drop of a hat with the apples already peeled and sliced, all you have to do is thaw out the amount you want.


Once thawed (or in the above picture semi-thawed) you can arrange them in a baking dish.


The topping is so simple a child could make it...as illustrated by my 4 year old son Owen.
Although if Owen were in charge of ingredients, it would be an all-sugar topping.

So Mum takes charge of ingredients...and Owen is in charge of "smashing" the topping.

Start with the dry ingredients:

1/2 cup of white flour
1/4 cup of quick oats
1/2 cup of brown sugar packed
1/4 cup of white sugar
1/2 tsp salt
1/2 tsp cinnamon (or more if you like)
1/4 tsp nutmeg

Blend thoroughly.  Add 8 tbsp of butter or margerine.  Cut in the butter with pastry knives or a device like Owen is using.  Its so easy you can do it in front of the tv!!!


The picture above features the pre-oven version. 

Sprinkle the crumb-like topping evenly over the top of your sliced apples.  Some cookbooks I've read say to knock the pan a few times to settle the crumbs.  I gently shakes my baking dish from side to side. 
It's up to you.  Whatever floats your boat...


And here's the finished product!  You bake this beauty at 375 degrees F for 55min.

Your house will smell yummy and your tastebuds will love this winter warmer!

Alternatives:

  • Add rhubarb chunks in with the apples and switch the brown sugar for white sugar for a sweet, tart flavour.
  • Add frozen raspberries or strawberries for a taste of summer.
  • Add cubed cheddar on top of the topping for a savoury twist ("Apple pie without the cheese is like a hug without the squeeze!" a direct quote from my cousins)
  • Add a swirl of maple syrup on top of the topping for a sweet and naturally Canadian taste.
  • Add chunks of caramels (you can buy them at The Bulk Barn) on top of the topping for a decadent dessert.


Wednesday, November 16, 2011

Down n Dirty with the Carrots

So in a previous post I said all we had going on with the garden at this time of year was broccoli.

This post will prove I was lying....

I totally forgot about the carrots.  Which is what you're supposed to do! 

If you leave a root vegetable in the ground for a few frosts, they turn sweeter.
We discovered this when we grew parnsips in previous years. 
For whatever reason, the parsnips didn't even come up this year!

Carrots are nutritionally awesome.  The website http://www.carrotmuseum.co.uk/ says "The power and goodness of carrots - Carrots have many important vitamins and minerals. They are rich in antioxidants Beta Carotene, Alpha Carotene, Phytochemicals and Glutathione, Calcium and Potassium, and vitamins A, B1, B2, C, and E, which are also considered antioxidants, protecting as well as nourishing the skin. They contain a form of calcium easily absorbed by the body. Finally they also contain Copper, Iron, Magnesium, Manganese, Phosphorous. and Sulphur - better than a wonder drug!!"

We asked the boys to come help out with the digging up of the carrots last weekend.

It turned into quite the adventure!


As soon as big brother Noah got digging...Owen was jumping right in. 
He kept yelling, "Get me a shovel!"


Big brother Noah gave Owen instruction on how to properly pull out a carrot without grabbing up only the greens and leaving the rest of the root in the ground.  The sound of surprise in Owen's voice when he produced his first carrot was hilarious.


Turns out we produced some monster carrots this year!


Owen was compulsive...non-stop carrots pulling...

For about 10 minutes...which is a long time for him actually.


Noah kept on working for a few hours, pulling up carrot after carrot.
Each time he thought he had unearthed the biggest carrot of the year...the next one would be even bigger!


This was our total end of season haul.  Orange and purple carrots!
Some of the carrots turned out bigger than my head!!!
Keep in mind that we had already dug up half of the total planting.  We haven't bought store carrots in over two months...

We brushed off the excess dirt and broke the greens off of the top. 


We will keep them this winter in buckets, labelled, filled with moist peat.
Unlike potatoes, root veggies need moisture to stay fresh all winter.

This is something I've only read about.  Its our first year storing food without the use of hydro electricity!

We have a makeshift root cellar in our basement.  The onions kept well down there last year, in wire baskets.  We don't currently have a temperature gauge in the cellar...but that may be something I'll invest in this year.

I'll be doing future posts on root cellars...as they are my new-found obsession!  Storing food without using electricity is amazing to me.  The concept has been around for ages...but for whatever reason root cellars have fallen out of fashion.  I am to bring new awareness of it.  Anyone who owns their own house can do it!

Keep an eye out for a root cellar tutorial...