Showing posts with label cherry tomatoes. Show all posts

Tuesday, January 12, 2016

Product Experiment - Upside-down Planters - The Results are In!

By completely accident we became the owners of two separate upside-down planters.
I have always been intrigued by these contraptions.

We never had one during our apartment days.
But I always kinda wanted one secretly.
(not so secret now though)

By the spring, this year, we had two of them.
Along with our gigantic garden and auxiliary garden beds,
it seemed like we really didn't need them!

However, I thought it would be worth a try this year.
And to show you all the results!

Bonus!


We chose two different varieties of cherry tomato plant.
One was a sweet million...the other was labelled tri colour.
(we never did find out what tri colour meant....
they looked exactly like a sun gold to me)
We had them both on our deck railing.
Both were south facing with loads of sunlight.
One did far better than the other.


The tri colour started going to flower almost instantly!


The sweet million died shortly after its first water.
(Luckily we had a bunch of sweet million volunteers in the garden,
so we didn't do without red cherry tomatoes at all!)

I have to say...I was completely unimpressed by these things!
Sure, if you live in an apartment, they kinda make sense.
If I were an apartment dweller...I would just go with planters and elevate them
using milk crates or whatever.
That brings the planter up to a height were the whole plant gets enough sunlight.
(those barricades are tall in apartments!)
I would also recommend rotating the plants so that the entire plant gets light...
instead of just one side.
Its important to note that if you use planters...
make them big but not so big you can't rotate them.
(or put them on something with wheels or casters)

We usually resort to planters for cherry tomato plants because when we plant them
in the ground...they truly go insane.
They branch out and lay down all over whatever had the nerve to be planted next to it.

RESULTS:

Don't bother!
Use a container that allows the plant to grow as nature intended.
If you are only looking for a few handfuls of cherry tomatoes...
than maybe this is the solution for you.
Me?  I love cherry tomatoes.
A few handfuls wouldn't do me (let alone the rest of the family)
any good.
The whole season reaped a sad return for my efforts.


Anyone else had a turn with these contraptions?
I'd love to here your feedback.
Sound off below!


Friday, October 17, 2014

What to do with your Tomatoes...

As any gardener knows, you do the best with what you've got.
Sometimes that means you deal with a poor growing season...
(like the one we just had...cool and rainy)
and save what you can...while you've got it!


This past spring, we started our own tomato plants indoors in March.
We always had indoor cats...so this was a first for us!
We raised 45 Roma tomato plants and several yellow pear and tiny tim cherry tomatoes.
The romas did so well, we donated 35 of them to the Grandmothers for Africa plant and bake sale.
In return, we were gifted with some of the heritage tomatoes we grew this year. 

Although the growing season was poor...we were still drowning in tomatoes.
What to do?

I picked a sunny day to sit outside and listen to the Blue Jays 
(a local fall bird....not the sports team)
while I sliced and seeded our plentiful Romas.


There was also a beautiful breeze going on...so I took advantage!
Sundried tomatoes...on my screen.
The dried for about 3 days, each night I brought them in so the heavy dew wouldn't make them mold.

Alternatively, I tried a food dehydrator to see if there was a big difference.


It just so happened my mother in law had one she was willing to loan me!
What I eventually found out was...both ways worked about the same.
The dehydrator was pretty darned convenient during our week of overcast skies and rain.
They smelled pretty nice too.
Still...there is something extra nice about tomatoes that were actually dried in the sun.
These sad indoor tomatoes just felt like impostors.


Luckily you can't tell the difference between them when they are all in the same bag!

The end result was a small freeze bag of dried summery goodness that we will enjoy all winter.

***************

Another solution is to host a salsa party!


We had friends come by, enjoy some salsa music and we took over the entire kitchen with salsa fixins.
Of course the open bags of tostitos were for the sampling...so much sampling...just to make sure, ya know?

A salsa party is an excellent idea to make the work go quicker.
You can also invite each guest to bring something that they has in abundance...
or that they can buy and contribute to the salsa.
We don't grow sweet bell peppers or cilantro...so having our guests bring those ingredients was a win for us!
We even had a guest bring the snap lids!
Perfect!!!


With so many helpers...you can make enough to split between each guest.
Everyone wins!

***************

This year, we also made pizza sauce in jars...


And pasta sauce for the freezer...

You can also make ahead meals and freeze them too...using your tomatoes...but I haven't gotten than far yet.
You can also blanch and skin them for the freezer too!

****************

Sadly...I tried making pasta sauce in jars...
but after a few days it became apparent that something went wrong in the canning process.
While this is common...it is no less heartbreaking.
It felt like a serious waste...but that sometimes happens when you are learning.
I am very thankful for the fact that my mistakes aren't going to mean my family will be starving this winter.
Luckily, when I make sauce, I don't add meat until I'm ready to cook it for dinner.
That meant the spoiled sauce went right into the composter.
Not so sad, right?


So tell me, what do you do with your tomatoes?


Friday, September 20, 2013

5 Days of Work Food - Challenge COMPLETE!

5 days have come and gone...that went fast!

So here is a quick recap on the meals I brought with me to work:

DAY 1:

Creamy Pasta with spinach and zucchini from the garden
Plain greek yoghurt with frozen raspberries (from picking) & blueberries (from road stand)
and local honey
chopped veggies sticks - celery, carrots, sweet yellow peppers, cherry tomatoes and cukes from the garden
a grocery store apple and ivanhoe cheese curd - white!


************

DAY 2:

Spinach salad with sliced turkey slices, cherry tomatoes, cukes, sweet yellow peppers and diced Wilton cheddar cheese
Home made balsamic salad dressing
a grocery store apple
Veggie sticks - celery and carrots
Mexican oatmeal - quick oats, cinnamon, nutmeg, chili powder, brown sugar


************

DAY 3:

Turkey-Pumpkin Chili with 2 johnny cake muffins (cornbread) in reused ziplock bag
Spinach salad with cukes, cherry tomatoes, sweet orange peppers, onions and walnuts served with homemade balsamic dressing.
Maple cinnamon oatmeal with chopped almonds and apples.


************

Day 4:

Leftover Sheppard's Pie
Veggie sticks (carrots, cukes, peppers, celery)
1 whole orange, sectioned
small (reused) ziplock bag of Tostitos chips with 1/4 cup homemade salsa


************

DAY 5:

TAKE OUT DAY!!!
(I thought I would treat myself and,
in the process, show you what I eat for fast food)

Sushi lunch combo B


Added BONUS:  It's across the street from my work - so I can walk there!
How's that for balancing the high carbon foot print sushi?!

I could have remixed any of the elements from the week's lunches to make a fifth lunch.
It wouldn't have been that hard, once I had all of the stuff on hand.

************

I tried to make a bunch of healthy snacks using stuff from the garden and pantry
for 5 whole days.
I tried to make sure I had plenty of protein (but not enough for a construction worker),
decreased my salt intake (by making home made stuff, stead of packaged),
bring stuff I could snack on throughout the day that was both sweet and savoury (to satisfy both cravings),
to eat the rainbow each day,
to reduce my waste by using and washing the same packaging...
and I think I succeeded!


So how did you do with the challenge?

Friday, July 19, 2013

UPDATE: Gardens abound...

Here's the update!

It took a little longer to get the big garden prepped and planted this year.
We're about a month behind.
There were tiller issues - don't get me started.
On the upside, our plants (which weren't planted yet) were not harmed by a late May hail/wind storm.
On the downside, everyone else I know is already harvesting stuff from their gardens.

What we planted this year:

-beefsteak, roma, cherry and yellow pear tomatoes
-cabbages
-green, yellow and purple beans
-white corn
-beets
-peas
-green zucchini
-potatoes
-jalapeno peppers
-regular and pickling cukes
-carrots, both orange and purple
-broccoli
NEW:  brussel sprouts - never tried growing this one before!

The big garden bed on a lovely sunny morning
The actual garden work feels like its been on hold lately.
I manage to weed the garden for about an hour in the morning or an hour in the evening, but I can't seem to manage both.  Between the incessant heat and the bugs...it's just not happening.
At least there are no water shortages this year!  WOW! 
Rain aplenty...wishing we had more rain barrels though.

One thing we have at the new house (that we certainly didn't have at our old house) is
DEERFLIES!
OMG these suckers take a chunk out of you!
I have yet to get a deerfly patch for the back of my gardening hat...
but its coming sooner rather than later.


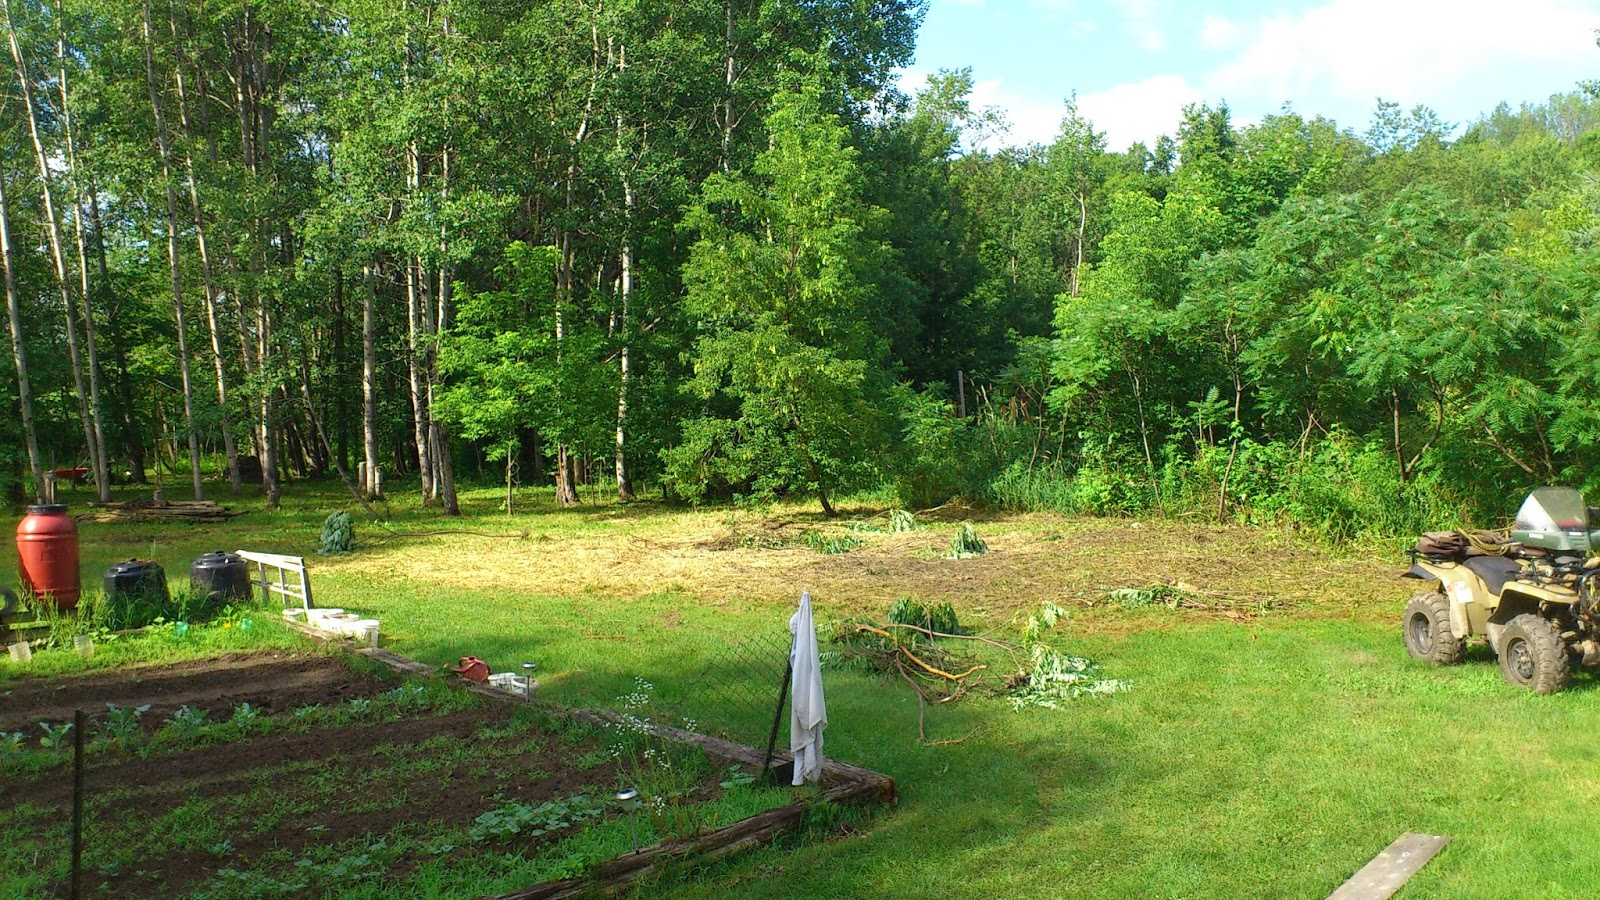
Husband has been feverishly clearing some neglected sections of our property.
The dried area you see above was previously a sumac patch riddled with long dead, wild raspberry canes.
It also was hiding a small play structure from the previous owners approximately 20 yrs ago.

Our plan is to clear it, then add more beds to the space.
We are both excited to plant berry bushes!
A space for huckleberries, fresh wild raspberry canes, blueberries and blackberries.
As an aside, Husband is super stoked to get a blackberry variety called Chester.
(his name doesn't get many shout outs...especially from fruit)


Way in the back yard, by the fire pit, is a small bed I made from deadhead rocks in the immediate vicinity.
I planted a citronella plant that I purchased from a local garden center.
The plant had been over-wintered (brought inside after its first year) and was enourmous!!!
We pick leaves, crush them up a bit and stick them in our pockets or shoes.
I stick them on top of my ears, like a flower.
Using them this way, you can also judge when you've gotten too close to the campfire.
(Discovered by accident! I was tending the campfire and forgot I had them behind my ears.
I was greeted with a strong lemony smell...much stronger than just crushed leaves)


Close up on the citronella flowers above.


Now to the front beds!  Above you can see the herb garden at the front of our house.
I labelled each herb and plant.  The green onions were transplanted from our stash last year.


The dill getting out of control!  Owen, my little guy, says it looks like a rainforest.


The mint has rooted nicely!  I still think we needs another area for mint...let it grow wild and crazy.
Momma likes her mojitos!


This side of that front garden bed was like the dumping spot for everything last minute.
(It was supposed to be for tea herbs...but I really need to do more research on teas)

The lavendar so far has been disappointing. 
I thought I would have tons for tea this winter...we'll see how that goes...
I have never grown horseradish, but it sounded like fun.
I don't even eat the stuff, but Husband does!  So I bought some...a week before someone pointed out wild horseradish that stands up to my waist in a completely unrelated area of the yard....sigh...


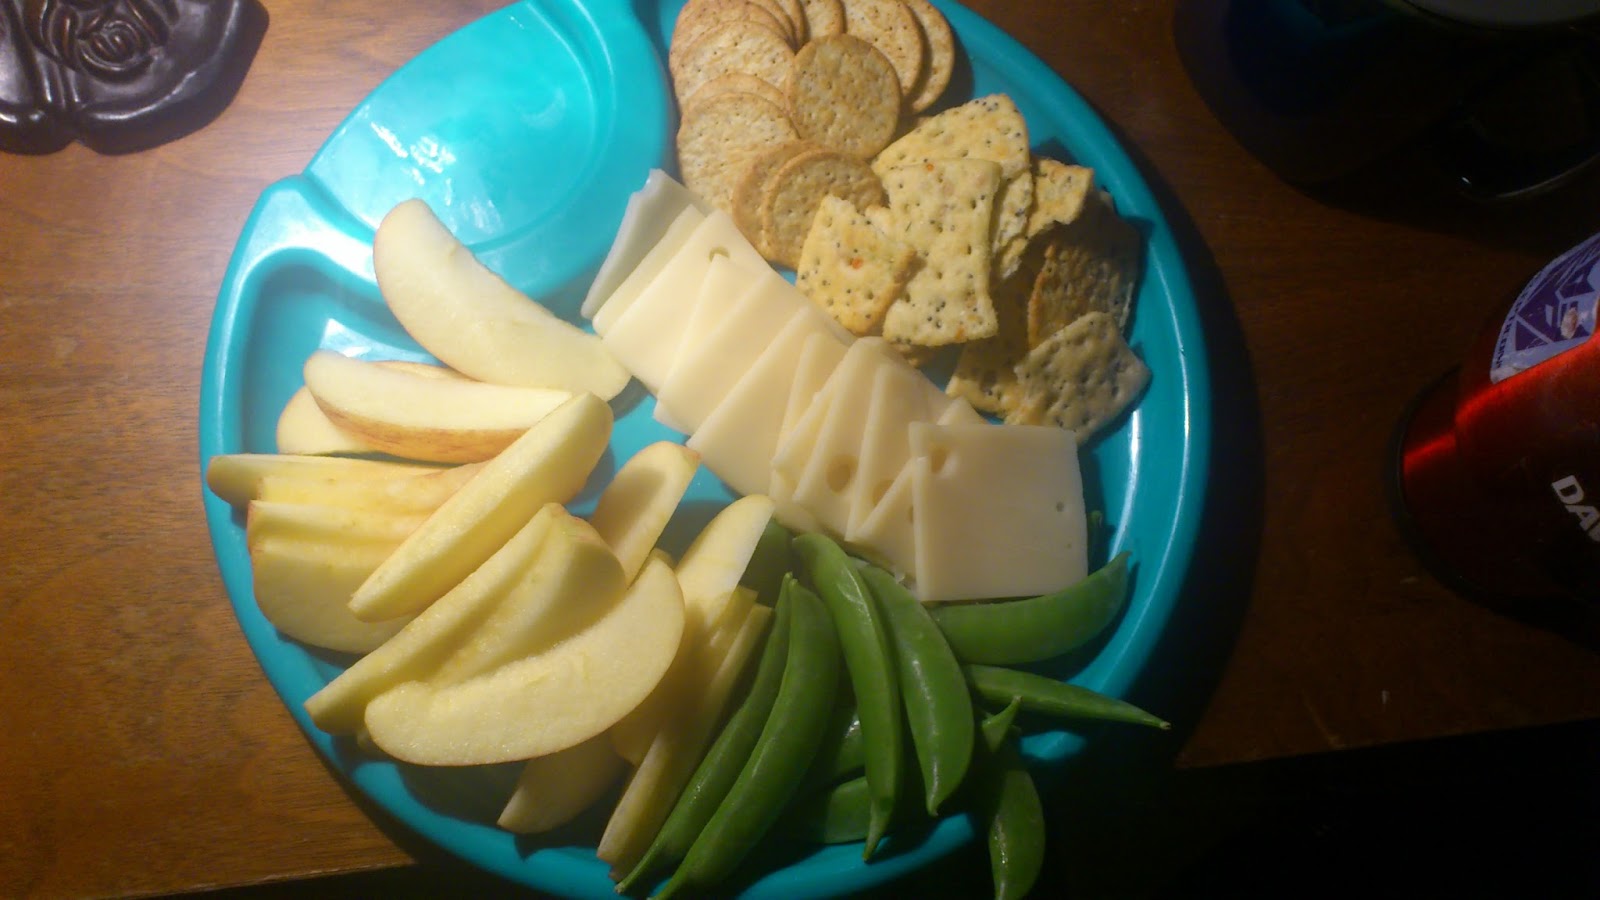
All that hard work deserves a snack!

Before bed snacking is big at our house.
Here is what was on our snack plate:

Swiss cheese from Wilton Cheese Factory
Gala Apples
Fresh peas in pods from the garden (not enough for a family meal, but enough to snack on!)
Breton mini crackers


Tuesday, September 11, 2012

Ode to Eggs...

So we are decided.

We're going to be chicken farmers.

It was something that my husband and I have talked about for some time.
Now we are in a property that would allow us to actually have poultry
and not disturb our neighbours or break any by-laws.

The property we bought in May has a fenced in area.

Some of you may remember it from my post breaking the news about the new place.


Its been a few months and we really neglected this particular corner.
We had other things going on.


I finally took a crack at it with the lawnmower.
That is saying a lot when you consider wild black raspberry canes and goldenrod had taken over the entire place, standing about waist high!


The entirely fenced space is just perfect now!


I even found an old sink (that matches our clawfoot tub used for gardening) buried!


One of the previous owners apparently had rabbits.
The old structures are still present.
Old and dilapitated.
Rotting and foul.


The fencing needs some attention.


In some areas, the nearby trees have grown right around the fence!

Our plan is to research all winter about what kinds of chickens, what housing is needed, how to design it and built it.  We will be saving all winter to be able to feed these animals and what will be required for care.
There is a nice introductory chapter in The Backyard Homestead about chickens along with a simple design for a coop.  Fingers crossed and come next year we'll finally be protein producers!

So this recipe post is in honour of people who raise their own chickens!!!

Here's to years of omlettes and quiches!
Here's to roasten chickens all winter long!

After all that mowing, I was tired, sweaty and hungry.


I made a quick salad and ate it on the back porch, observing all that I had done.
Feeling quite proud of the progress I had made.
Next step will be to have the husband clear out the dead trees and chop them up for winter wood burning in our fireplace.

For the salad, I mixed up some baby spinach, boston lettuce (that a friend gave us), baby pear tomatoes (from nana), some white onion and cucumbers.  I hard boiled an egg and sliced it up fine.  I also made a quick mustard vinegrette.

Dijon Mustard Vinegrette:

glob of oil
splat of white vinegar
a few drops of lemon juice
squirt of grainy dijon mustard
1 small pressed clove of garlic
fresh ground salt & black pepper

Substitutions:

- If you use dandelion greens or garlic mustard greens, omit the black pepper and lessen the dijon mustard
-If you use purslane, add more lemon juice
-you can also add chopped up bacon or ham


And don't forget to check out my all my recipes on facebook...I've been posting them there all summer long...

My facebook page:


My facebook group:

Friday, August 10, 2012

Helping out helps everyone...

I'm pretty sure I've already mentioned this before...but we don't really have a full garden this year.

In the meantime, we are committed to helping out my mother in law with her garden!
She just lives around the corner, so its not an inconvenient endeavour.

I have to say, it's great to get my hands back in the dirt and taking care of blooming plants.


She planted cabbages, herbs, carrots, beets, beans, peas, pumpkins and cukes.

There are also tomatoes of various varieties.


Our mother in law is a busy lady and always has loads of stuff on the go.

She returns the favour by offering up some of the surplus veggies as well as bringing us the odd bucket of compost!


Owen checked to make sure the apple trees are still strong...

Helping out has so many benefits:

-healthy outdoor exercise!  (my legs are killing me)
-aiding another's desire to grow their own food is never a bad thing.
-pooling your resources is a wise endeavour.
-if you don't want to dig up your own property but still want home grown organic foods, helping someone else could supply you with that extra food!
-make a deal with your gardening neighbours, food for work!
-building relationships with your gardening buddies.
-takes the load off of someone who is busy.
-builds good karma!

and last but not least...you can still get the opportunity to get in the garden...even if it isn't yours!!!

Saturday, October 8, 2011

Chicken and Swiss Chard Noodle Pesto

Our gardening season for 2011 may be coming to a close....but the garden itself is still kicking out all sorts of yummy things.  Most days we have a hard time keeping up with eating all of it!  That's when we're fortunate to have lots of friends who are willing to take these free vegetables off our hands...tee hee!


The other day, Hubbie asked me if I could make those swiss chard pesto noodles.  I was a little surprised...as I wasn't sure how good they were the first time I made them.  I guess they were a hit, when they are getting a second request!


I thought I would go over that recipe in more detail...as I think I glossed over it largely in the the 3 recipe post a while back.  First you need an enormous pile of swiss chard.  I'm not even kidding here.  The bigger the better!!!  This stuff wilts down to almost nothing....and I almost always underestimate.


Fortunately this time we had prepared pesto on hand.  Hubbie made it with basil from our herb tub.  He used walnuts instead of pinenuts...as that was all we had on hand.  Now is actually a good time to be collecting walnuts...if anyone has a walnut tree and would like to get rid of their pesky walnuts...LET ME KNOW!!!

Originally with the pesto chard noodles...I used garlic, oil, walnuts, parmesan cheese and basil directly on the noodles...this time I just spooned the mixture over the chard liberally...which was not necessarily a good thing...


Here is a shot of the chard cut into "noodles".  I wash the leaves, rinsed them, then shake off most of the excess moisture (or you could use a salad spinner).  I remove the ribs of the chard...Hubbie always reminds me I can leave them in...but I only do that when I want the water chestnut texture in my dish....not this time though....


Next we took all the meat off of a whole roasted chicken from Costco...the in-laws buy them for us now and again...and it's always a welcome treat!


Here I wish I owned a wok...as the biggest frying pan we own doesn't quite seem to do it.  Swiss chard was spilling everywhere.  I added a touch of pesto sauce to the bottom of the pan and started warming it up.


At some point the chard wilts down enough to fit into the pan.  I then realize how this dish is lacking in colour...so I dice up a yellow zucchini and throw it in too!  It is also at this point that I start to notice how much liquid is in the pan.  It occurs to me that by spooning on the pesto...I've added too much oil to this dish...next time I'll use more restraint when adding the pesto mixture!


I started heating up the pulled chicken pieces in another frying pan with lemon juice, S & P.


I layer the swiss chard noodles and zucchini on the bottom of the plate, next the chicken, then chopped up parsley on top.  I also halved some cherry tomatoes and threw them at the plate after all was said and done.

The cherry tomatoes added more colour and were nicely warmed by the hot meal.  (I had trouble taking pics of this dish....the steam kept fogging up my camera lens!) 

This dish is EASY, healthy, colourful and warming.  I feel healthier after eating all of that dark, rich, green matter.  I understand this to be a very low carb meal...but kept wondering if a piece of toast or crusty bread would have gone nicely with this dish.  

What is the healthiest meal you've ever made fresh out of the garden?

Tuesday, September 13, 2011

Pasta Fasta...for all your cherry tomatoes...

So you've decided to grow tomatoes. 

Perhaps, you aren't a big fan of tomatoes...but its a place to start.  You pick out the cutest little cherry tomato plant at your local green house.  You water it and nurture it all summer long.  By late summer, you are drowning in the little suckers.  You're wondering if you could stand to eat another cherry tomato.  They do take over.  They vine around everything else you've planted.  There's not much you can do to store them either, long term.  So what do you do with the zillions of ripe cherry tomatoes? 


Here's a great recipe from me to you.  It has a taste so fresh and simple, you'll think it came straight from a high end restaurant!  Impress your friends and write this one down...


PS.  I topped mine with any leftover shredded mozzarella as well...


The flavours are all fresh and summery.  They aren't complicated or pretentious. 
Served on top of whole wheat pasta, it's a dish you can feel good about.

The key is to make it in the morning (or if you are game, you can even do it up the night before).  It really does make all the difference, as I've craved this recipe so much I tried to make it up all in the same night....and the result is not as fantastic.  Still tasty, but definitely worth the wait if you can get the flavours blending ahead of time.  I've made this dish ahead before and taken it to friends homes...as long as they don't mind you cooking pasta while you visit.  It marinates really well in a car on a hot summer day and makes you hungry while you drive!


Do you have any favorite recipes for your cherry tomatoes?  Let me know, I'm always on the lookout for great cherry tomato recipes.